Iqeye alliance wall mount installation – IQinVision Alliance-pro Backbox User Manual
Page 5
5
C. Mounting to a threaded ¾” pole for a pendant mount application:
a. Pass any required cabling into the Back Box through the rear ¾” threaded NPT hole.
b. Carefully attach the Back Box to the threaded ¾” pole, while ensuring none
of the cables are crimped or pinched. Use a silicon adhesive or equivalent on
the threads of the pendant pipe to help ensure the camera does not become
unthreaded from the pipe.
NOTE: When pendant mounting the Alliance outside, take special precaution to seal all of the
mounting holes in the rear of the Back Box.
c. Go to Step “5” of this installation guide.
IQeye Alliance Wall Mount Installation
A. The Alliance Wall Mount is designed for installation indoor or outdoor, and with
either the Alliance-pro Outdoor Back Box, or the Alliance-pro Indoor Mounting
Plate.
B. Mounting to a masonry or other durable surface wall:
a. Using the supplied printed template, mark the necessary hole locations on the
intended mounting surface. Follow common mounting practices required to
safely mount the Alliance Wall Mount to the intended surface.
b. Mount the Wall Mount to the surface using the supplied or equivalent hardw
are.
NOTE: It is recommended to use silicon or other equivalent sealant generously between the gasket
and the Wall Mount, and the gasket and the Alliance-pro Back Box or Alliance-mx dome camera to
ensure a good seal.
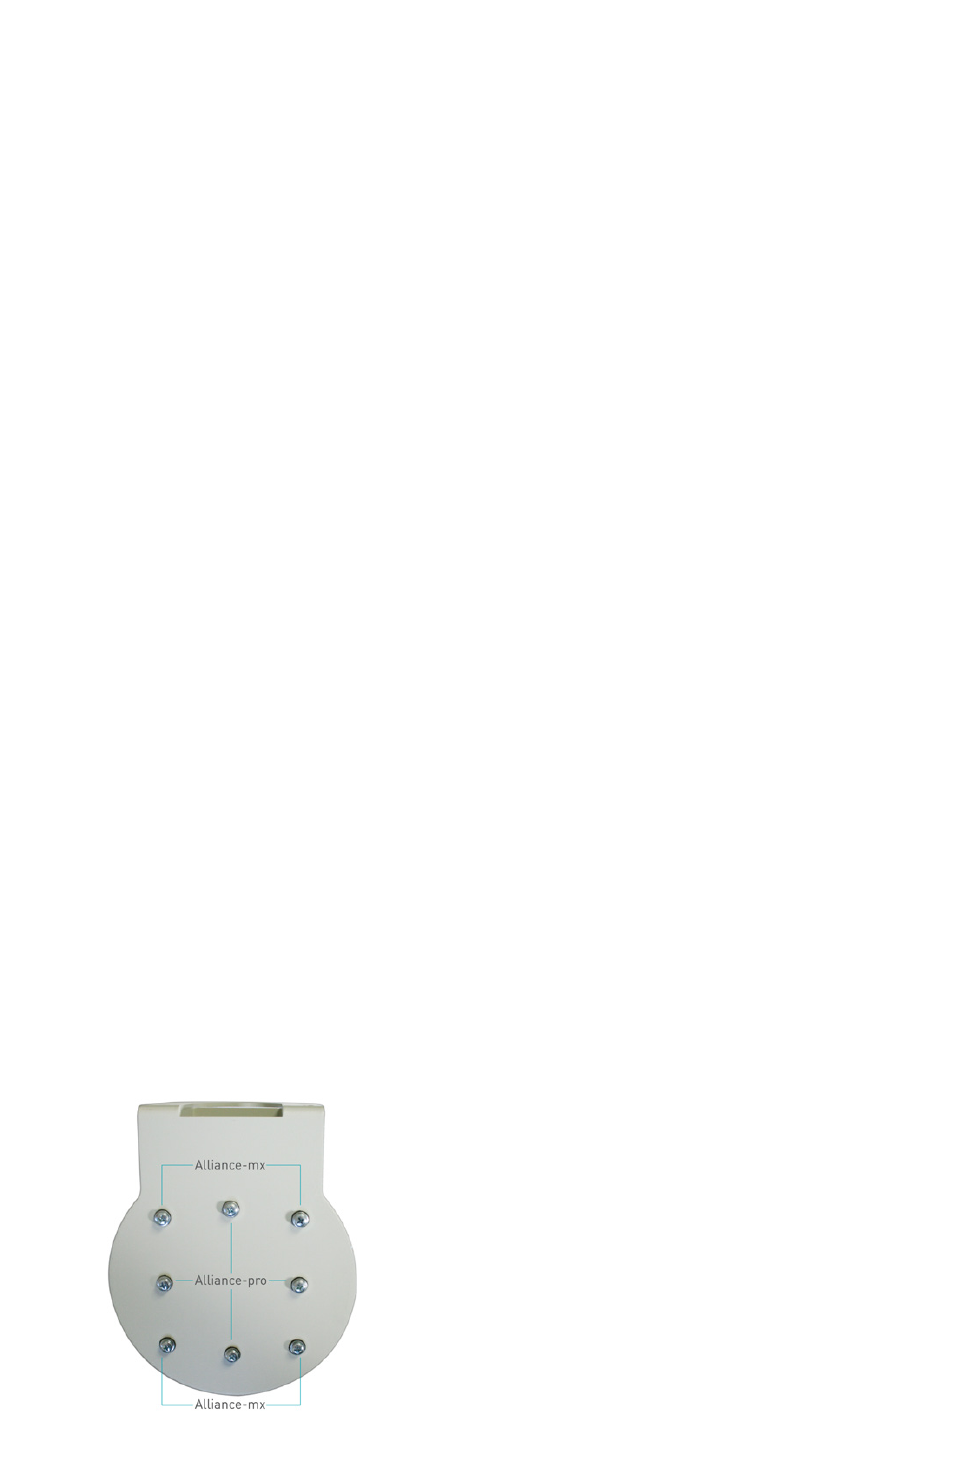
C. When attaching an indoor, Alliance-pro or Alliance-mx to the Alliance Wall Mount:
a. Remove four screws and sealing washers from the Wall Mount, and attach the
Alliance Indoor Mounting Plate or Alliance-mx camera base to the corresponding
threaded holes in the Alliance Wall Mount using the supplied or equivalent
hardware. See Figure 4.3
b. Feed the connecting cables from the Alliance camera through the Mounting
Plate and corresponding Wall Mount center hole.
c. Go to step “5” of this installation guide.
Figure 4.3