9 install the pump/valve pinch plate, Installation – Hach-Lange CL17 USER MANUAL User Manual
Page 26
24
Installation
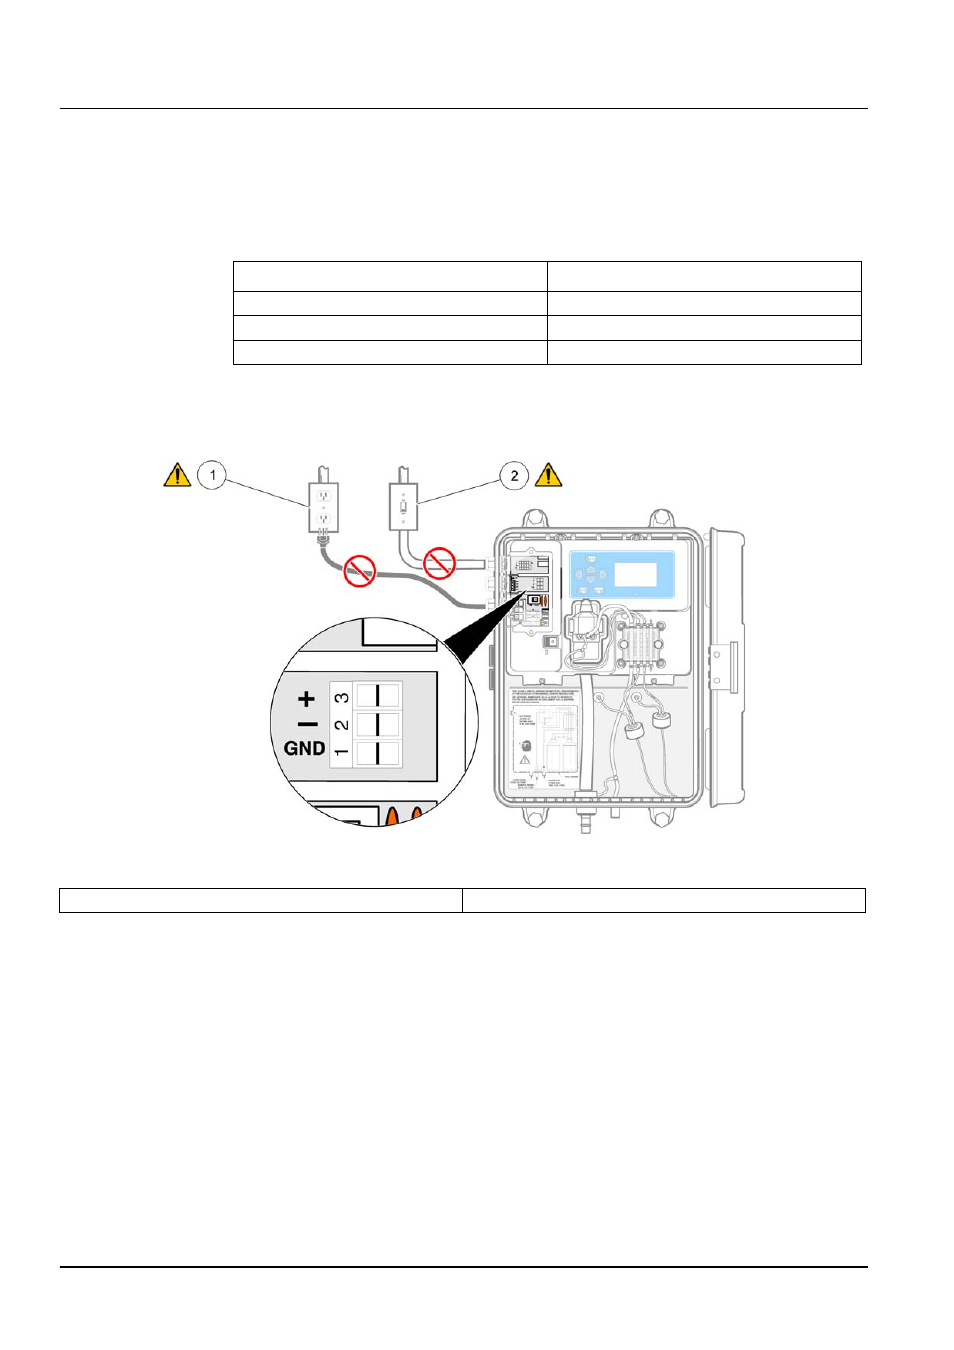
5. Remove the connector from the instrument. Refer to
for
connector position.
6. Insert the wire ends into the connector (refer to the table below) until the insulation
seats against the connector as shown in
. (Do not seat the insulation under
the terminal pinch plates.)
7. Replace the connector and supply power to the instrument.
3.9 Install the pump/valve pinch plate
To eliminate the effects of constant pressure on the pump tubes during shipment and
storage, the pinch plate and screws for the pump/valve module are shipped in the
installation kit and the pump tubes are held in place with tape.
Reagent flow through the pump/valve module must be from bottom to top. If reversed,
fluid mixture will be pumped from the colorimeter sample cell, causing reagent bottles to
overflow.
Complete the assembly of the pump/valve module as follows:
1. Remove the tape.
2. Make sure the individual pinch blocks are positioned as shown in
, with the
dissimilar-shaped block on top.
3. Align the pinch plate on the pump/valve module (refer to
).
Recorder Wires
Circuit Board Markings
Recorder +
+
Recorder –
–
Shield
GND
Figure 16 Recorder connections
1
Make sure no power is supplied to the instrument
2
Make sure no power is supplied to the relay