Clear-Com HME DX200 User Manual
Page 2
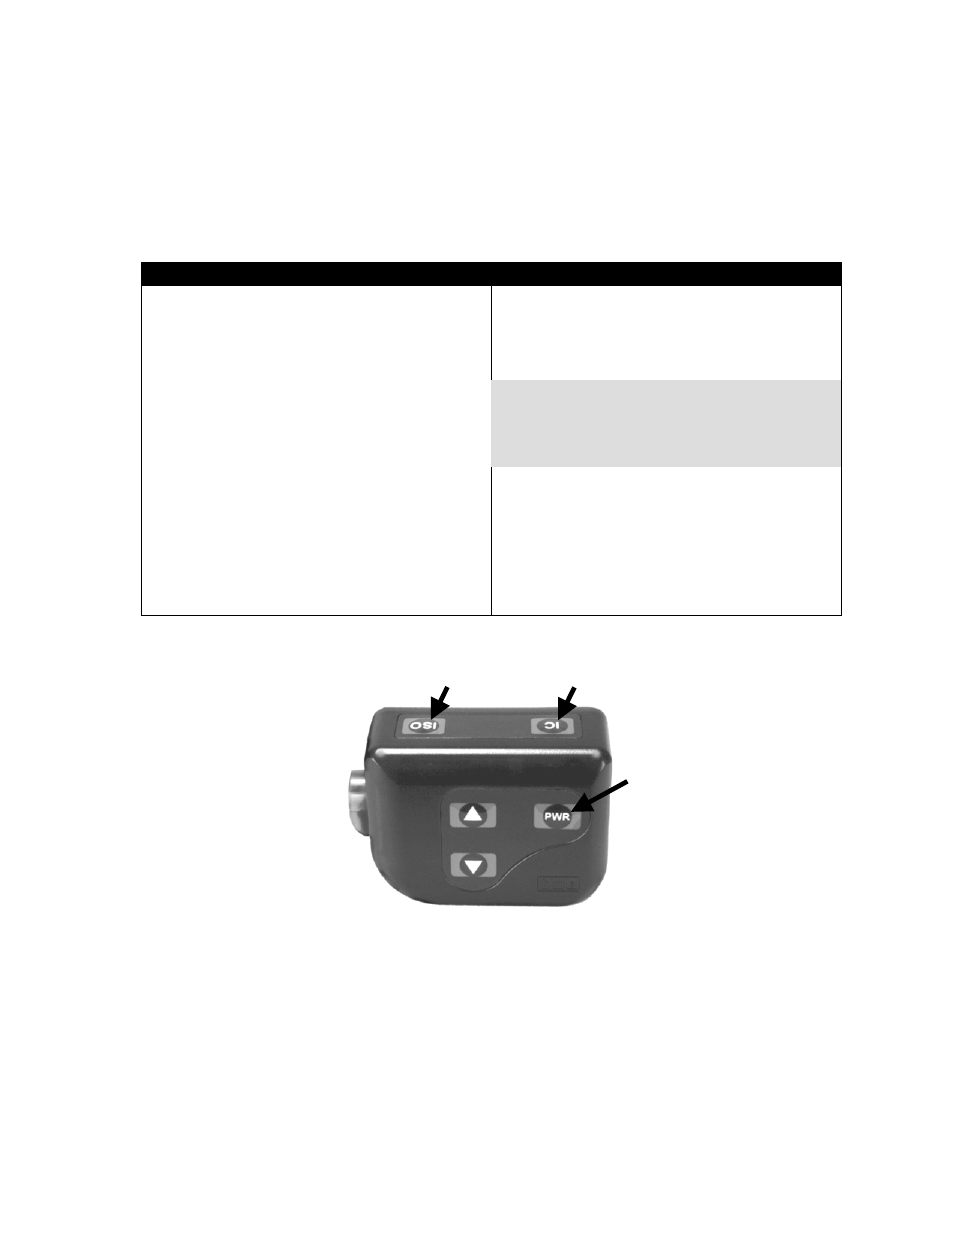
Press and hold the
ISO button on the Belt-pac while pressing and releasing the PWR (power)
button to turn the unit on, then release the
ISO button. This will cause the Belt-pac to enter
the registration mode.
⎯ The two power lights next to the IC and ISO buttons on the Belt-pac will begin blinking red,
then will blink green two or three times and go off momentarily.
⎯ Wait! There may be a short delay.
⎯ One of the following will happen.
If Registration is Successfully Completed:
If Registration Failed:
⎯ A voice message in the headset will say
“Power on, Belt-pac #, Version #, Begin registration,
Registration complete, …”
⎯ After a delay of up to 15 seconds (in some cases),
the
REGISTRATION STATUS display will show
the ID number assigned to this Belt-pac,
momentarily. NOTE: ID numbers are assigned
sequentially as 0 thru 9, A, b, C, d and E.
⎯ The power light on the Belt-pac, next to the IC
button, will remain on steady green.
⎯ A voice message in the headset will say “Power
on, Belt-pac #, Version #, Begin registration, …”
Both power lights on the Belt-pac will be blinking
red, and there may be a delay of up to 90 seconds
before you hear “Registration failed.”
⎯ Press the RESET button. (See Figure 1.)
⎯ When the REGISTRATION STATUS display
goes blank, press the
REGISTER BELT-PAC button
and repeat the registration procedure.
⎯ If registration fails again, call (in the USA)
HME Customer Support at 1-800-848-4468 or
(outside the USA) your local HME representative for
assistance.
When the maximum number of Belt-pacs (15) is exceeded:
If a Belt-pac is replaced, the new one must be registered and the old one remains in memory. If
the maximum number of 15 (in memory) is exceeded, all current registrations must be cleared
and all active Belt-pacs must be re-registered. To clear all current registrations, press the
RESET
REGISTRATION button and the RESET button simultaneously. To press the RESET button,
insert a small paper clip or similar object into the
RESET hole at the lower-left corner of the
base station front panel. Refer to Figure 1. Continue holding the
RESET REGISTRATION button
after releasing the
RESET button, until the clear code “c” (lower case) appears momentarily on
the
REGISTRATION STATUS display. All active Belt-pacs can then be registered, one at a time.
(Previously registered Belt-pacs must be re-registered.)
“ISO”
button
“IC”
button
Power
button
Figure 2. Registration controls on Belt-pac
If the failure is due to excessive (more than 15)
Belt-pacs registered, an
F will also appear on the
REGISTRATION STATUS display. If this happens,
follow the instructions at the bottom of this page.