Completing the installation – Axis Communications 225FD User Manual
Page 11
AXIS 225FD Installation Guide
Page 11
EN
GL
ISH
DE
UT
SC
H
ESP
AÑ
O
L
ITALI
ANO
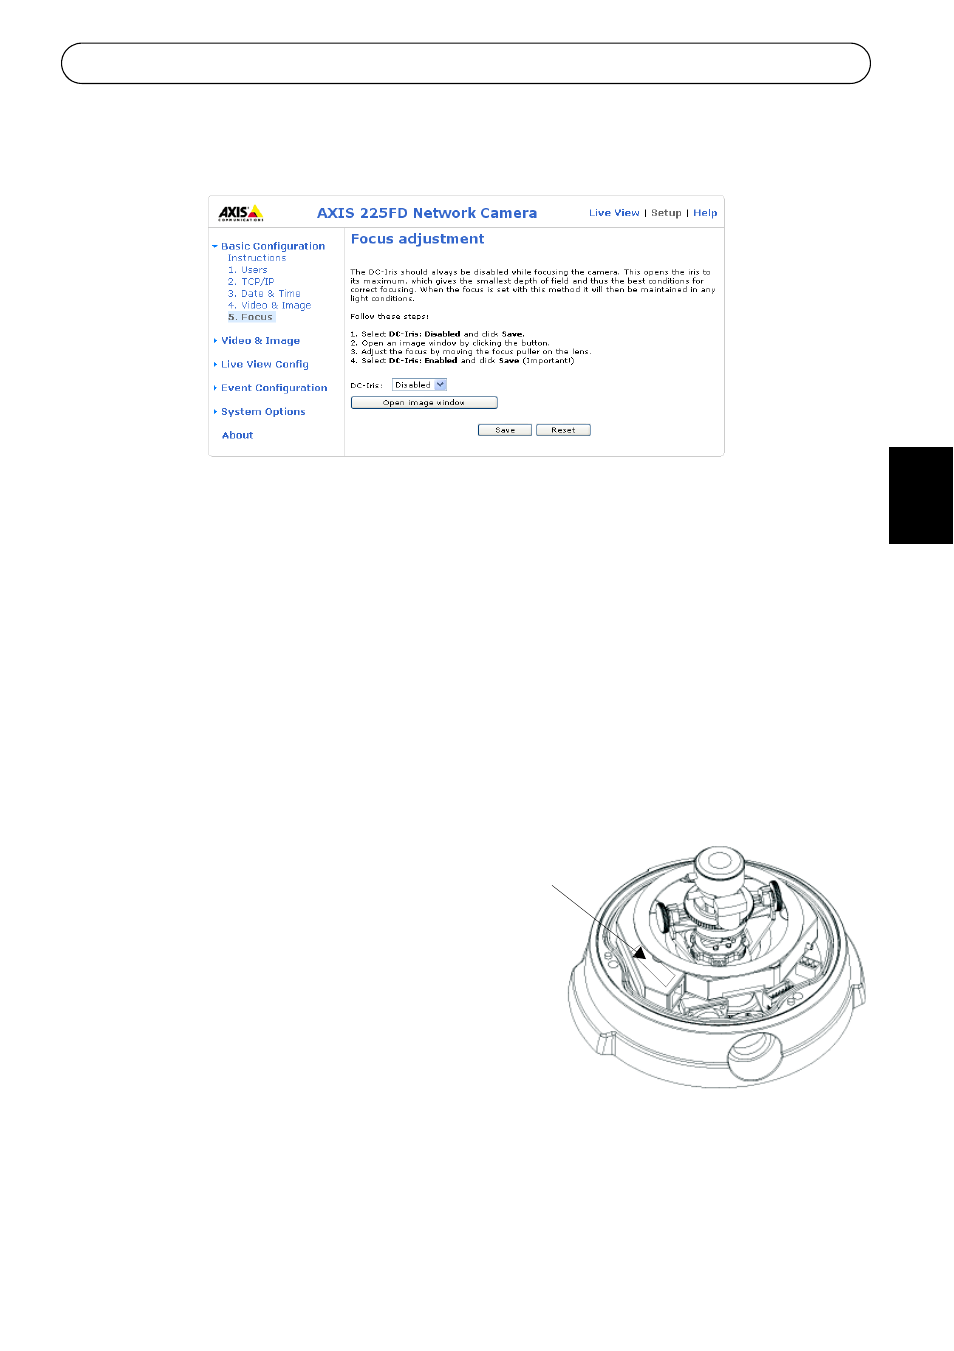
7. Go to the Basic Configuration menu in the Web interface and select Focus. Follow the
on-screen instructions to set the focus.
8. After determining the zoom and focus, lock the zoom puller and the focus puller in
position by rotating the screws clockwise.
Note:
The image can be fine-tuned for low lighting conditions.
Go to 'Setup > Video & Image > Advanced' and refer to the help files for more information.
Completing the installation
1. Check that the safety cord is attached to the hook to prevent the dome casing from falling
off the unit casing during the installation process. Be careful not to damage the dome or
scratch the glass.
2. Rotate the black protective shield inside the dome to match the camera’s position.
3. Clean the dome with a dry soft cloth to remove dust and finger prints and use a blower to
remove dust from the lens.
4. Remove the silica gel packet from the
plastic bag and remove the protective paper
from the adhesive strip. Place the silica gel
packet on the camera unit as suggested in
the illustration.
5. Replace the dome casing and tighten the
tamper-proof screws using the allen key.
The installation is now complete.
Note:
The silica gel packet will absorb moisture
trapped in the dome casing during installation. Be
sure to attach the packet so it does not obstruct
the camera, LED indicators or cable connections.
Place silica gel
packet
here