Finding the camera’s ip address – eLine Technology SIP-D User Manual
Page 9
7
8
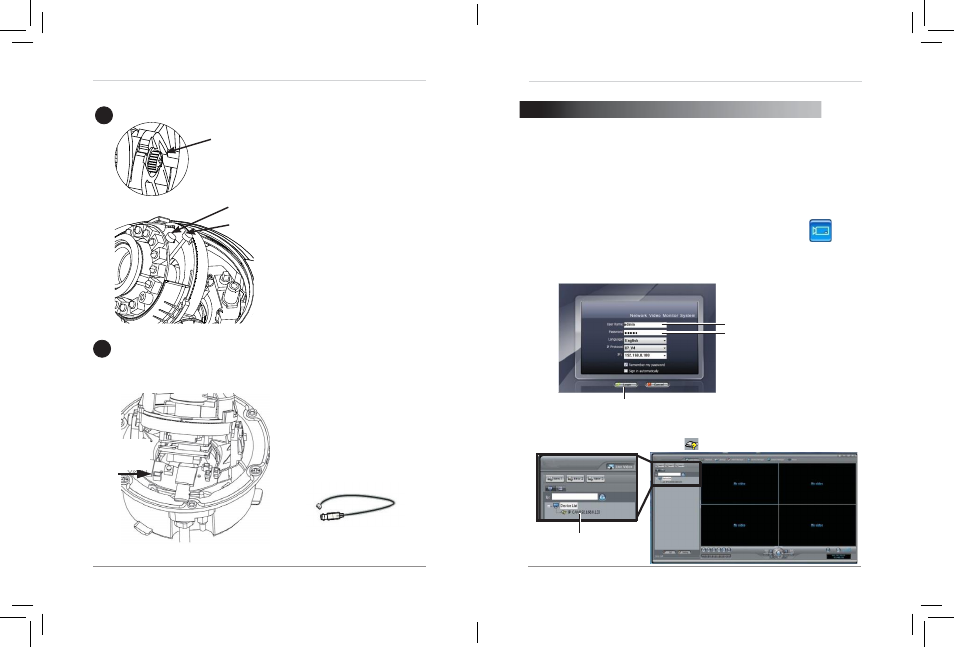
Connection
Addition
Insert a video test cable into the
video test cable terminals and
connect to a test monitor to set
up camera or find the IP when
running.
Video Test Cable
Finding the Camera’s IP Address
4. FINDING THE CAMERA’S IP ADDRESS
Use the steps below to find the camera’s IP address and connect to the
camera over the local area network (LAN) using NVMS, UPnP on
Windows® 7, or Bonjour® in Mac OS®.
4.1 Finding the Camera’s IP Address Using NVMS
1. Install NVMS from the CD. Now Double-click the NVMS icon (
) on the
Desktop. The log in screen appears.
2. Under User Name and Password, enter the default NVMS user name
(
admin) and password (admin). Click Login.
Enter Admin
Enter Admin
Click Login
3. NVMS opens and scans the local network for connected cameras.
Detected camera IP addresses on the LAN appear in the Device List on
the left side of the screen with a
icon.
Found camera
IP address
a) Re-attach the camera cover, using the thumb screw as a guide,
until it snaps into place.
b) Reattach dome cover.
a) Remove camera cover by
squeezing the back and front
of the cover as indicated by
the arrow indicators at the
same time and lifting it up and
away from the lens.
b) Insert the included video test
cable into the RCA jack and
connect to a test monitor to set
up camera set below.
c) Adjust camera viewing angle
and secure into place by
tightening thumb screw using
a flat head screwdriver. Adjust
zoom and focus as required.
Note: Lens adjustment levers
are by default in the locked
position. Turn counter
clockwise to unlock.
Tighten levers to secure
lens setting.
4
3
Zoom
Focus
Thumb Screw
eLineTechnology.com