Camera installation – eLine Technology SIP-MVD-R User Manual
Page 8
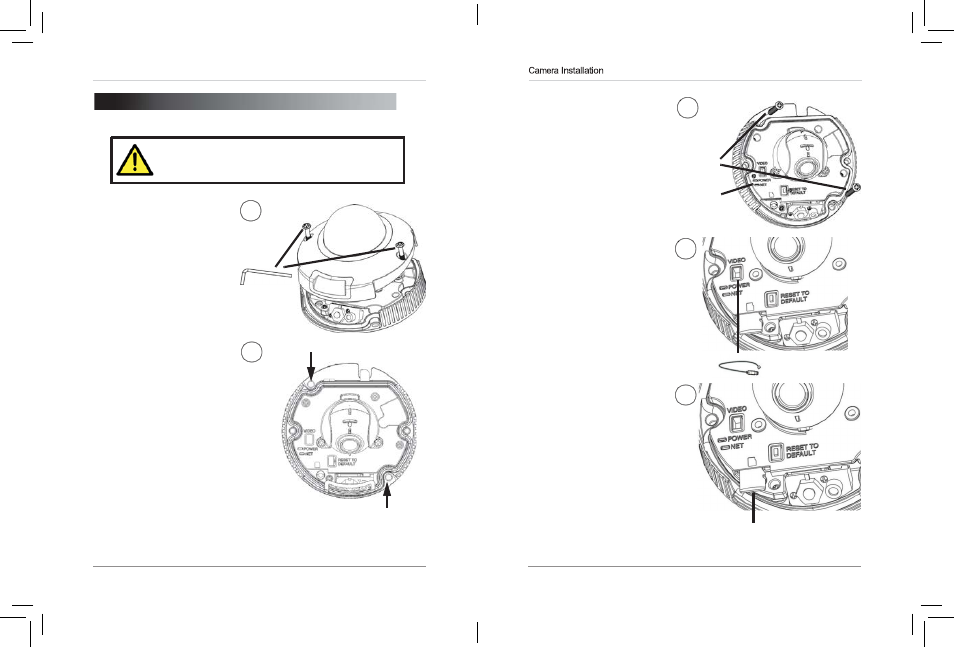
5
6
3. Mount the camera to the
surface using the included
mounting screws (2x).
TIP: The NET LED in the middle
flashes when the camera is
connected to the network.
3
Mounting
Screws
NET LED
4. (Optional) Insert the
included BNC test cable into
4
the video test cable
terminals and connect to a
test monitor to check the
camera viewing angle.
5. (Optional) Insert a microSD
card into the camera. To
5
enable recording, you must
format the microSD card and
configure microSD
recording. For details, see
“6.9.1 Record Directory” on
page 36.
NOTE: The camera supports
microSD cards up to a
maximum size of 64GB.
SanDisk™ or Kingston™ brand
microSD cards are
recommended.
BNC Test Cable
microSD card
Connection
3. CAMERA INSTALLATION
Make sure to follow the correct polarity if connecting
the camera to DC power. Polarity is marked on the
power connector.
1. Use the included allen key to
remove the camera cover
1
screws (2x). Lift the cover
away from the camera.
2. Use the included mounting
template or the camera to
2
mark holes for the mounting
screws.
Mounting Screw Hole
Mounting Screw Hole
eLineTechnology.com