Drill Doctor 400 User Manual
Page 12
10
www.DrillDoctor.com
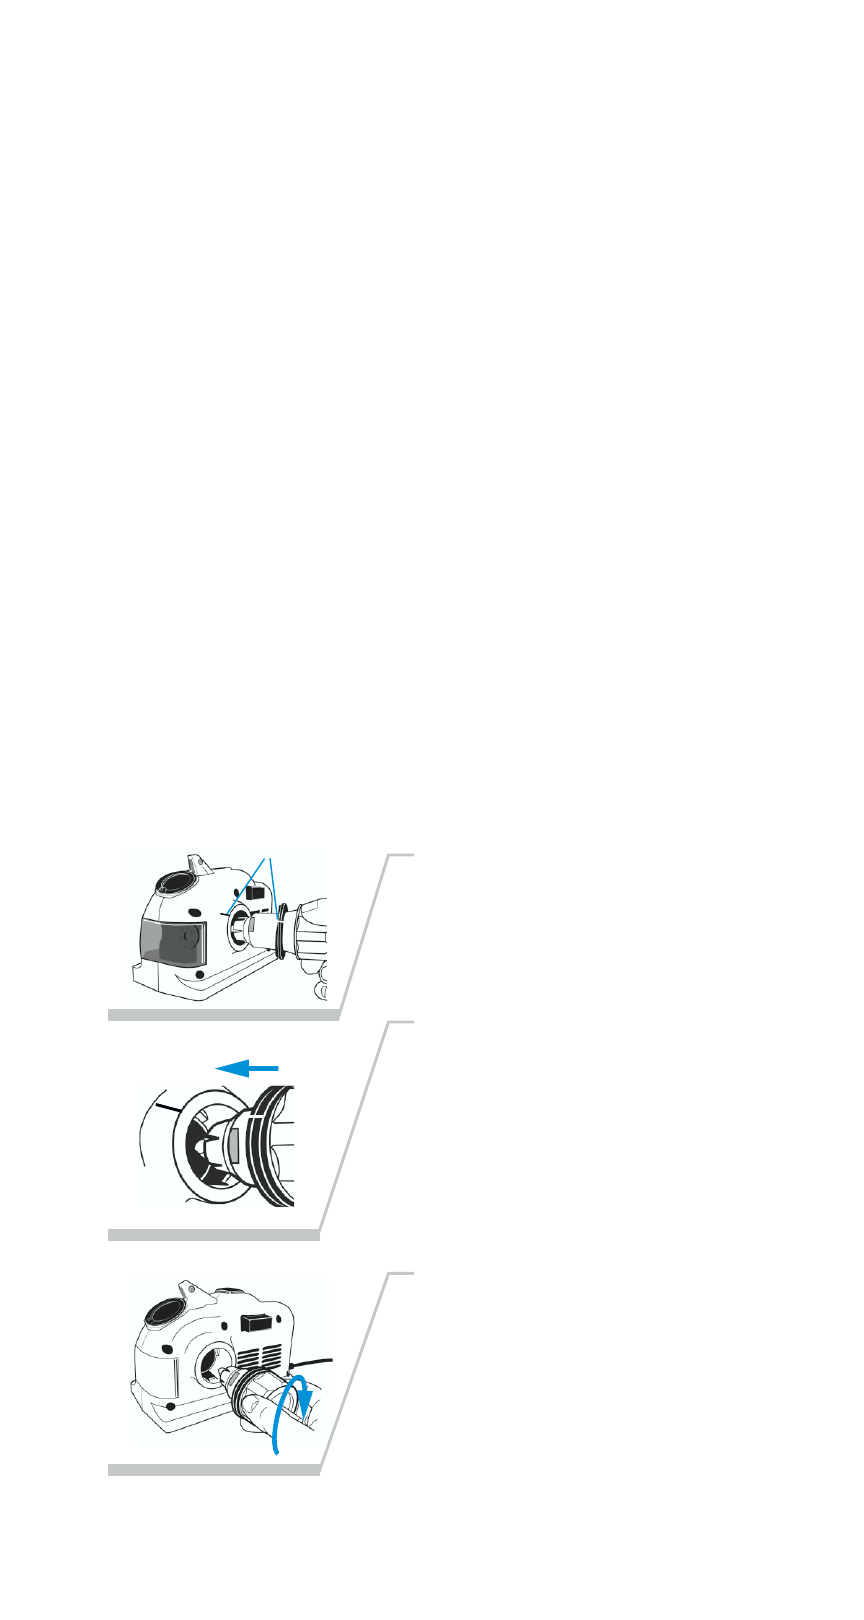
2.
3.
1.
With the machine turned on,
match the white line on the
Chuck with the white line next
to the Splitting Hole.
Split Points
Split point drill bits prevent walk-around on the material before
they begin to cut.
This feature is described as self centering. The need to center
punch is effectively eliminated. A standard drill bit chisel point
has to wear an area in the middle of the hole to be drilled before
the cutting edges will remove material. Due to its additional
cutting lips along the chisel edge, a split point will begin cutting
immediately. Up to 70% less thrust (when compared to a non-
split or conventional point) is required to drill a hole with a split
point.
Creating or Replacing a Split Point
Always align and sharpen a bit before splitting it. With the
Splitting Hole facing you, notice that the Splitting Hole has flat
spots like the Alignment Hole and a white mark on the case
next to the Hole. When inserting the Chuck into the Hole, align
the white mark on the Chuck with the white mark on the case.
As you push the Chuck slowly into the Hole, the flat spots on
the Chuck and in the Hole should match. The Chuck will be tight
in the Hole.
Insert the Chuck into the Splitting
Hole so the flat spots match
(white line to white line) and
push slowly and firmly until
the Chuck stops (you will hear a
grinding sound). Push hard until
the Chuck stops.
Pull the Chuck out slightly until
the flat spots release, and turn it
a half-turn either way. With the
white lines and flat spots aligned,
push it in firmly and slowly
until it stops. The second side of
the bit is now split.
White Marks