Datamax-O'Neil microFlash 4t_4te Standard Swivel Lock User Manual
Selecting a location
Standard Swivel Lock (210216-000)
Use the Standard Swivel Lock bracket for the 2t and
4t printers (all makes and models).
Parts List:
(1) Standard Swivel Lock
(3) #10 pan head screws [not included; screw length
to be determined by user]
SlimCard Reader Swivel Lock
(210217-000)
Use the SlimCard Reader Swivel Lock bracket for 2t
and 4t SlimCard Reader printers manufactured after
01/01/2004 (all makes and models).
Parts List:
(1) SlimCard Reader Swivel Lock
(3) #10 pan head screws [not included; screw length
to be determined by user]
(2) Bumpers (pre-installed)
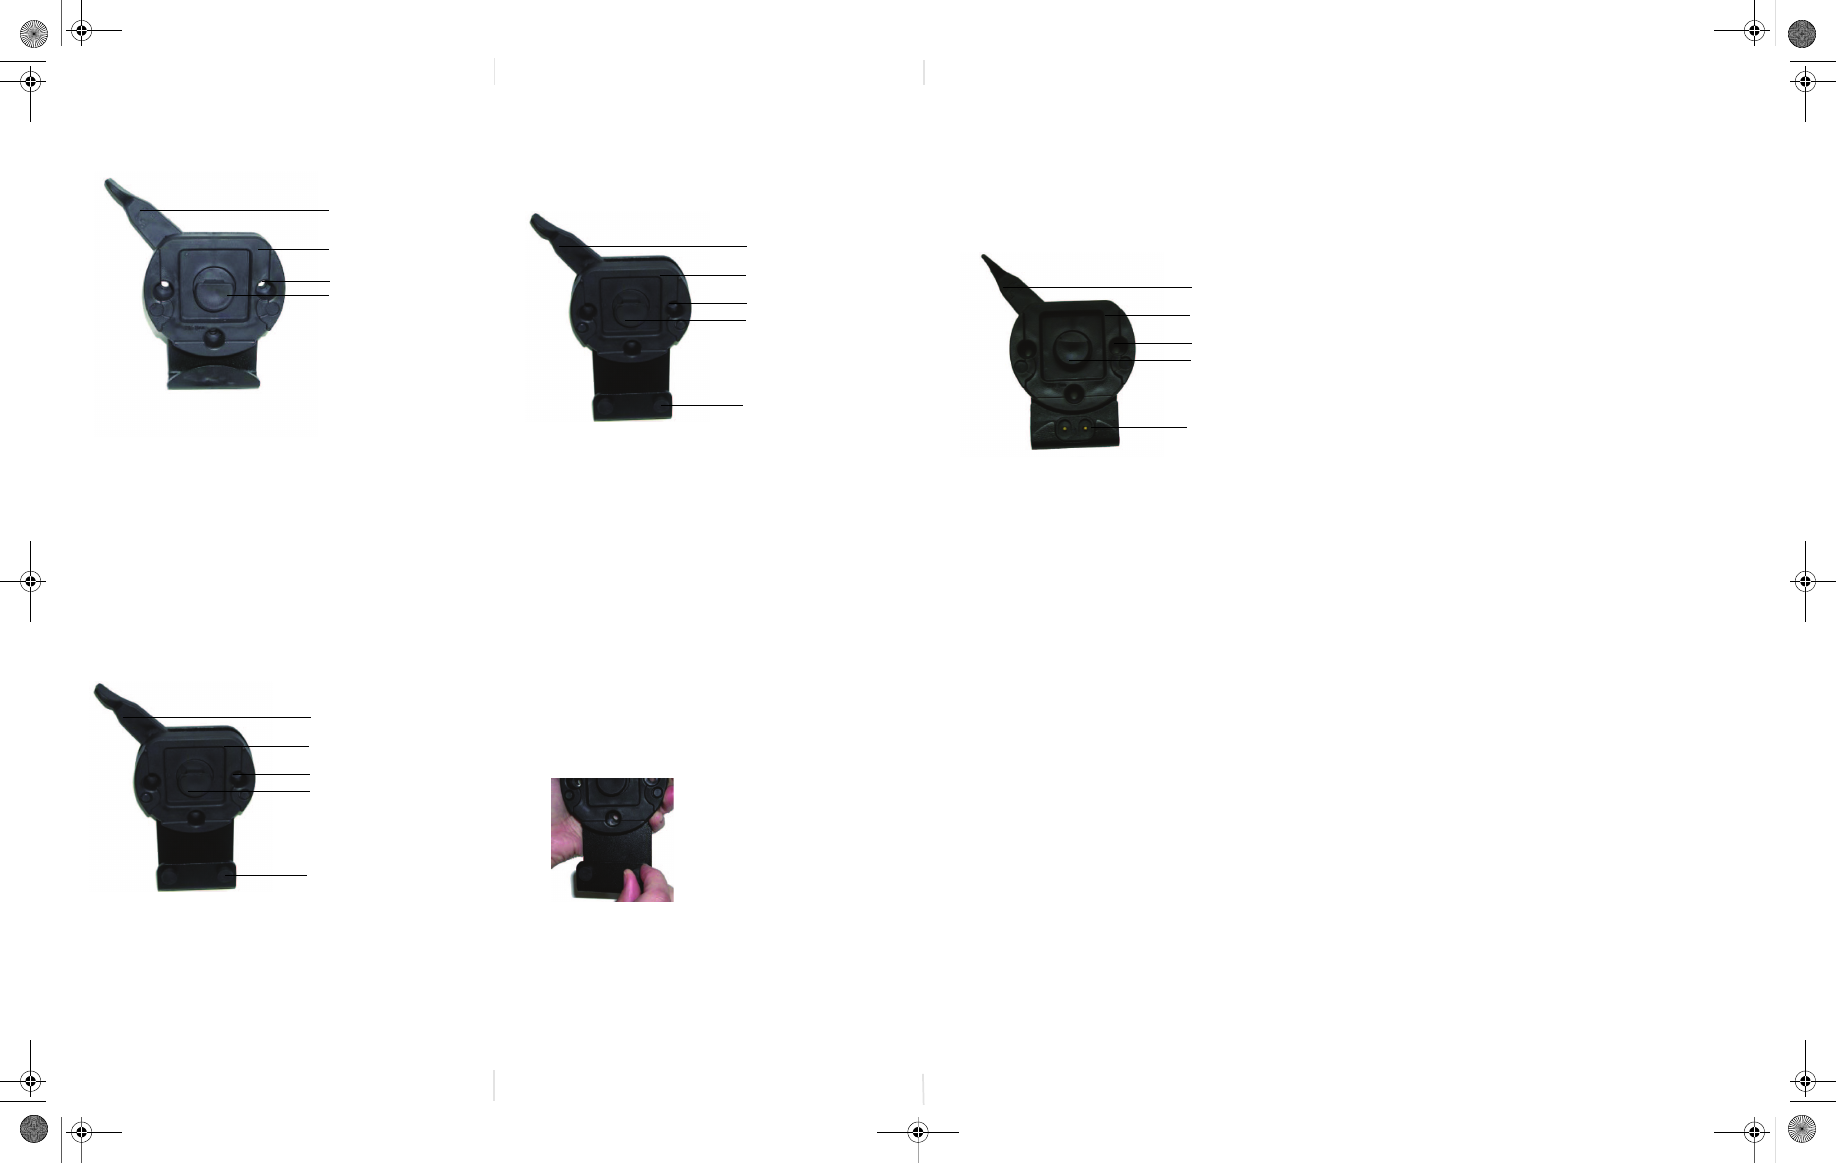
Locking Lever
(3) Mounting Holes
Swivel Lock Head
Figure 1
Swivel Lock Base
Locking Lever
Swivel Lock Base
(3) Mounting Holes
Swivel Lock Head
Figure 2
(2) Bumpers
SlimCard Reader Retrofit Swivel Lock
(210222-000)
Use the SlimCard Reader Retrofit Swivel Lock
bracket for 2t and 4t SlimCard Reader printers
manufactured before 01/01/2004.
Parts List:
(1) SlimCard Reader Retrofit Swivel Lock
(3) #10 pan head screws [not included; screw
length to be determined by user]
(2) Bumpers (pre-installed)
Removing the Bumpers
If you are using the 4t SlimCard Reader printer, you
must remove the bumpers from the swivel lock
base. Use the following procedure to remove the
bumpers from the swivel lock base:
1. Remove the bumpers from the swivel lock base
by pulling the bumpers down toward you
(Figure 4).
Locking Lever
Swivel Lock Base
(3) Mounting Holes
Swivel Lock Head
Figure 3
(2) Bumpers
Figure 4
Charger Swivel Lock (210216-001)
Use the Charger Swivel Lock bracket with printers
that are equipped with two charging contact points
(located on the back of the printer's case). When a
printer is attached to the Charger Swivel Lock
bracket, the printer's batteries are automatically
charged.
Parts List:
(1) Charger Swivel Lock
(3) #10 pan head screws [not included; screw
length to be determined by user]
Figure 5
Locking Lever
Swivel Lock Base
Swivel Lock Head
(3) Mounting Holes
(2) Charging points
Selecting a Location
General Guidelines
• If you are using the charger swivel lock, do not
short contacts.
• Use only an Datamax-O’Neil approved power
supply.
• If you are using the charger swivel lock, do not
allow the charging points to come in contact
with metal objects.
• Position the bracket and/or printer with enough
room to properly open and close the printer.
• Position the bracket and/or printer so it is
protected from environmental elements such
as moisture, tools, and boxes.
• Position the bracket and/or printer in a secure
area in normal traffic patterns.
• Do not position the bracket above, near, or
relative to, the driver's position as to interfere
with normal driving operations.
• Mount the bracket and/or printer away from the
driver's head to eliminate potential injury in the
event of an accident.
• Hole centers:
Left to right = 2.324"
Up and down = 1.162" on center
• Only use #10 pan head screws for mounting.
• Datamax-O’Neil does not accept liability for
improperly mounted or poorly placed swivel
locks and/or printers.
Swivel Lock Wall Mount Bracket.fm Page 1 Sunday, February 14, 2010 1:15 AM