Installation fixture of indoor unit, Installation of w all-m ounting plate, Installation of indoor unit – Amcor UCHW-H09AF2 User Manual
Page 16
3
*
Installation fixture of indoor unit
*
IN STALLATIO N & R EPAIR G U ID E
Split W all-M ounted air conditioner
Pipelines can be connected in the directions of****
****and
*
as indicated in Fig.1. W hen the pipelines
are connected to the directions of***and
*
, a groove
for the pipes has to be opened at the proper place on
the base stand.
*
R ear outlet
*
Left rear outlet
*
Left outlet
*
R ight outlet
*
Bottom outlet
Fig.1
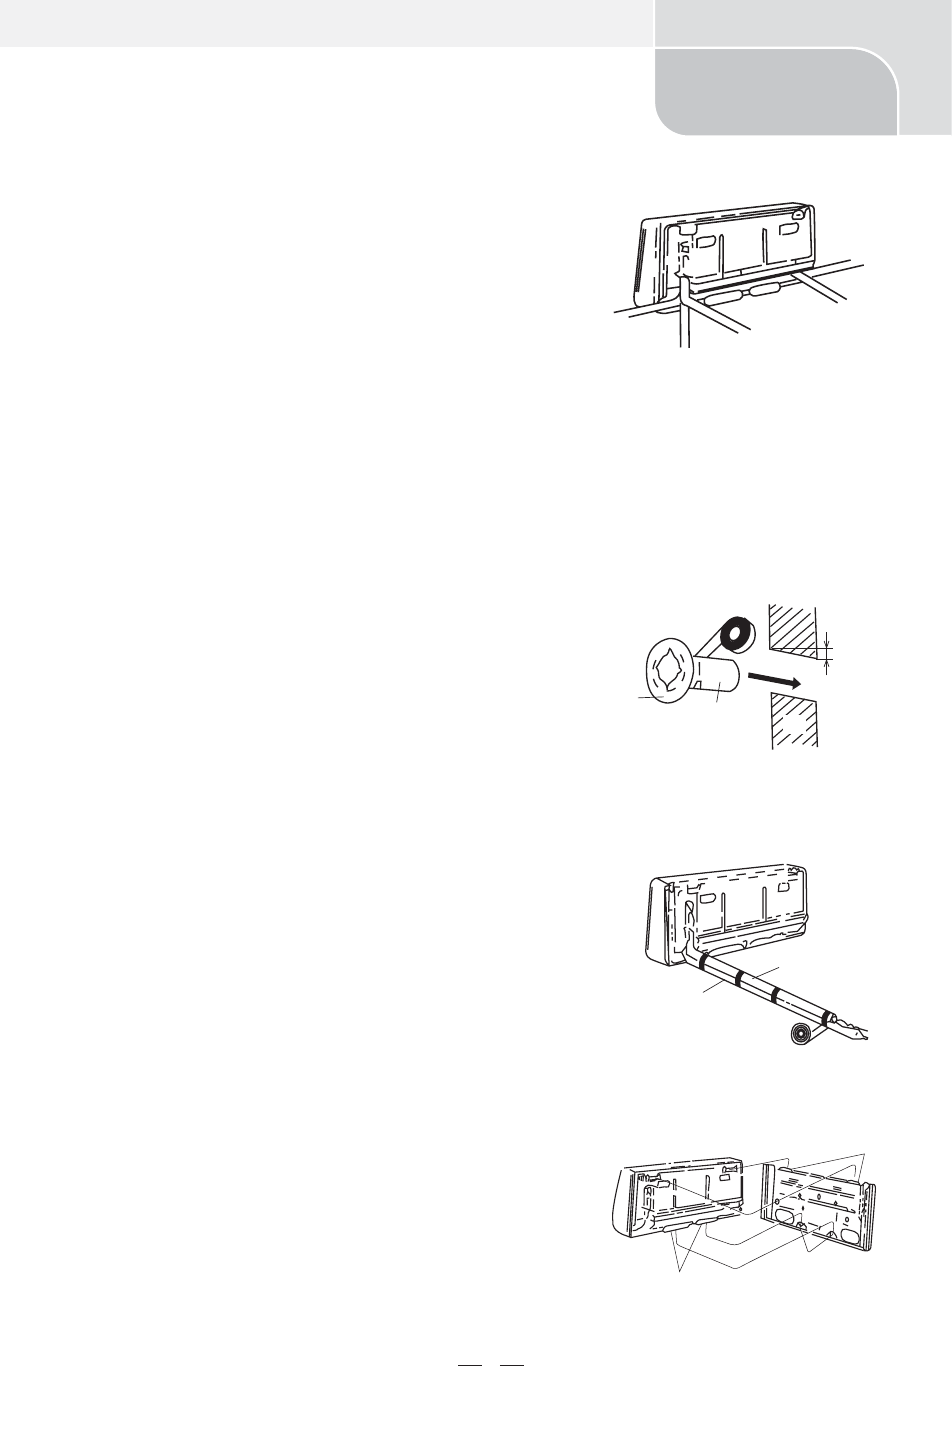
1.Installation of w all-m ounting plate
Fix the w all-m ounting plate firm ly on the w all w ith screw s.
M ake sure of the leveling of the plate. Slanted w all-m ounting
pl
ate m i
ght j
eopardi
ze the sm ooth di
scharge of the condensed
w ater.
2.D rill holes on the w all
3.Installation of drain pipe
Install the pipelines of the indoor unit in accordance w ith
the direction of the w all holes. W rap tightly the drain pipe
and the pipelines w ith tape. M ake sure that the drain pipe
is underneath the pipelines. (Fig.3) (W hen the drain pipe
passes the room interior, som e condensed w ater m ight
occur to its surfaces if the hum idity is very high).
4.Installation of indoor unit
Pass the connection w ires, connecting pipelines and drain
pipe through the w all hole. H ang the indoor unit on the
hooks at the top of the w all-m ounting plate so that the
hooks at the bottom of the indoor unit m atch the hooks of
the w all-m ounting plate. (Fig.4)
Fig.2
Fix w ith a tape
W all cap
W all pipe
Interior
Exterior
5-10m m low er
(1/5-2/5")
W all
Fig.3
Pipelines of indoor unit
D rain pipe
R ear pipe
Bottom hooks
H ook supports
Top hooks
Fig.4
D rill holes at places slightly below the w all-m ounting plate,
w ith hole diam eter of 65m m (2-3/5") and the outer edge of
the hol
e 5-10m m (1/5-2/5") l
ow er (Fi
g.2) so that the condensed
w ater can sm oothly flow out. C ut the w all penetrating pipe
to proper length according to the thickness of the w all (3-
5m m (1/10-1/5") longer than the w all thickness) and insert
the pipe as indicated in Fig.2.