Front panel description – Analog Way Orchestra2 User Manual
Page 2
Please refer to User manual for comprehensive explanations.
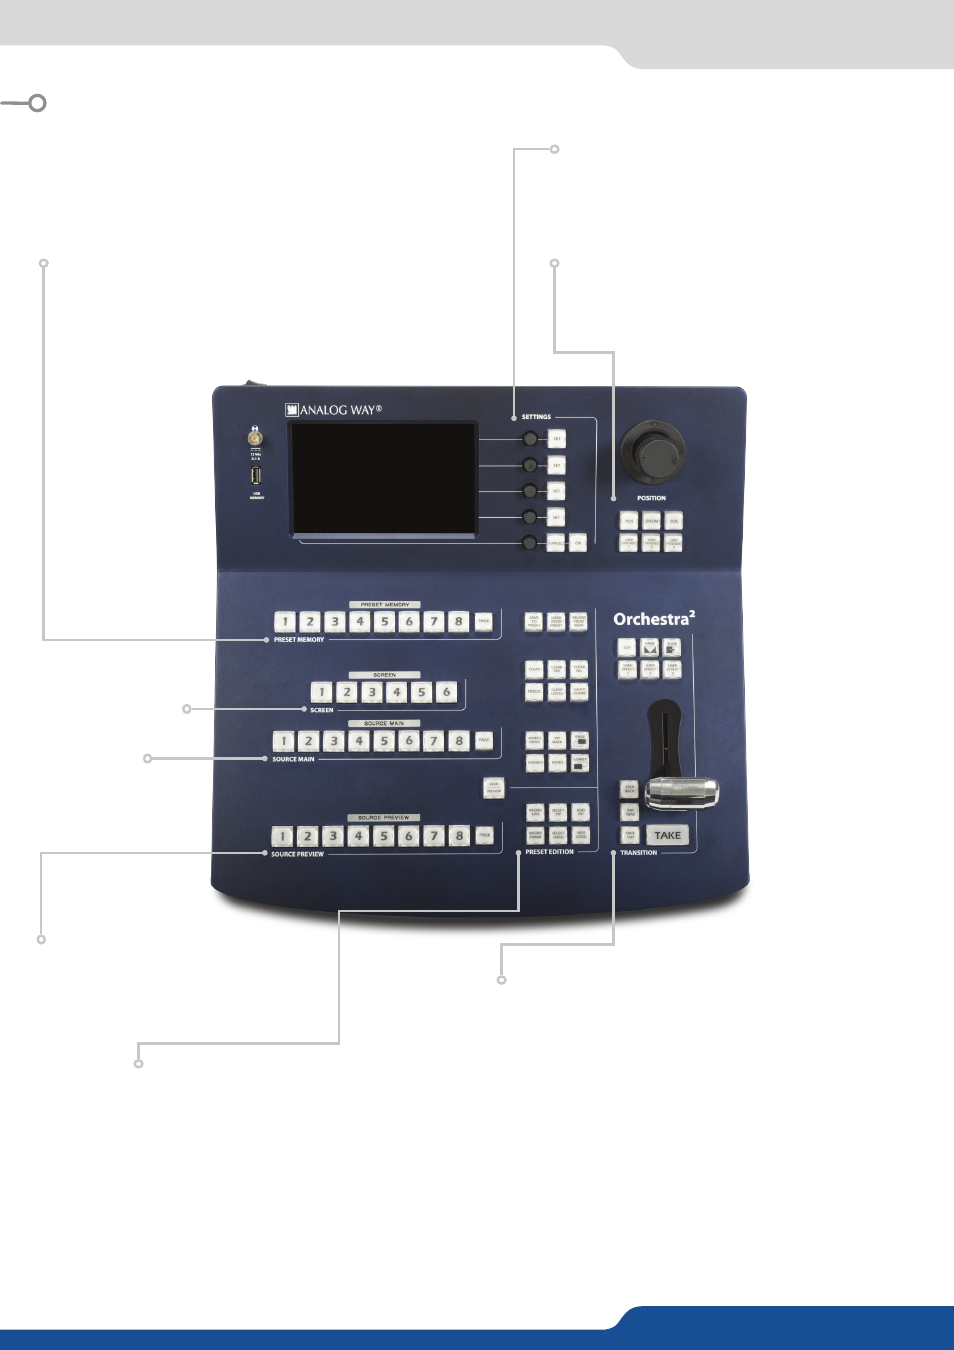
FRONT PANEL DESCRIPTION
Settings:
allows you to access all of the Orchestra menus and
functionalities quickly and easily. The 4 top rotative knobs
will allow you to set values, while the last knob will allow to
navigate through the interface, to access source or element
settings for example.
Preset memory:
Each time you configure a screen (background,
PIPs, logos), you can save it to a Preset Memory for future use.
To do this, configure a screen with all the desired elements,
press the SAVE TO PRESET button and then a preset memory
button.
Source Preview:
select your
sources. It will appear on the
Preview output of your switcher
and press TAKE to go live on your
Main output.
Preset Edition:
Save, load and modify presets.
Various layer properties are also available in this section.
- CLEAR ALL: delete all layers.
- QUICK FRAME: allows the instant display of a stored
emergency frame above all layers.
NOTE: This function
requires Eikos², Saphyr, SmartMatriX², Pulse²,
QuickMatriX or QuickVu.
Please refer to our User manual for all the functions in
this section.
Transition:
Selection of Effects and User Effects.
• T-Bar to control effect level.
• TAKE: Press the TAKE button to display the pre-selected sources onto
the MAIN output with the selected effects.
• 3 functions associated with TAKE and T-BAR:
- STEP BACK: > short press activates the Step Back function
> long press to enable/disable the PRESET TOGGLE function.
- INIT T-BAR
- TAKE CUT
Screen:
Screen selection
Source main:
Status only
Position:
Joystick for easy adjustments (position/size). Adjust
the selected PIP or Logo, X-Axis (Left/Right), Y-Axis (Up/Down).
Snap function: Enable this function by long pressing POS or
SIZE buttons. With this tool, your PIP/logo will be automatically
positioned at the closest predefined position.