Front panel description – Analog Way Axion2 User Manual
Page 2
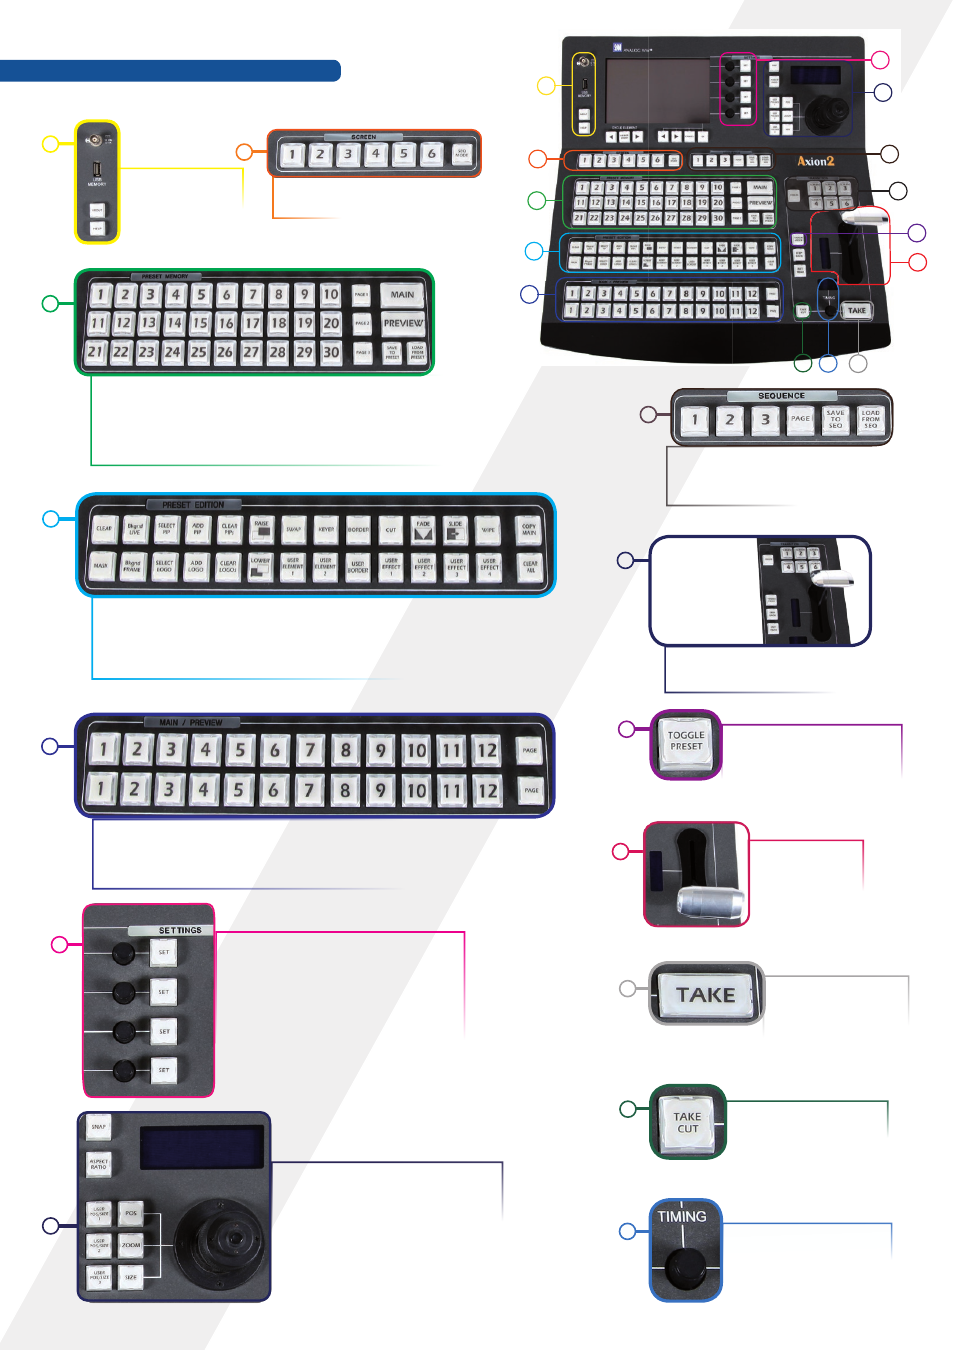
Front Panel Description
1
> BNC for desk light
> USB Port
> Help/About Page
2
> Screen & Sequence mode selection
3
>
Preset Memory: Each time you configure a screen (background, PIPs,
logos), you can save it to a Preset Memory for future use. To do this,
configure a screen with all the desired elements, press the
SAVE TO
PRESET
button and then a preset memory button.
4
>
Preset Edition: select your effect. It will appear on the pre-
view output of your slave device and press the
TAKE
button
to go live on your Main output.
>
CLEAR ALL
button: delete all Effects.
5
>
Source Selection: select your sources. It will appear on the
preview output of your slace device and press
TAKE
to go
live on your Main output.
6
>
Settings: allows you to access all of
the Axion2 menus and functionalities
quickly and easily. The 4 top rotative
knobs will allow you to set values, while
the last knob will allow to navigate
through the interface, to access source
or element settings for example.
7
>
Joystick for easy adjustments
(position or size). Adjust the selec-
ted PIP or Logo, X-Axis (Left/Right),
Y-Axis (Up/Down) and click to select
the next PIP/Logo.
8
>
Sequence: Allows to save your
sequences. Press the
SAVE TO SEQ
button when you’re in Sequence Mode.
9
>
Transition: Selection of screens (Filter
Take and Load/Save Preset memory).
10
>
Toggle Preset: Automa-
tically swap Current and
New preset at the end of a
TAKE
.
11
>
T-Bar to control
effect level.
13
>
TAKE
with
CUT
effect
instead of selected ef-
fects.
12
> Press the
TAKE
button to display the
pre-selected sources
onto the MAIN output
with the selected
effects.
14
> Allows to modify the time
of selected effects.
1
2
3
4
5
13
14
12
11
10
9
8
7
6