Camera/component installation, Adjustments – CHIEF TA250 User Manual
Page 8
TA100/200/250
Installation Instructions
8
Camera/Component Installation
WARNING:
Exceeding the weight capacity can result in
serious personal injury or damage to equipment! It is the
installer’s responsibility to make sure the combined weight of
all equipment and accessories mounted on the TA100/200/
250 shelves does not exceed 10 lbs (4.54 kg) per shelf.
NOTE:
Mounting options will vary depending on the type of
camera being mounted.
NOTE:
Camera or component can also be secured to mount
by threading cable ties or a PAC103 safety strap (not
included) through outside slots on shelf and around the
device.
Using Adhesive Squares
1.
Use up to eight adhesive hook and loop squares (M) to
secure camera or component to shelf. Attach adhesive
squares to bottom of camera first and then attach
corresponding squares to shelf when the exact mounting
location has been determined.
Using Screw (TA200/250 only)
2.
Install 1/4-20 x 3/8" Phillips pan machine screw (N) through
mounting slot and into hole on bottom of camera. (See
Figure 8)
Figure 8
NOTE:
It is also acceptable to mount the camera directly to the
shelf without any screws or ties.
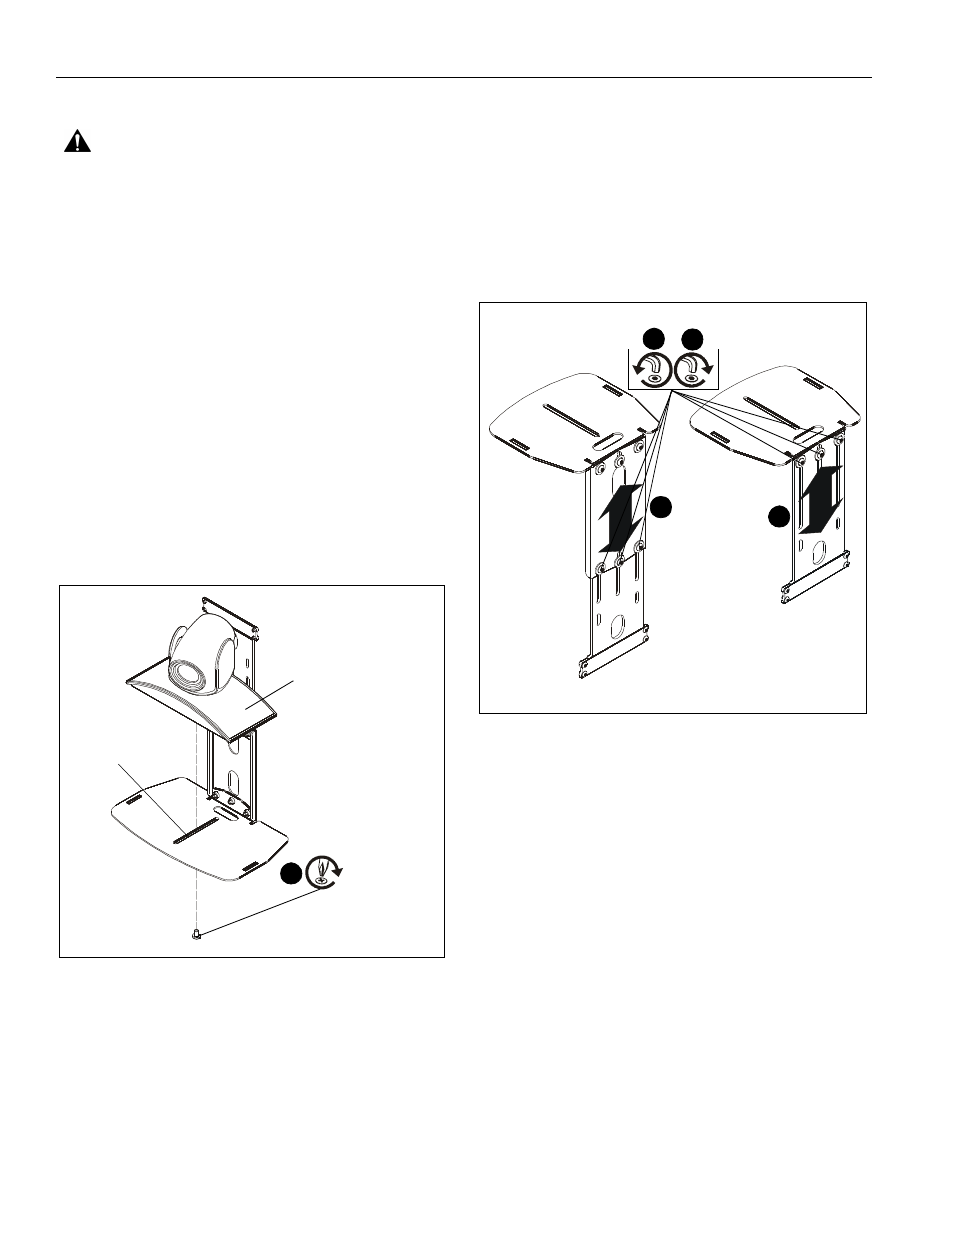
Adjustments
Height Adjustment
1.
Loosen three 1/4-20 x 5/8" button head cap screws (F)
holding extension bracket (B) or shelf (C) to attachment
bracket (A). (See Figure 9)
2.
Adjust height of shelf (C) as desired.
3.
Tighten three 1/4-20 x 5/8" button head cap screws (F)
holding extension bracket (B) or shelf (C) to attachment
bracket (A). (See Figure 9)
Figure 9
camera (example)
2
(N)
(TA250 shown)
mounting slot
2
1
3
with extension bracket
without extension bracket
2