CHIEF KSA1011 User Manual
Page 6
Model: KSA-1011
Installation Instructions
6
5.
Install washer (40) or spacer (30), as desired, on pin
(20) (See Figure 7).
NOTE: Washer (40) will lock Y-connector (10) to wall
mount. Spacer (30) will allow limited movement
of Y-connector (10) relative to wall mount,
dependent upon tension of screw (50).
6.
Install Y-connector (10) on pin (20) (See Figure 7).
7.
Insert nut (80) into recessed cavity of wall mount
housing as shown (See Figure 8).
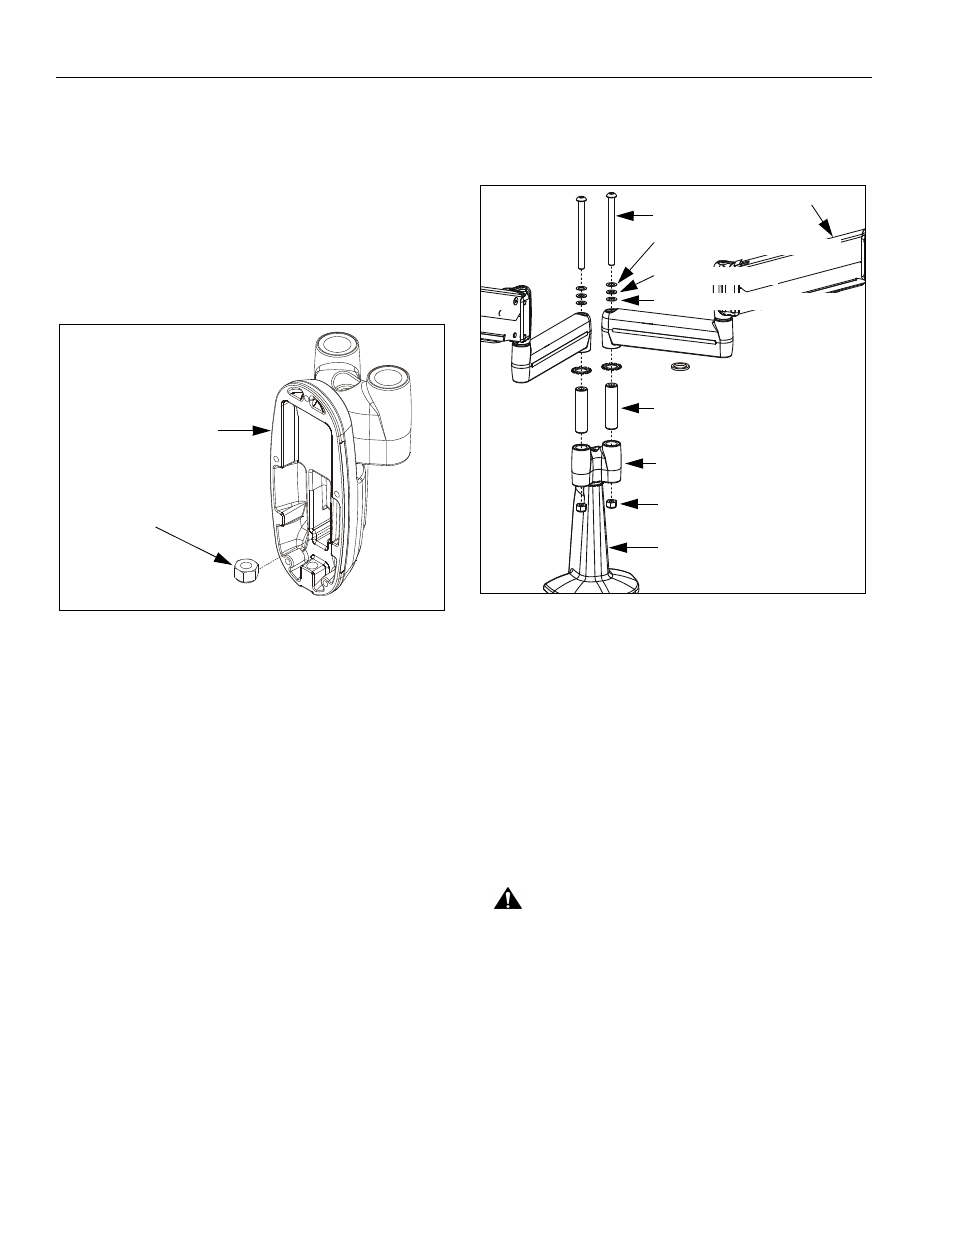
Figure 8: Install Nut
8.
Install screw (50) through washer (70), washer (60),
washer (70), and Y-connector (10), into nut (80) (See
Figure 7).
9.
Using 3/16" hex key tighten screw (50) as required to
maintain desired Y-connector (10) position.
10. Install wall mount housing to wall plate per
instructions included with wall mount.
11. Proceed to "ASSEMBLE MOUNT ARMS TO Y-
CONNECTOR."
ASSEMBLE MOUNT ARMS TO Y-CONNECTOR
1.
Insert retained pin into Y-connector (10) upper bore
(See Figure 9).
Figure 9: Multi-Dual Arm Assembly
2.
Install washer (40) or retained plastic spacer, as
desired, on pin (See Figure 9).
NOTE: Washer (40) will lock arm to Y-connector. Spacer
will allow limited movement of arm relative to Y-
connector (10), dependent upon tension of screw.
3.
Insert mount arm assembly on pin (See Figure 9).
4.
While holding retained nut in lower bore of Y-
connector (10), insert retained screw through retained
washers (stainless steel washer, plastic washer, and
stainless steel washer), mount arm assembly, and Y-
connector (10), into retained nut (See Figure 9).
CAUTION: Improper positioning of desk mount arm
may result in failure of mount and subsequent damage
to displays. Do NOT position either arm in gray shaded
area.
5.
Position desk mount arm within UNSHADED area as
shown (See Figure 10). Tighten screw as required
using 3/16" hex key.
NOTE: This step not applicable to wall mount arms.
Wall Mount Housing
80
(in recessed cavity)
Mount Arm Assembly
Screw
Washer (Stainless Steel)
Washer (plastic)
40 or
Plastic Spacer
Pin
10
Desk Mount
NOTE: All parts
same for both sides.
Nut
(Wall Mount similar)
Washer (Stainless Steel)