Install cover plates and end caps – CHIEF PNR User Manual
Page 6
Model PNR™
Installation Instructions
6
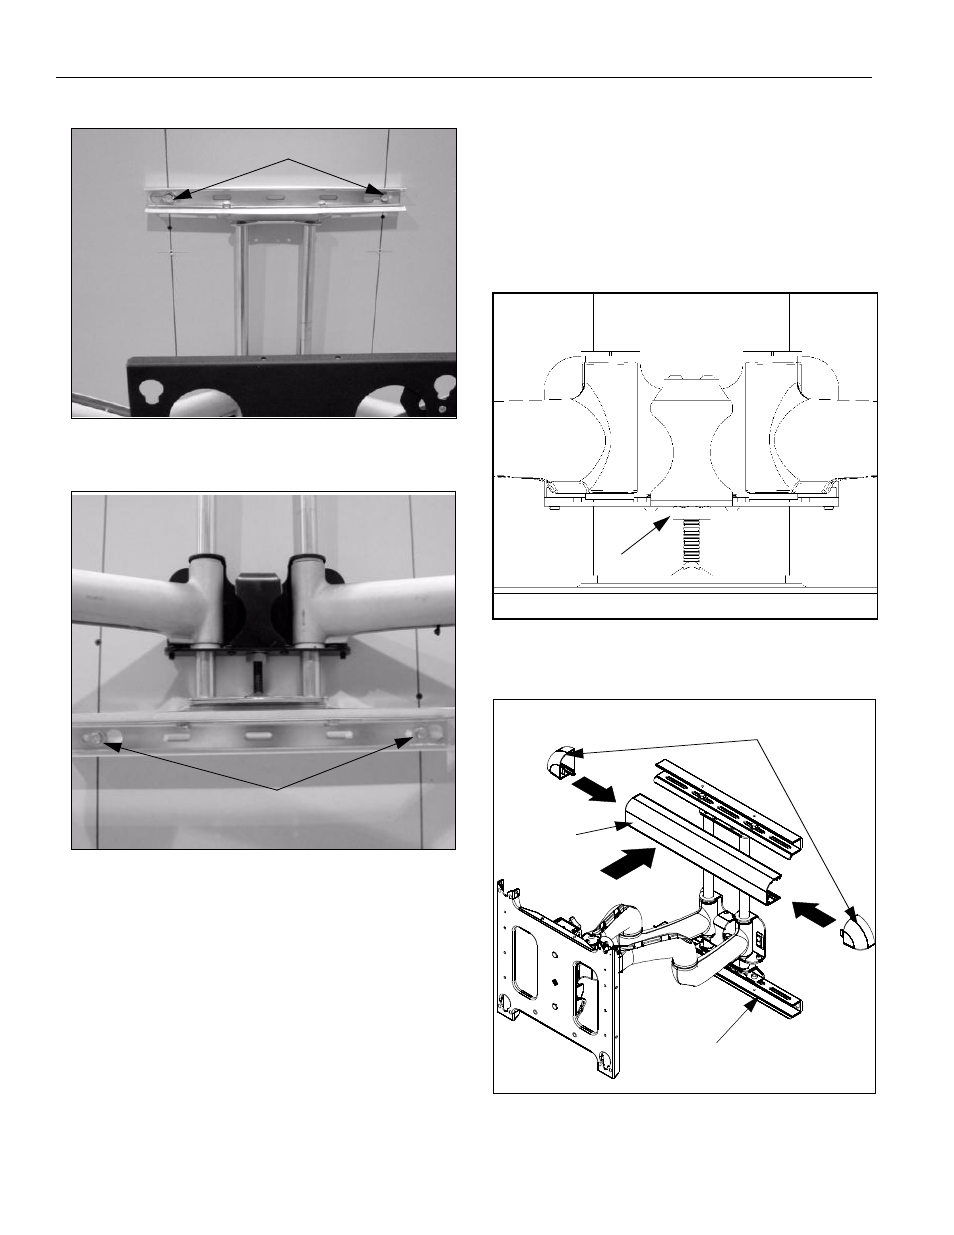
Figure 2
Figure 3
Adjust Height on the PNR
NOTE:
Height adjustment range up to 1.08 inches.
To adjust the PNR height:
1.
Check PNR for the desired height. If needed, use the
adjustment wrench (40) to adjust the PNR height.
•
Turn adjustment nut (see Figure 4) clockwise
(CW) to lower the unit height, or
•
Turn adjustment nut counterclockwise (CCW) to
raise the unit height.
Install Cover Plates and End Caps
NOTE:
The cover plates and end caps have pressure fitting
ends that lock in place with each other.
1.
Install cover plate (20) over the top bracket. (See figure 5)
2.
Install end cap (30) on the cover plate (20). (See figure 5)
3.
Repeat steps 1 and 2 for the bottom mounting bracket.
(See figure 5)
Figure 4
Figure 5
Mount (Hang) the PNR on Lag Bolts
Use Lag Bolts and Washers to Fasten PNR to the Wall.
Adjustment Nut
Cover Plate (20)
End Caps (30)
Bottom Mounting Bracket
- MSMVPU (12 pages)
- K-Series (16 pages)
- FDP Series (8 pages)
- FSP Series (8 pages)
- JPP Series (8 pages)
- TPP Series (12 pages)
- TPM-2000 Series (8 pages)
- TPS Series (12 pages)
- PSS Series (8 pages)
- FSB018BLK (2 pages)
- PTS Series (8 pages)
- STS1 (8 pages)
- STLU (12 pages)
- MSS6000 (12 pages)
- PXR (32 pages)
- CM2L40 (76 pages)
- CM2C40 (76 pages)
- FWDIW Series (8 pages)
- JWDIW Series (8 pages)
- MWRIW Series (12 pages)
- PWRIW Series (12 pages)
- PNRIW Series (12 pages)
- TS525TU (16 pages)
- TS325TU (20 pages)
- TS218SU (16 pages)
- TS118SU (12 pages)
- MCD Series (8 pages)
- PDC Series (8 pages)
- MCS Series (8 pages)
- PCM Series (8 pages)
- PCS Series (8 pages)
- FHP110, FHPV (8 pages)
- JHS Series (8 pages)
- FHS Series (8 pages)
- MCB1U (12 pages)
- MCM1U (12 pages)
- MWC Series (8 pages)
- PWC-2000 (12 pages)
- RMT2 (12 pages)
- MTTU (12 pages)
- LTTU (12 pages)
- FTR Series (8 pages)
- MTMPU (12 pages)
- LTMPU (12 pages)
- XSM Series (12 pages)