Inspect the unit before installing, Specifications, Parts list – CHIEF PNR User Manual
Page 4
Model PNR™
Installation Instructions
4
Inspect The Unit Before Installing
WARNING: Watch for pinch points. Do not put your
fingers between movable parts.
1.
Carefully inspect the PNR for shipping damage. If any
damage is apparent, call your carrier claims agent
and do not continue with the installation until the
carrier has reviewed the damage.
NOTE: Read all instructions before starting installation.
2.
Lay out components to ensure you have all the
required parts before proceeding. See
“DIMENSIONAL DRAWING” on page 3.
SPECIFICATIONS
Table 1 provides the specificiations for the mount.
NOTE: *Dimension does not include the PSB interface
bracket.
INTERFACES
Table 2 lists the interface for the PNR.
TOOLS REQUIRED FOR INSTALLATION
•
Allen wrench set
•
Drill and bit set
•
Wrench set
NOTE: Other tools may be required depending on the
method of installation.
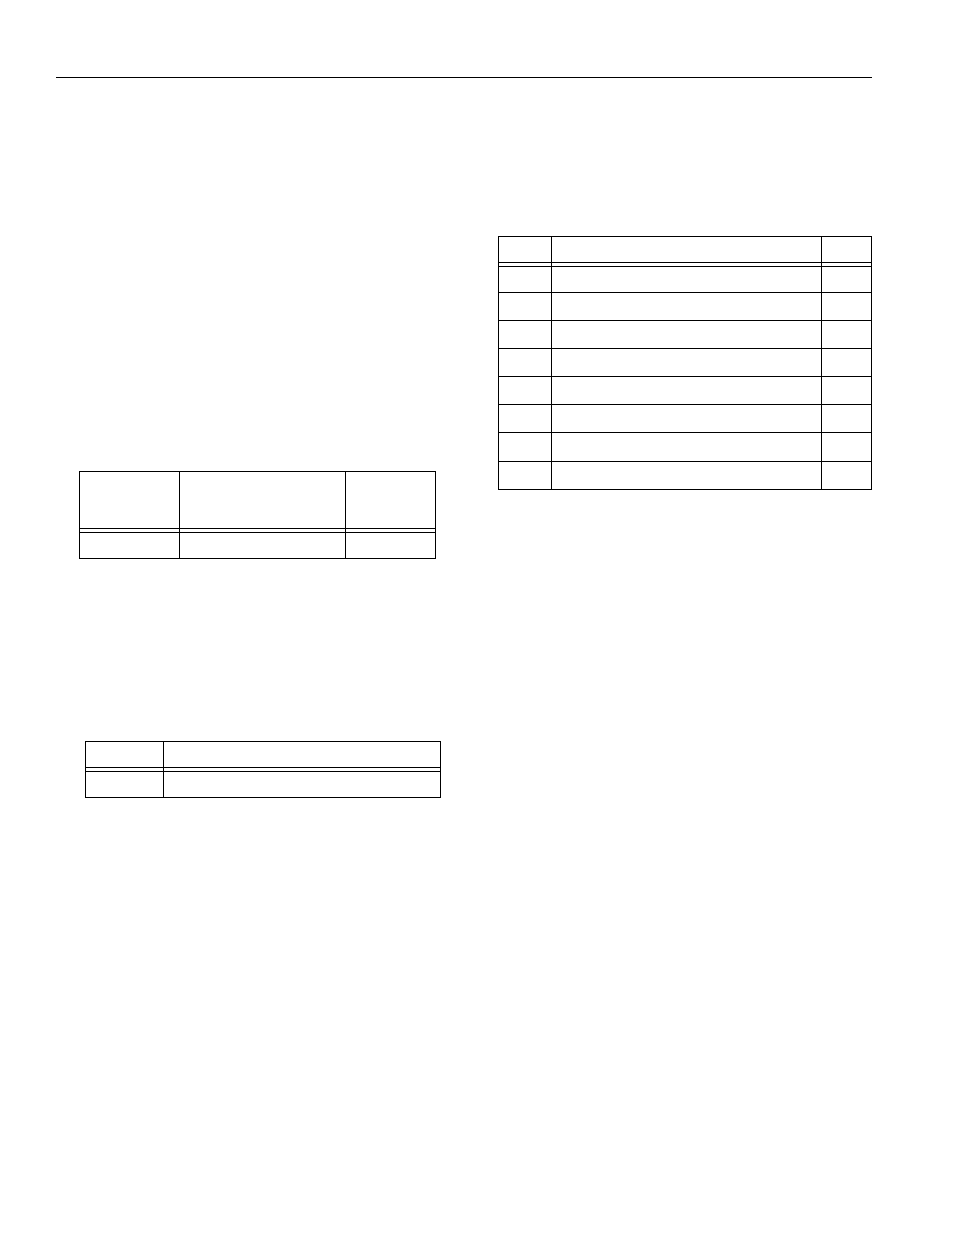
PARTS LIST
Unpack the carton and verify the contents listed in Table
3.
Table 1: Mount Specifications
Model
Max Support Weight
Mount
Extended
from Wall
PNR
200 lbs. (90.72kg)
25”*
Table 2: PNR Interfaces
Model
Interface
PNR
14” x 14” Plasma Static Brackets (PSB)
Table 3: Parts List
REF
DESCRIPTION
QTY
10
PNR Wall Mount
1
20
Cover Plates
2
30
End Caps
4
40
Tiewraps
12
50
Lag Bolts, 5/16” x 2-1/2”
4
60
Thick Washers, .850x.385x.135”
4
—
Wrench, Adjustment
1
—
Bar, Adjustment
1