2 diameter gauge – CEMB USA K9 User Manual
Page 15
15
40 mm
Use and maintenance manual Rev. 04-2011
ENGLISH
CORRECT CALIBRATION
Return the gauge to rest position.
The wheel balancer is ready for operation.
INDICATION
In the event of errors or faulty operation, the writing
“r.P.”:
ap
pears on the display : shift the gauge to the
rest position and repeat the calibration operation exactly
as described above. If the error persists, contact the
Technical Service Department. In the event of incorrect
input in the rim distance gauge calibration function, press
to cancel it.
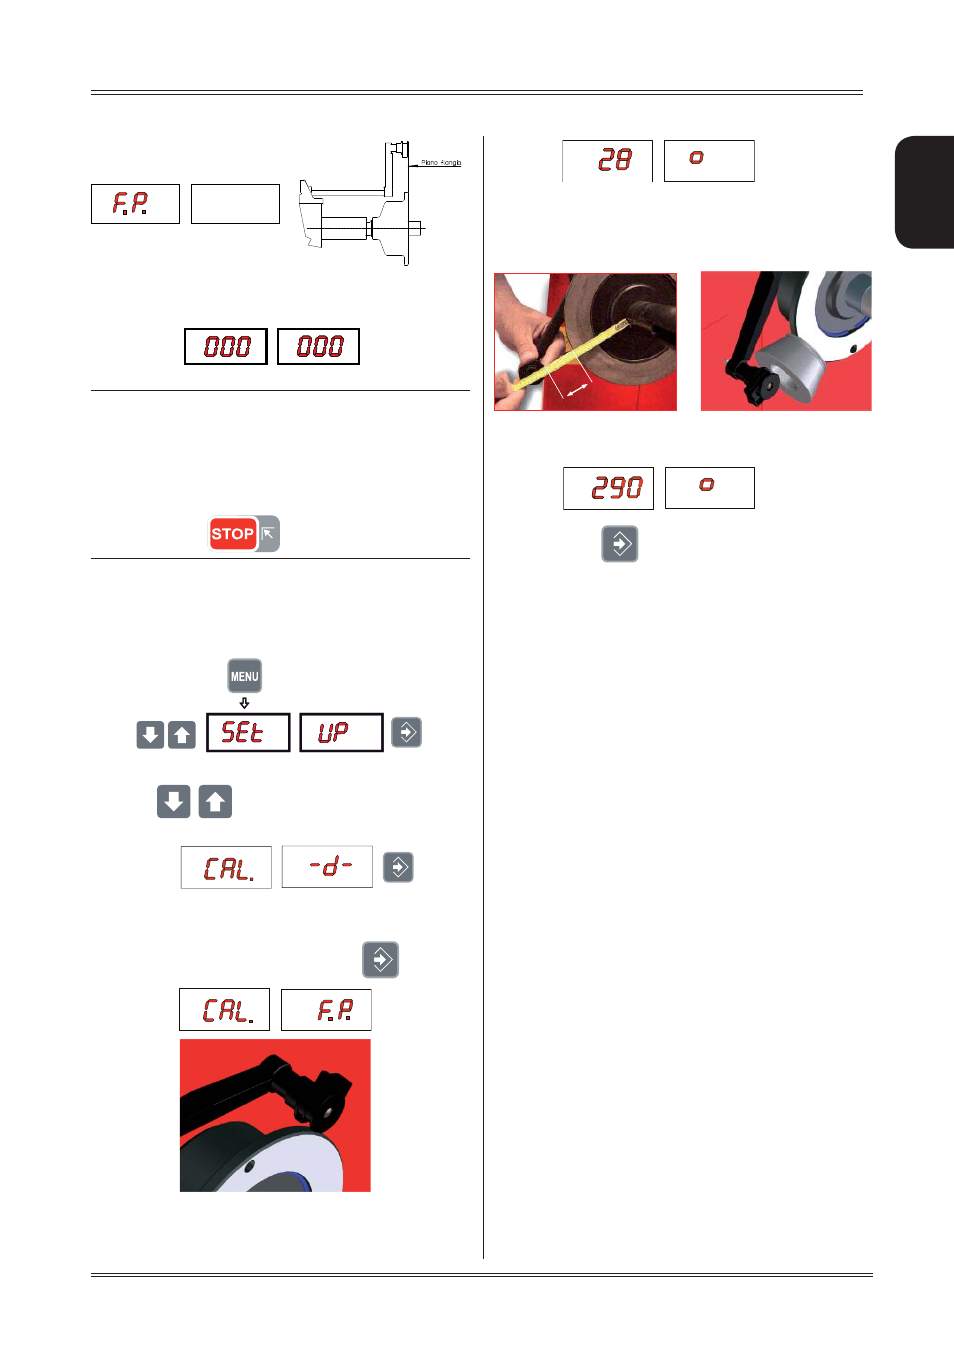
6.4.2 Diameter gauge
E
Display the SETUP menu
P
1. ress
to view the diameter gauge CALI
BRATION
function.
m
Place the round part of the gauge terminal on the
flange as shown in the figure and press
Th
2.
e number 28 ± 3° appears on the left display .
Turn
3.
the gauge downward position the round part
of the gauge terminal at 40 mm (radial distance)
from the flange as indicated in the figure; alternati
vely use one of the cones provided as shown in the
images
The nu
4.
mber 290 ± 3° should appear on the left
display. The calibration is already correct.
If not, press the
button holding the gauge still at 40
mm: the number 290 appears on the left display.
Return the gauge to rest position.
Setup