Castle 30 Express User Manual
Page 6
Now that the tape is calibrated you are ready to drill your first test panel.
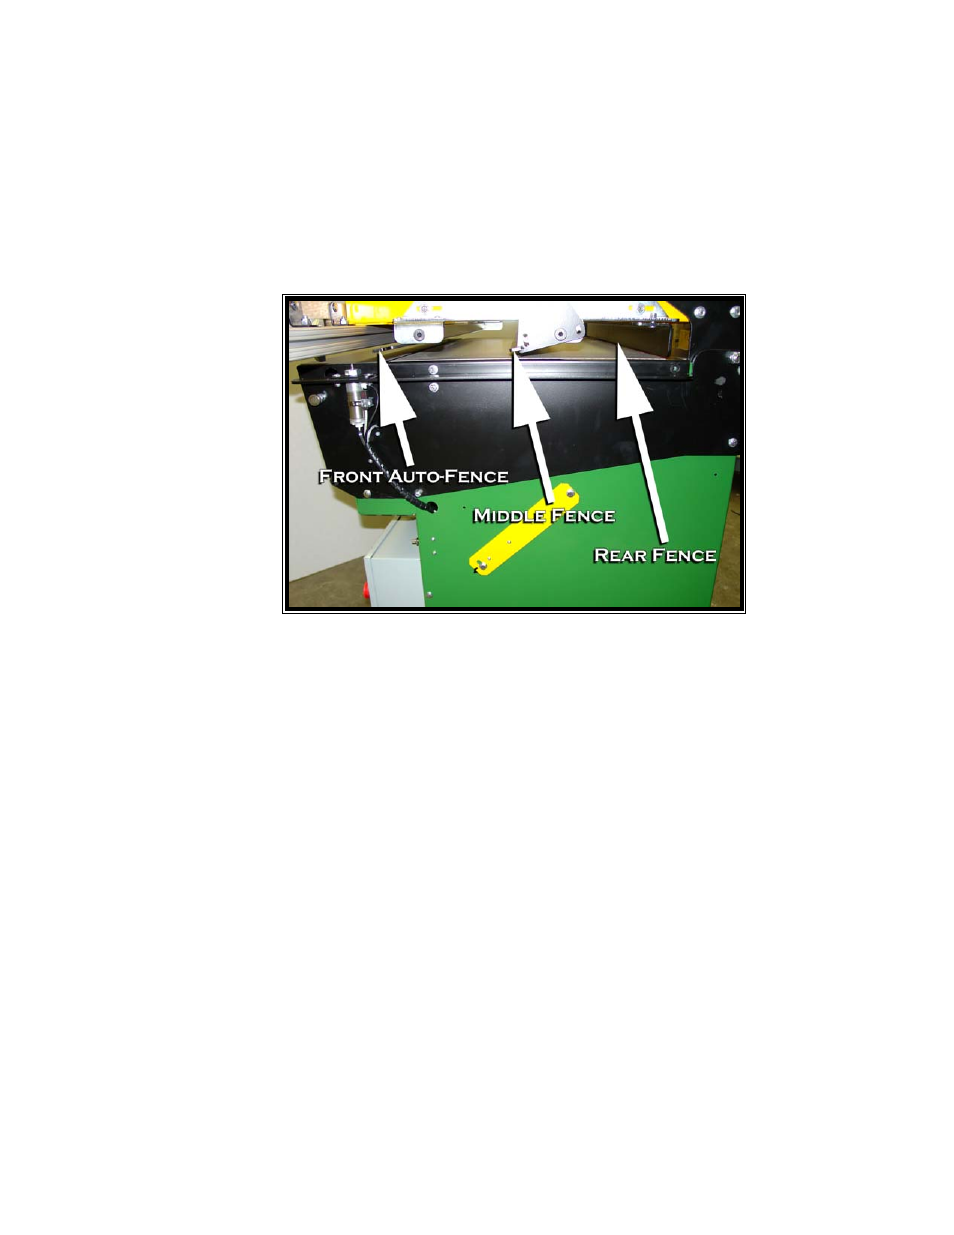
The Front Auto-Fence is factory set to 37mm from the center of the Drill Bits to
the front edge of the board.
.
Insert your first test panel under the Clamp Beam with the front edge of the panel
facing in, toward the Front Auto-Fence and the bottom edge of the panel toward
the Right Stop. If the Front Fence is up tap the Foot Pedal to toggle it down.
The panel should now be in a position for the Clamp to come down and the Drill
Bits to come up from the bottom to drill the first row of holes.
Press the green Start Button. (The red Safety Button must be pulled out to the
ready position before green button will activate your machine.)
Step on the Foot Pedal and hold it down until the drill completes the drilling cycle
(approximately 3 seconds). You may hear a released air sound after the panel has
been drilled. This is normal.
NOTE: If at any time during the clamping and drilling cycle you release the Foot
Pedal, the drilling process will be interrupted and will stop drilling. The Clamp will
release, the Auto-Fence will change position, and the drill will retract to the ready
position.
This has completed the first row of holes in the under side of your panel.
4