Specifications (continued) – Atec HP-Agilent-8643A-44B-64A-65AB User Manual
Page 11

11
8643A
8644B
8664A
8665A/B
Avionics Option 009
Option 009 provides the performance needed for testing VOR
N/A
and ILS (localizer, glide slope and marker beacon) receivers.
Option 009 provides guaranteed specifications necessary to
make these demanding tests.
VOR (108 to 118 MHz)
Bearing accuracy: 0.1°, frequency accuracy: Same as timebase,
AM accuracy (30%): ±5% of setting, AM distortion: 2%,
FM accuracy (480 Hz dev.): ±1.5 Hz
ILS: localizer/glide slope
DDM resolution:
Localizer: 0.0002 Glide slope: 0.0004
(108 to 112 MHz/329.3 to
DDM accuracy:
Localizer: ±0.0004 ±5% of DDM
335 MHz)
Glide slope: ±0.0008 ±5% of DDM
Marker beacon (75 MHz):
AM accuracy: ±5% of setting AM distortion: 2%
AM accuracy (95%): ±5% of setting + 1% AM distortion: 5%
2 GHz counter Option 011
Frequency range:
20 Hz to 2 GHz in three ranges
N/A
Sensitivity:
25 mV
rms
(-19 dBm into 50
Ω)
Maximum input:
2.25 V
rms
(+20 dBm into 50
Ω)
Impedance:
50
Ω, 10 MHz to 2 GHz; 1 M Ω shunted by <65 pf, <10 MHz
Coupling:
ac
Gate times:
0.1s to 1s in 0.1s steps
Measurement resolution:
Measured frequency (Hz) x 10
-8
/gate time or 0.01 Hz if greater
Measurement uncertainty:
(± timebase accuracy) plus (± measurement resolution)
General
Power requirements:
±10% of 100 V, 120 V, 220 V or 240 V; 48 to 440 Hz; 500 VA except 8643A/44B 400 VA.
Operating temperature:
0 to 55 °C
Leakage:
Conducted and radiated interference meets MIL STD 461 B REO2 and FTZ 1046.
Leakage is measured into a resonant dipole antenna, one inch from the instrument’s surface
with output level <0 dBm (all inputs/outputs properly terminated, f
c
<1 GHz).
Leakage is typically <16 µV or <2 µV with Option 010, measured at the front panel.
The older two-turn loop method of measurement is typically <1 µV or <0. 1 µV for Option 010.
Acoustic noise:
Typically <5.5 bels
Storage registers:
Ten full function and 40 frequency/amplitude registers.
Calibration/diagnostics:
Internal calibration and diagnostics functions are available to the user. Built-in test capability
locates circuit malfunctions to allow repair through module replacement.
Calibration interval:
Recommended three years (MTBC).
Weight:
8643A; 23 kg (50 lbs). 8644B; 30 kg (67 lbs). 8664A/65A/B; 35 kg (78 lbs)
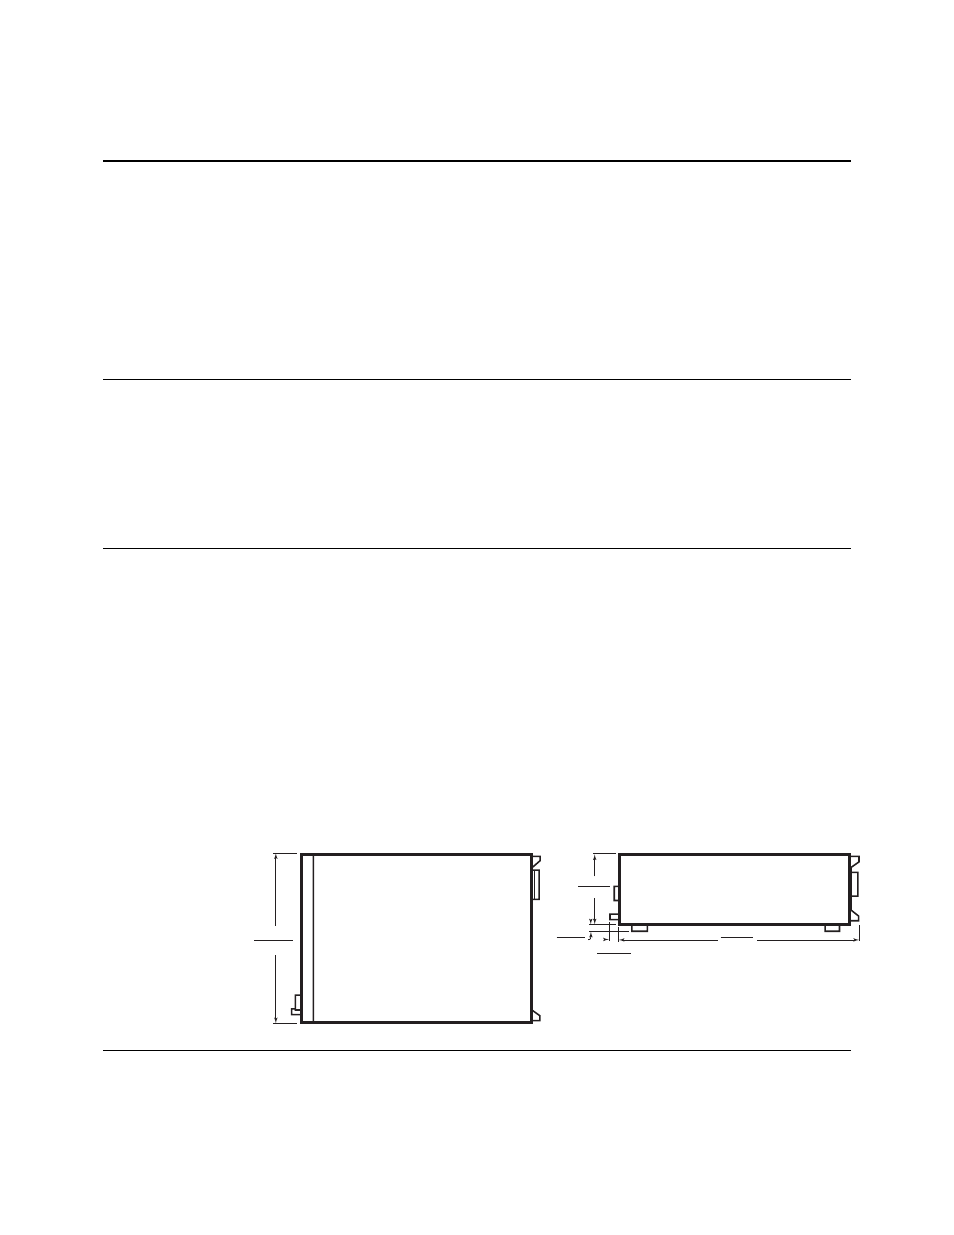
Dimensions:
177H x 426W x 601D mm (7 x 16.8 x 23.7 in.). Option 010 adds 35 mm (1.4 in.) to depth.
Specifications (continued)
TOP
426 mm
(16.8 in.)
SIDE
Option 010 in creases depth by 35 mm (1.4 in.)
177 mm
(7.0 in.)
17 mm
(0.7 in.)
23 mm
(0.09 in.)
601 mm
23.7 in.)
