Aeromotive 18688 - PHANTOM 340 STEALTH FUEL SYSTEM User Manual
Page 6
10. Place the included "installation ring" over the 3-1/4" hole so the raised register drops into it. Now rotate the ring until
the bolt pattern is in the predetermined alignment. If the tank is corrugated or has ribs, rotate or clock the installation
ring to ensure that none of the holes on the bolt pattern would have to be drilled into the side walls of the ribs.
11. With the installation ring correctly clocked in place, use the included #2 drill bit and drill one of the bolt pattern holes.
12. Place one of the included 10-24 x 2-1/2" screws in the above hole to help hold the index ring for further drilling.
13. With the installation ring still in place, drill a second hole, directly across (180-degrees) from the first.
14. Place the second 10-24 x 2-1/2" screw in the above second hole.
15. With the installation ring still held in place by the first two alignment screws, drill the remaining 8 holes.
16. Remove the installation ring and two alignment screws.
17. Using the fuel pump retainer ring, align the studs with the newly drilled holes and check for proper fit.
18. Remove any burrs that where created during the drilling operations above.
19. Carefully clean any debris from inside the fuel tank, a good shop-vac can be very helpful here.
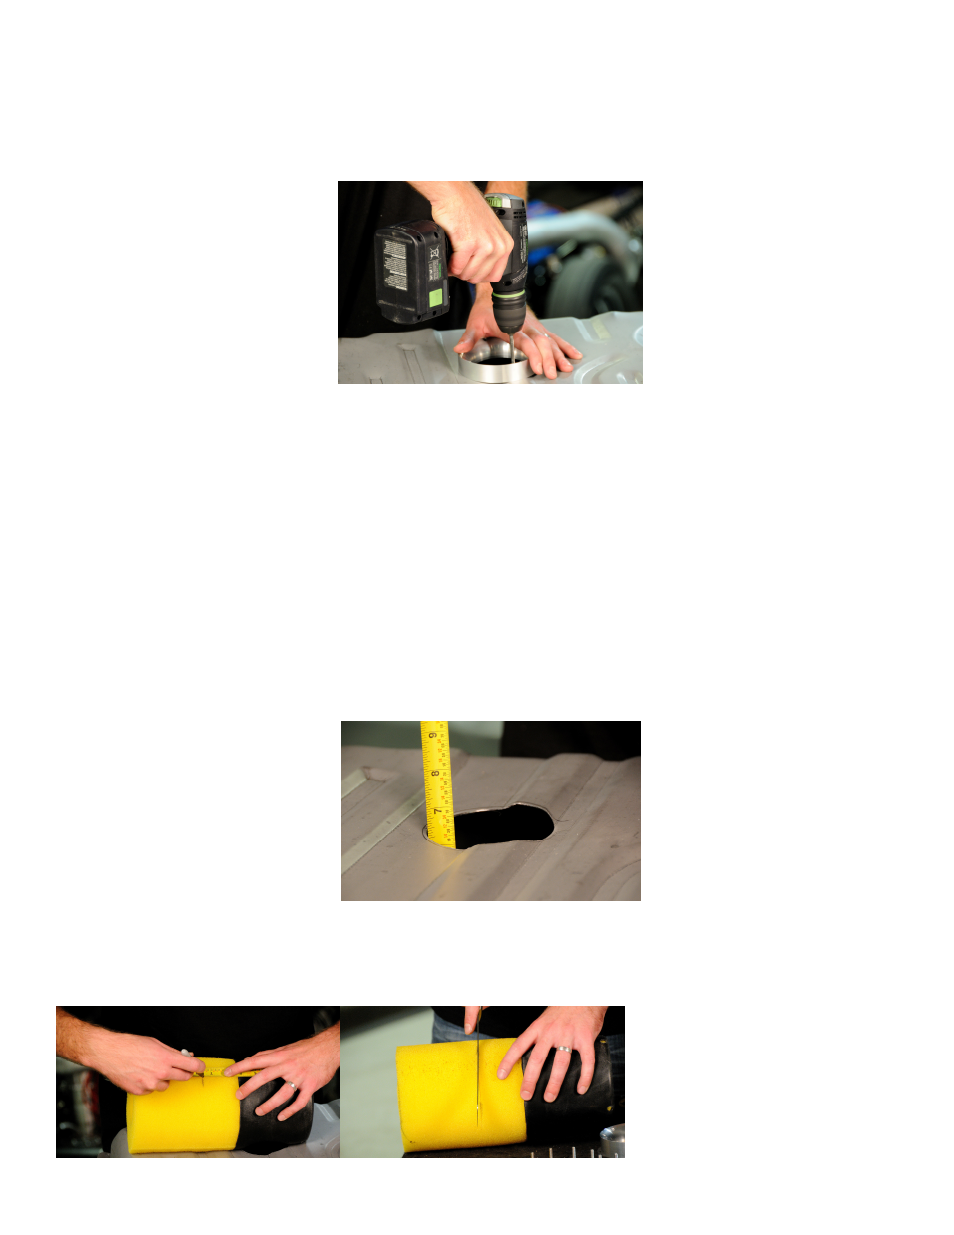
20. Using a tape measure, determine the depth of the tank at the fuel pump location.
21. Measure the foam baffle assembly from the bottom (black rubber part) up and mark the assembly 1" longer than the
determined tank depth. (If the tank was 6" deep, mark the foam baffle assembly to be 7" long)
22. Using a bread knife or fine-tooth hacksaw blade, carefully cut the foam baffle to the desired length.