Quick start guide — sw4 3g hd-sdi, Installation, Step 1 – Extron Electronics SW4 3G HD-SDI User Guide User Manual
Page 5: Step 2, Step 3, Step 4, Step 5
SW4 3G HD-SDI • Quick Start Guide
QS-1
Quick Start Guide — SW4 3G HD-SDI
SmMan_main_template_V4_051605
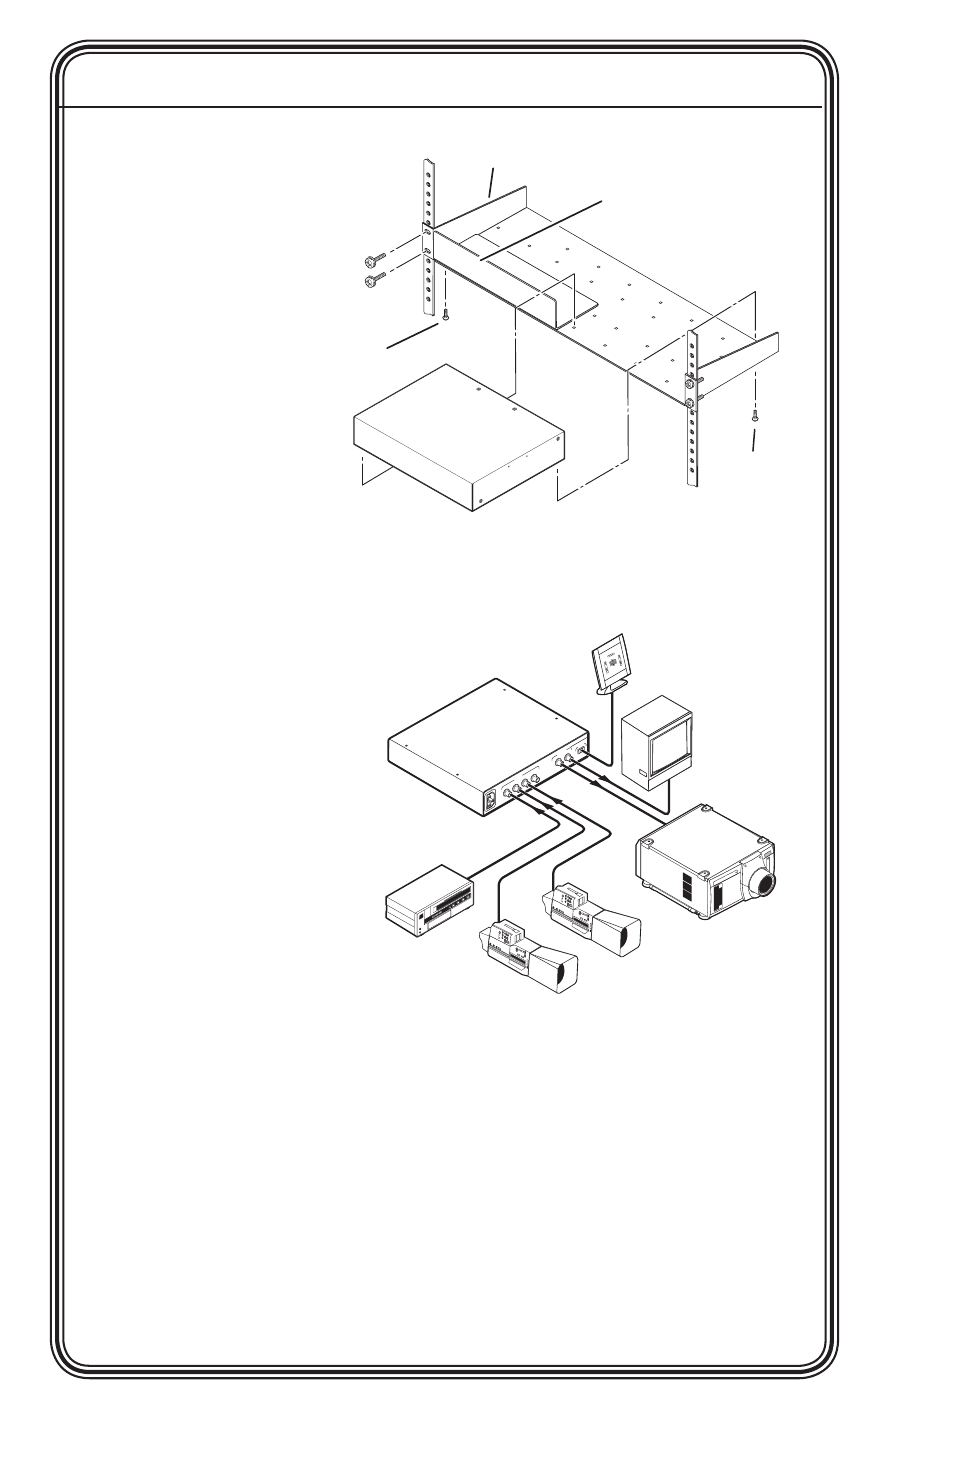
Installation
Step 1
Turn off all of
the equipment
and disconnect
it from the
power source.
Step 2
(Optional)
Mount the
switcher on
one of the rack
options.
Step 3
Connect the video input cable(s). Connect up to four video inputs
to the switcher’s BNC input connectors 1 through 4. See “Rear
Panel Connections”
in chapter 2,
“Installation and
Operation.”
Step 4
Attach the video
output cable(s).
Connect one or
two video output
devices to the
switcher’s BNC
output connectors
(SDI, HD-SDI, or
3G-SDI).
N
Outputs 1 and 2 output identical signals.
Step 5
If the switcher is to be connected to a computer or host controller for
remote control, wire the provided 3-pole captive screw connector
to an RS-232 cable. Connect the cable to the RS-232 port on the
switcher’s rear panel and to the host’s RS-232 port (see the serial port
pinout on the next page).
The RS-232 port has the following protocol:
• 9600 baud
• No parity
• 1 stop bit
• 8 data bits
6" Deep Rack Shelf
Front false
faceplate
uses 2
screws.
1/2 Rack Width Front
False Faceplate
Use 2 mounting holes on
opposite corners.
(2) 4-40 x
3/16" Screws
100-
240V
0.2A
50-6
0H
z
INPUTS
1
2
1
2
3
4
OUTP
UTS
RS-232
SW4 3G HD-SD
I
HD-SDI
Monitor
Extron
SW4 3G HD-SDI
Multi-Rate SDI
Switcher
HD-SDI
Projector
Control
System
HD-SDI Cameras
HD-SDI VTR