Quick start — replacing mlc 206 firmware, cont’d, Step 5, Step 6 – Extron Electronics MLC 206 Replacing Quick Start User Manual
Page 2: Step 7, Step 8, Step 9, Step 10, Step 11, Extron electronics, usa, Extron electronics, europe
Quick Start — Replacing MLC 206 Firmware, cont’d
A
B
C
D
E
A
B
C
IR
Displa
y/Sour
ce Contr
ol
Extr
on Switc
her Contr
ol
Rela
ys
IR
/RCM
RS-232
D
E
A
B
C
A
B
D
1A
1B
2A
2B
3A
3B
1
2
3
4
5
6
Tall
y Out
MLS
/Power
33-644-01 A
07 01
Pr
inted in the
USA
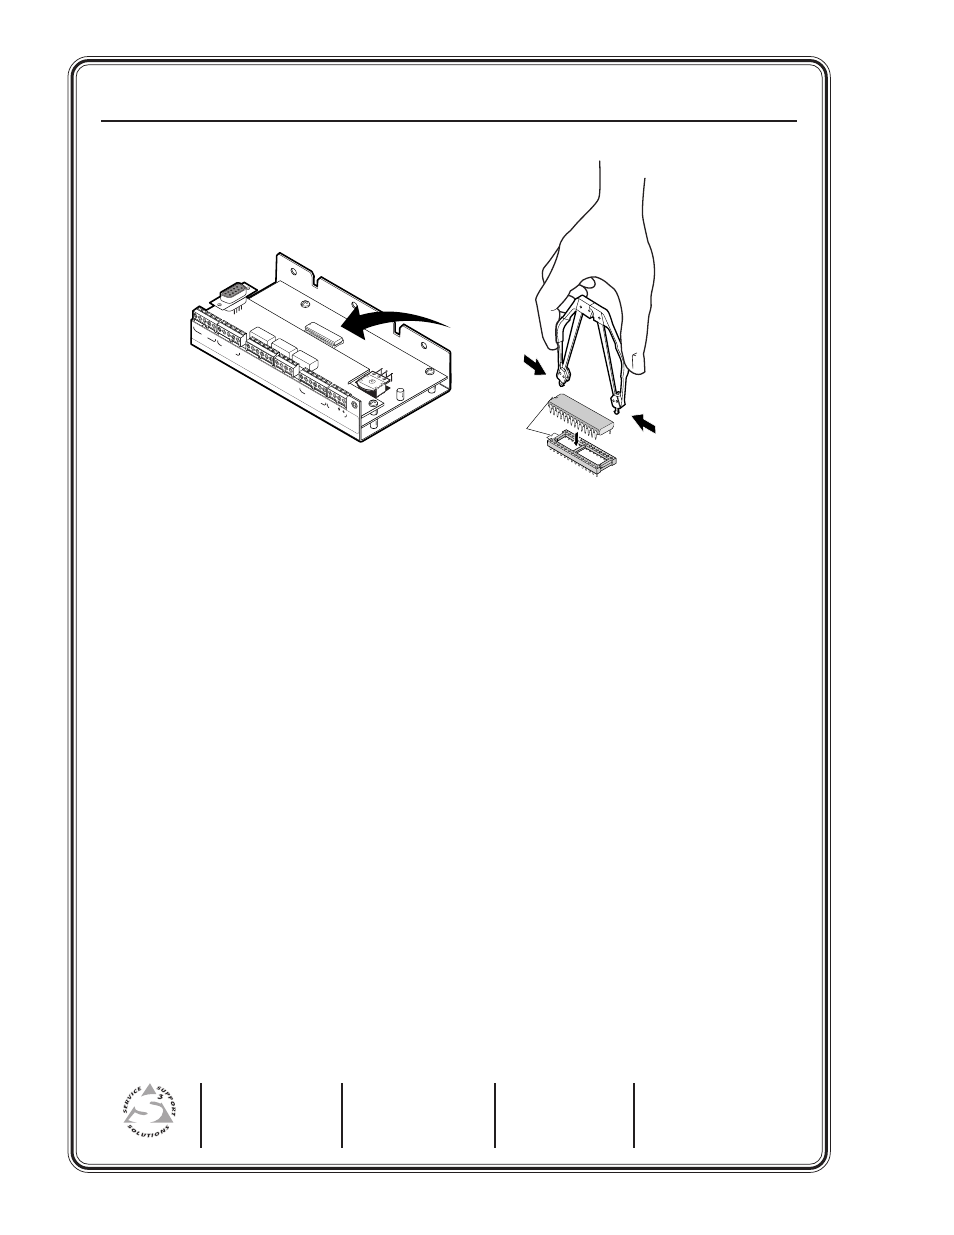
Align Notches
Locating the U6 firmware IC chip,
and aligning the PLCC chip puller tool with the firmware chip slots
Step 5
After you are electrically grounded, align the hooks of a PLCC IC puller tool with the slots located in
opposite ends of the firmware chip.
Step 6
Insert the hooks into the slots, and squeeze the tool gently to grasp the chip.
Step 7
Pull the chip straight out of the socket, and set it aside.
Step 8
Align the notch on one end of the new firmware IC chip with the socket’s notch indicator (in the same
orientation you observed and noted in step four for the old chip).
Step 9
Gently but firmly press the chip into place in the socket.
Step 10
Replace the MLC’s rear cover, and fasten it with the screws and hex standoffs that were removed in
step 3.
Step 11
Re-mount the MLC, and reconnect the power supply to the power source.
Contact an Extron applications engineer if you need further assistance.
Extron Electronics, USA
1230 South Lewis Street
Anaheim, CA 92805
USA
714.491.1500
Fax 714.491.1517
Extron Electronics, Europe
Beeldschermweg 6C
3821 AH Amersfoort
The Netherlands
+31.33.453.4040
Fax +31.33.453.4050
Extron Electronics, Asia
135 Joo Seng Road, #04-01
PM Industrial Building
Singapore 368363
+65.6383.4400
Fax +65.6383.4664
Extron Electronics, Japan
Daisan DMJ Building 6F
3-9-1 Kudan Minami
Chiyoda-ku, Tokyo 102-0074 Japan
+81.3.3511.7655
Fax +81.3.3511.7656
www.extron.com