Video and audio output, Rear panel dip switches, Gain/peak – Extron Electronics RGB 109xi Setup Guide User Manual
Page 2: Front panel dip switches, Horizontal shift, Extron contact information, Setup guide — rgb 109xi (cont’d), Step 6 — connect video output, Step 7 — connect audio output, Step 8 — connect power
Setup Guide — RGB 109xi (cont’d)
68-410-50
Rev. A
02 10
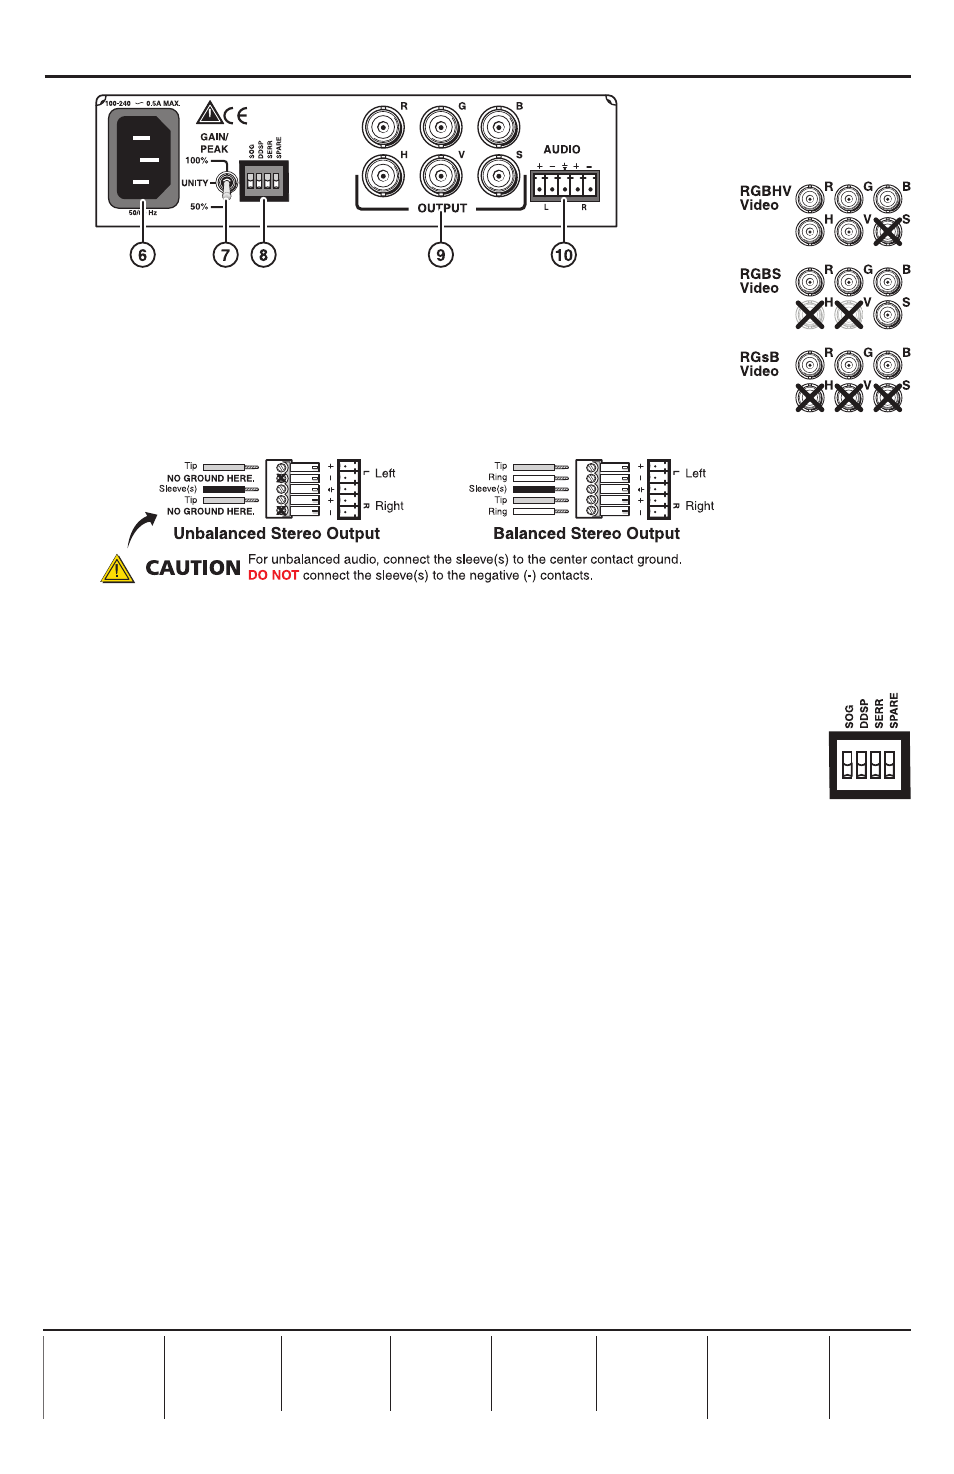
Step 6 — Connect video output
Connect a RGBHV, RGBS, or RGsB video display to the video output (
i
),
as shown in the figure at right.
Step 7 — Connect audio output
Connect an audio device to the five-pole, 3.5 mm captive screw connector
(
j
). Follow the wiring diagram below for unbalanced or balanced stereo output.
Step 8 — Connect power
Connect a standard IEC AC power connector (100-240 VAC, 50-60 Hz) to this socket (
f
).
Power on input and output devices.
Step 9 — Set rear panel DIP switches
The first three rear panel DIP switches (
h
) control:
Sync on Green (SOG) —
Set to on (up) for RGsB output; set to off for RGBHV or
RGBS output.
Digital Display Sync Processing (DDSP
™
) —
Set to off (down) for sync processing; set to on
(up) for no sync processing (may be needed for some LCD and DLP plasma displays) .
Serration Pulses —
Set to on (up) to keep serration pulses; set to off (down) to remove them. If
there is flagging or bending at the top of the video image, set this switch to off.
N
Turning on the DDSP switch disables the horizontal shift.
Step 10 — Set rear panel Gain/Peak switch
This rear panel switch (
g
) can be set to Unity (no gain and no peaking), gain with 50%
peaking, gain with 100% peaking. For cable runs of 125 feet or less, use the Unity setting.
Step 11 — Set front panel DIP switches
These front panel ID bit termination DIP switches (
c
) must both be set to on (up) if using a
laptop and no local monitor. Both switches must be set to off (down) if using a local monitor.
Step 12 — Adjust horizontal shift
This front panel knob (
d
) adjusts the horizontal shift of the remote output display device(s).