Extron Electronics Extron Mounting Bracket Installation User Manual
Page 3
3
Extron Mounting Bracket • Installation Guide
The backing clip can be in either orientation shown in the previous figure.
4.
Use a cross-head (Phillips) screwdriver to hand tighten the screws to fasten the
mounting bracket in place. (Refer to the Detail A and Detail B diagrams in the
figure on the previous page.)
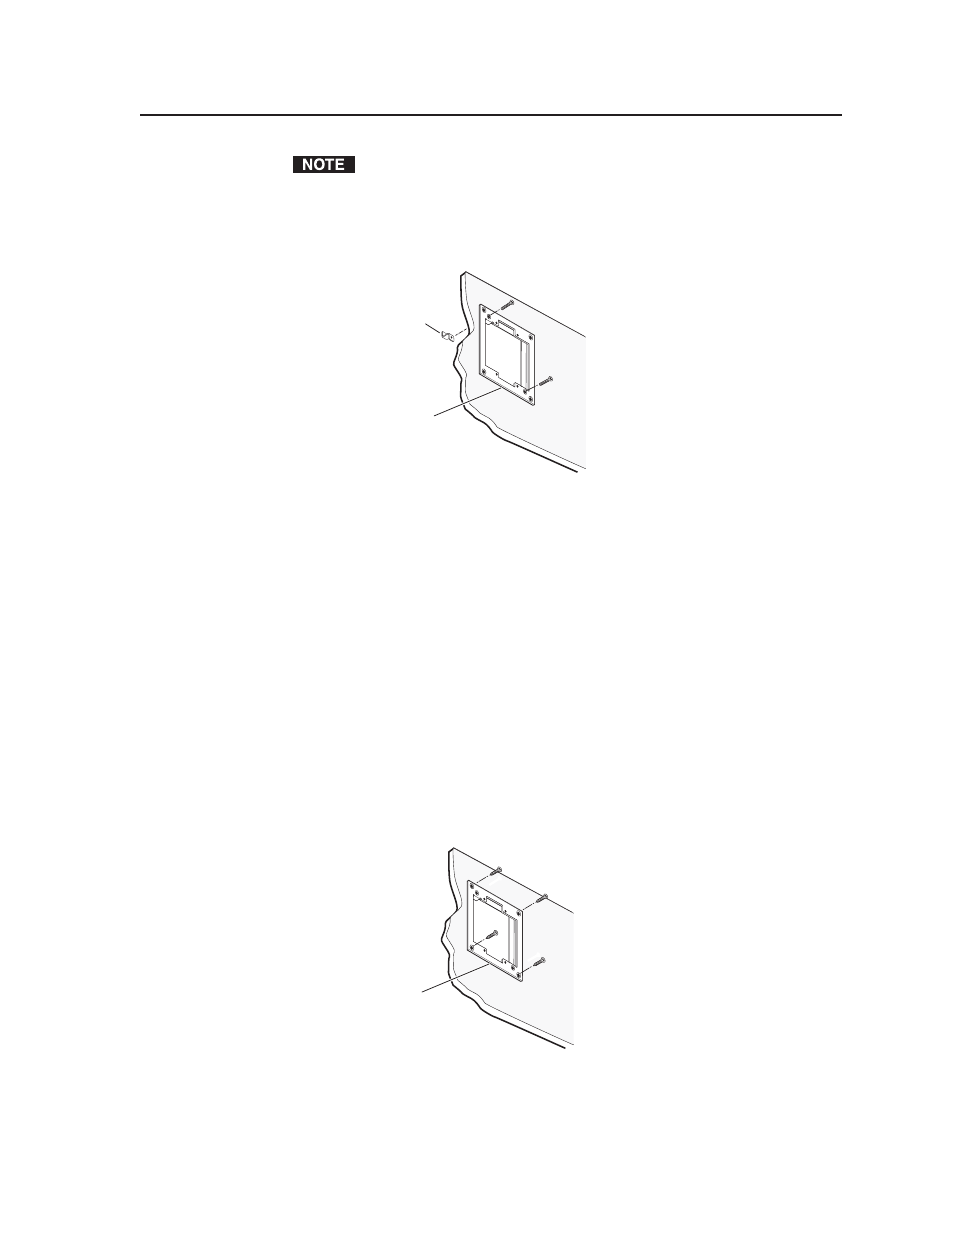
Mounting Bracket
Backing clip can be
in either orientation.
Fastening the bracket with backing clips
Fastening the bracket with wood or sheet metal screws
Use this installation method if the installation surface is a sturdy, dense material
such as sheet metal, plywood, or hard wood.
1
.
Insert the mounting bracket into the opening in the wall and hold it firmly in
place.
2
.
Mark the locations of the outermost/corner bracket holes on the installation
surface.
3
.
If desired, remove the mounting bracket and drill ¼" deep pilot holes (half the
width of the shaft of the screw) at the marked locations.
4
.
Insert the bracket back into the hole.
5
.
Use four ½" (1.3 cm) long, #6 flat headed wood screws (provided) to fasten the
bracket directly onto wood; or use self-tapping sheet metal screws to fasten
the bracket to metal. Hand tighten the screws. See the illustration below.
Mounting Bracket
Fastening the bracket with screws for wood or sheet metal