Maintenance and modifications, cont’d – Extron Electronics HSA 222S & HSA 222C User Manual
Page 19
HSA 200/222 Series • Maintenance and Modifications
HSA 200/222 Series • Maintenance and Modifications
Maintenance and Modifications, cont’d
3-6
4
.
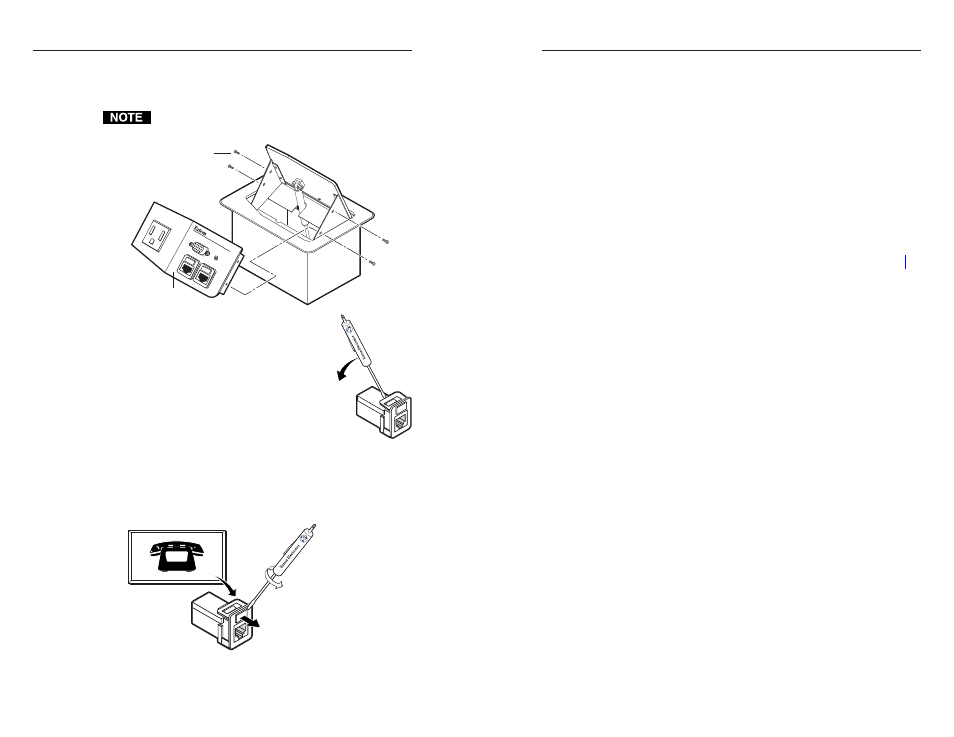
Remove the four 1/16" hex head screws on the right and
left sides of the front panel (figure 3-3). Retain the screws.
Lift the panel away from the enclosure.
Figure 3-3 shows an HSA 200 model. Removing the
front panel from an HSA 222 is an identical procedure.
Lift panel out
of enclosure.
Remove 2 hex head
screws on each side.
240 - 50/60 Hz 5A
HSA 200
AUDIO
Figure 3-3 — Removing the front panel
5
.
With a Tweeker, push down on and
gently twist on the front of each RJ-45
connector detent to disconnect the
connector from the rear of the front panel
plug-in.
6
.
Pinch the top and bottom bezel detents
together and push the bezel through the
front panel.
7
.
Snap a replacement bezel in place. If necessary, replace the
connector icon by prying the old icon off of the connector
plug-in with a Tweeker (figure 3-4) and snapping a new
icon in place.
Icon Label
Figure 3-4 — Changing the connector icon
8
.
Snap the internal RJ-45 connector onto the back of the front
panel enclosure bezel plug-in.
9
.
(HSA 222 models only)
Reach your hand through the
front panel access hole and snap the lower internal RJ-45
connectors onto the back of the lower enclosure bezel
plug-ins.
10
.
Replace the front panel in the surface mount enclosure and
secure it in place with the hex head screws removed in
step 4.
11
.
(HSA 222 models only)
Replace the front access panel in
the surface mount enclosure and secure it in place with the
Phillips head screws removed in step 2.
12
.
(HSA 222 models only)
Reinstall the surface mount
enclosure. See “Removing and Replacing the Enclosure”,
steps 6 through 11.
3-7