Xylem CR500 CIRCULAR CHART RECORDERS User Manual
Page 18
Global Water
800-876-1172
• globalw.com
- 18 -
III)
Programming
Recorder Setup - "Single Pen Ink Type"
In order to configure the recorder, you will need the recorder SET-UP CHART.
This chart contains the configuration categories of the recorder (Probe Input, Inner Chart
Values, Outer Chart Values, Units, Chart Rotation, Input Averaging, and Relay Options).
Place the SET-UP CHART onto the recorder. This setup chart should be saved for future
reference once setup is complete.
1. Place SETUP CHART on recorder.
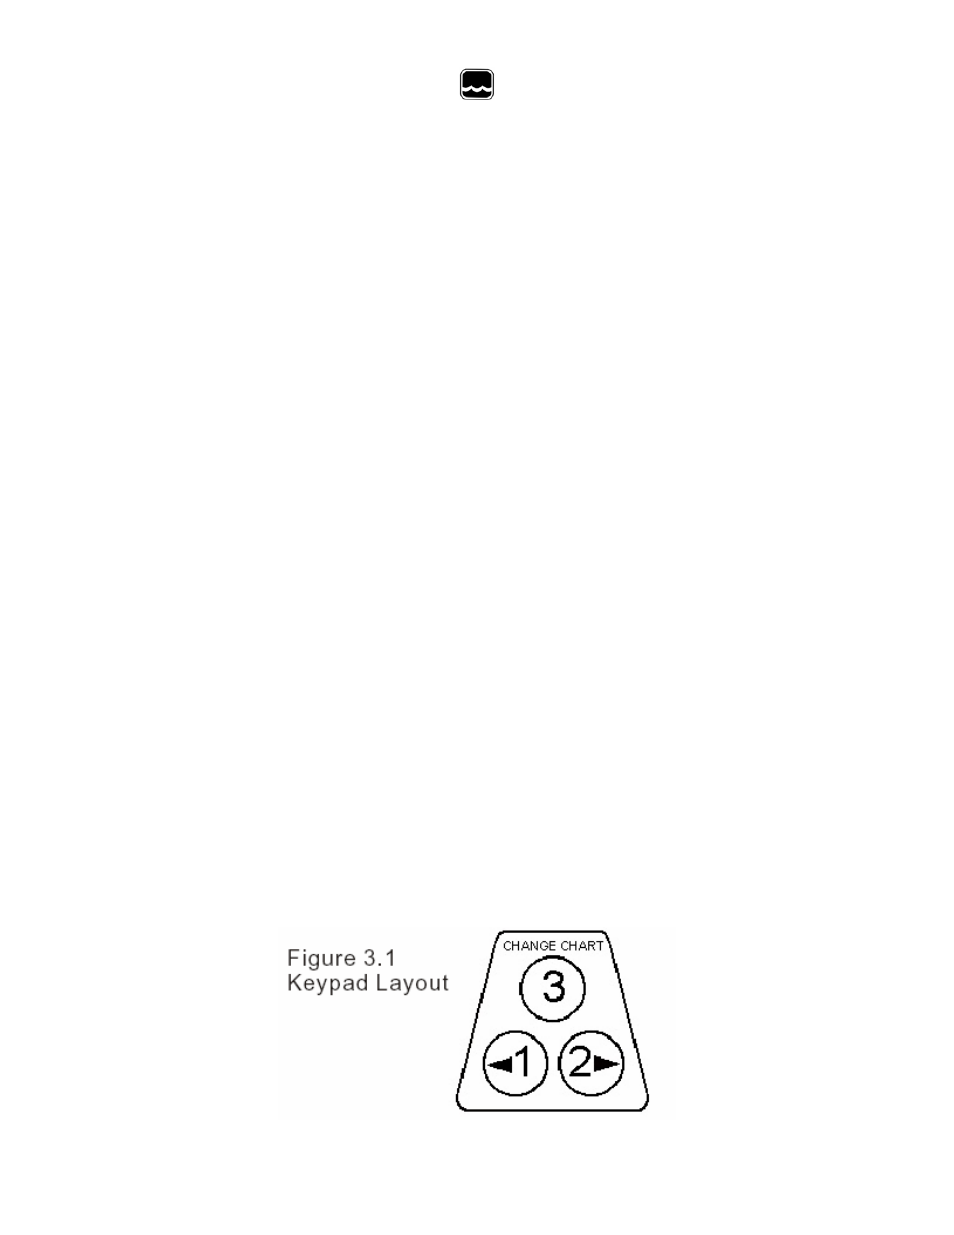
2. Press and release CHANGE CHART key (3).
3. Wait until pen moves above scale and green LED stops flashing.
4. Press and hold LEFT arrow key (1) until LED goes off, then release key.
5. Pen will move to outer ring of chart. Wait for LED to flash slowly. (.8sec on / .8
sec off) LED will continue to flash slowly during setup.
6. Loosen Chart knob and rotate chart to position RED pen in the middle of the
START CIRCLE.
7. Tighten chart knob. Press and release the CHANGE CHART key (3). Pen will
move to PROBE INPUT column on the setup chart.
8. Position pen to the desired selection using LEFT (1) and RIGHT (2) keys.
9. Press and release CHANGE CHART key (3) to store selection and advance to
next category.
10. Repeat selection process until all categories are selected. You must
Press and release CHANGE CHART key (3) after last category.
11. After all categories are selected, pen will move off scale and LED will stop
flashing. (Steady on)
12. Remove SETUP CHART and save. Install actual recording chart.
13. Press and release CHANGE CHART key (3).
14. LED will remain on steady, pen will stop at 100% ring, and then to alarm setpoint
values (if enabled). LED will turn off when pen(s) reaches alarm setpoint. Use the
RIGHT/LEFT arrow keys to adjust alarm value(s) for pen. LED is on steady when
pen(s) is recording actual values. If the optional battery backup is installed and the
battery is weak or not plugged in, the LED will blink until the battery is replaced.
Note: Units with optional display, display goes to ---- during setup.