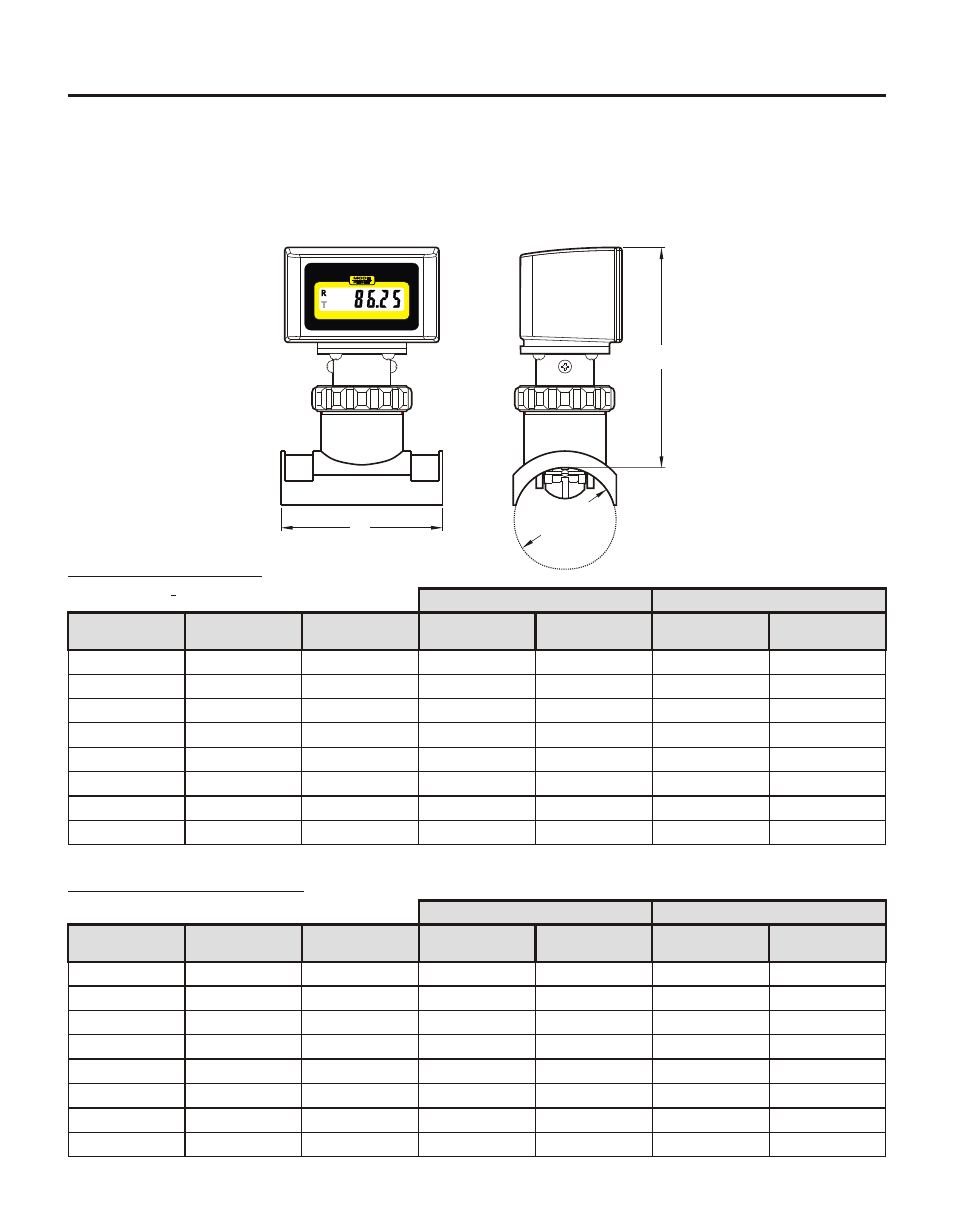
F-1000, 1 drill the mounting hole, 2 install the saddle – Xylem F1000 PADDLEWHEEL FLOW METERS User Manual
Page 6: 3 check the saddle alignment

108
4.3
HOW TO INSTALL YOUR F-1000 SADDLE FITTING
The F-1000 saddle is designed to mount on smooth schedule 40 IPS pipe, schedule 80 IPS pipe (ASTM-D-
1785) , PN10 metric pipe or PN16 metric pipe (DIN 8062). The outside of the pipe must be clean, smooth and
free of surface imperfections. The outside diameter must be as specified to ensure a leak free installation. The
inside diameter must be as specified to ensure meter accuracy.
4.3.1 DRILL THE MOUNTING HOLE
Select an area on the pipe as outlined in section 4.1. Be sure the surface area of the pipe is clean and
smooth.
Drill a 1-1/8" diameter hole through the center of the pipe wall. On horizontal installations, drill the hole as
close to the 12 O'clock position as possible. A hole saw kit is available from the factory, order part number
20000-062.
Clean all burrs from inside and outside the hole. Use fine sandpaper (440 grit) if necessary.
4.3.2 INSTALL THE SADDLE
Insert the alignment tool through the top of the saddle. Proper alignment is critical! Slide the large O-ring
over the bottom of the alignment tool and into the groove on the underside of the saddle.
With the alignment tool and O-ring in place, position the saddle over the drilled hole. Insert the alignment
tool into the hole seating the saddle. Be sure the O-ring is properly seated in the O-ring groove.
Place the pipe clamps around the pipe and into the slots on the saddle. Tighten the clamps in an alternating
method.
!
!
!
!
!
!
4.3.3 CHECK THE SADDLE ALIGNMENT
Pull the alignment tool out of the saddle. (If the tool is not easily removed, slightly loosen the clamps)
Inspect the hole. The saddle must be mounted directly over the hole. Adjust the saddle alignment until the
alignment tool slides freely in and out of the saddle.
Be certain the O-ring is properly seated and visible in the groove around the hole.
Tighten the clamps.
4.3.4 INSTALL THE F-1000 SENSOR
Be sure two O-rings are located on the sensor body. The O-rings have been lubricated at the factory with
silicone oil.
Push the sensor assembly into the saddle with a twisting motion. The notch on the sensor body must fit into
the slot on the saddle. Be sure the sensor is fully inserted into the saddle.
HAND TIGHTEN the union nut
.
!
!
!
!
!
!
F-1000
Page 6
F-1000
Page 7
PIPE O.D.
(
Outside Diameter)
H
Fig. 7
See Chart
on Page 4
See Chart
on Page 4
Alignment
Tool
Saddle
Sensor Body
O-rings
Union Nut
Hose Clamps
In. Diameter On Center
FLOW
I.D.
Drill Hole 1.125±
Saddle O-ring
.030
.000
Fig. 8
Center Line
Metric Pipe Sizes (in millimeters)
I.P.S. Pipe Sizes (in inches)
Nominal Pipe
Size
1-1/2”
2”
3”
4”
6”
8”
Length
3-3/16”
3-3/16”
3-3/16”
3-3/16”
3-3/16”
3-3/16”
Height
4-5/16”
4-5/16”
4-5/16”
4-5/16”
4-1/4”
4-1/4”
Outside
Diameter
1.900
2.375
3.500
4.500
6.625
8.625
Inside
Diameter
1.610
2.067
3.068
4.026
6.065
7.981
Outside
Diameter
1.900
2.375
3.500
4.500
6.625
8.625
Inside
Diameter
1.500
1.939
2.900
3.826
5.761
7.625
Schedule 40
Schedule 80
Nominal Pipe
Size
50 mm
63 mm
90 mm
110 mm
160 mm
Length
81
81
81
81
81
Height
110
110
110
110
108
Outside
Diameter
50.0
63.0
90.0
110.0
160.0
Inside
Diameter
45.2
57.0
81.4
99.4
144.6
Outside
Diameter
50.0
63.0
90.0
110.0
160.0
Inside
Diameter
42.6
53.6
76.6
93.6
136.2
Pn10
Pn16
(ASTM-D-1785)
(DIN 8062)
200 mm
81
200.0
180.8
200.0
170.2
O-ring
Saddle
Pipe
Alignment
Tool
L
F-1000-RT
Rate -
Totalizer
®
BLUE-WHITE INDUSTRIES
GALLONS PER MINUTE
F-1000-RT
Rate -
Totalizer
®
BLUE-WHITE INDUSTRIES
GALLONS PER MINUTE
10”
12”
4-1/2”
4-1/2”
4-1/4”
4-1/4”
10.750
12.750
10.020
11.938
10.750
12.750
9.564
11.376
108
250 mm
114
108
250.0
226.2
N/A
N/A
315 mm
114
315.0
285.0
N/A
N/A
