8 expansion slots, 1 configuring an expansion card, 1 installing a dimm – Asus A7N8X User Manual
Page 18
1-8
Chapter 1: Motherboard Information
1.8
Expansion slots
The A7N8X motherboard has six (6) expansion slots. The following sub-sections
describe the slots and the expansion cards that they support.
1.8.1
Configuring an expansion card
1.7
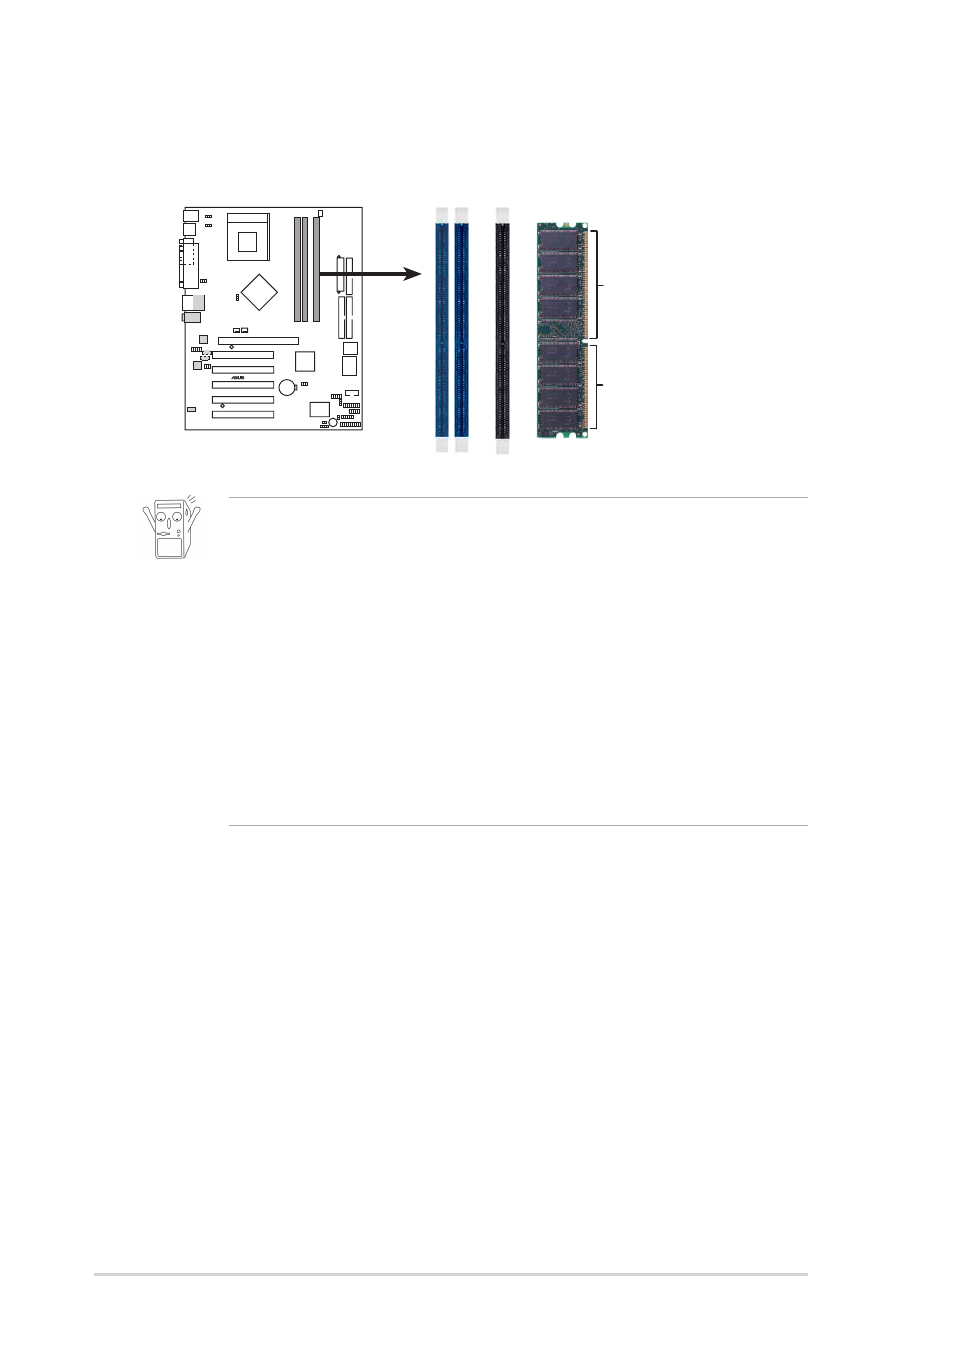
System memory
The motherboard has three Double Data Rate (DDR) DIMM sockets that supports
up to 3GB non-ECC PC3200/2700/2100/1600 DDR..
1. To enhance system performance, utilize dual-channel feature when
installing additional DIMMs. Install the DIMMs in any of the
following sequence: Sockets 1 & 3 or Sockets 2 & 3 or Sockets 1,
2 & 3.
2. DIMMs with more than 8 devices on each side of the module are
not supported.
3. Make sure the memory frequency and bus frequency setting in the
BIOS are the same or set to [Auto] ensure system stability.
4. A DDR DIMM is keyed with a notch so that it fits in only one
direction. DO NOT force a DIMM into a socket to avoid damaging
the DIMM.
5. Visit ASUS website (www.asus.com) for latest DDR400 Qualified
Vendor List.
A7N8X
®
A7N8X 184-Pin DDR
DIMM Sockets
80 Pins
104 Pins
Some expansion cards need an IRQ to operate. Generally, an IRQ must be exclusively
assigned to one function at a time. In a standard design configuration, 16 IRQs are
available but most are already in use.
1.7.1
Installing a DIMM
1. Unlock a DIMM socket by pressing the retaining clips outward.
2. Align a DIMM on the socket. Make sure the notches on the DIMM exactly match
the notches in the socket.
3. Firmly insert the DIMM into the socket until the retaining clips lock into place.