Asus P4SGL-VM User Manual
Page 108
5-16
Chapter 5: Software reference
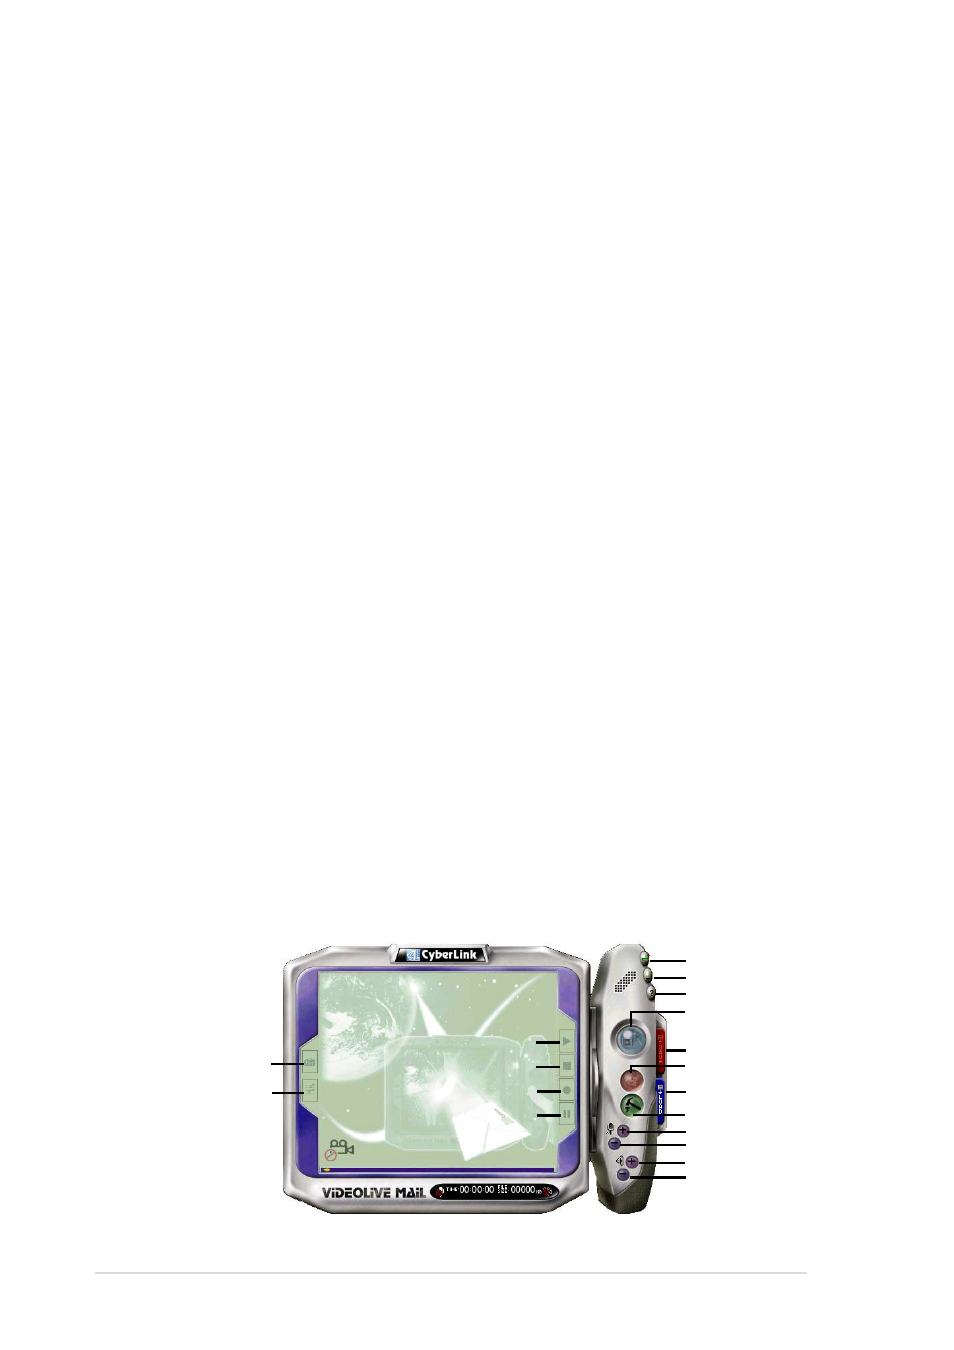
5.8.2 CyberLink VideoLive Mail User Interface
5.8.1 Starting VideoLive Mail
To start VideoLive Mail, click the Windows Start button, point to
Programs, and then CyberLink VideoLive Mail, and then click
VideoLive Mail x.x. VLM 3’s Setup Wizard will start and guide you
through configuring the video and audio input peripherals and to setup the
e-mail environment.
1. Setup Wizard first will prompt a dialog to confirm that you want to configure
the hardware and E-mail setting. Click Yes to continue the system
parameter configuration.
2. The e-mail configuration screen appears. You will need to enter your
name and the e-mail address. Click Next to continue.
3. The Internet e-mail configuration screen appears. You may choose to
use the VLM 3 built-in E-mail functionality (SMTP mail), or use MAPI
compliant e-mail system. Consult your ISP or MIS staff for the E-mail
server IP address if you are not sure. Click Next to continue.
4. Then the Video Configuration screen shows up. You may have to specify
the video driver for VLM 3, if there are several video-input devices installed.
Then configure the number of video frames to be captured per second.
Note that the more frames you choose, the bigger the file size will be.
Click Next to continue.
5. Then the Setup Wizard will then search for the GSM CODECS module
for audio compression, and prompt you with the result. Click Next to
continue.
6. Setup Wizard then tests the audio volume during playing and recording.
Click Next when ready.
7. Configuration done. Click Finish to complete the environmental setting
procedure.
Start Playback
Video Configuration
Snapshot to File
Exit
Minimize
Help
Pause
Stop Recording / Playback
Start Recording
Increase MIC volume
Decrease MIC volume
Increase speaker volume
Decrease speaker volume
Video Mail Wizard
Send Mail
Send Mail
Save Video File
Load Video File