2 how to use this manual, 1 welcome, 3 setup – Crown Audio CTs Series (2 Channel) User Manual
Page 4
Operation Manual
CTs Power Amplifiers
page 6
page 7
CTs Power Amplifiers
Operation Manual
• Legendary Crown class I (BCA
®
) and class
AB+B (Multi-Mode
®
) output topol ogies
offer the best in amplifier reliability. CTs
600/1200 use Class AB+B; CTs 2000/3000
use Class I.
• Class I is the lowest distortion, lowest
noise, and highest performing topology
available among switch-mode amplifiers.
• Continuously-variable fans optimize
cool ing efficiency.
• Three Year, No-Fault, Fully-Transferable
Warranty completely protects your
invest ment and guarantees its specifica-
tions.
2 How to Use This
Manual
This manual provides you with the necessary
information to safely and correctly setup and
operate your amplifier. It does not cover every
aspect of installation, setup or operation that
might occur under every condition. For
addi tional information, please consult Crown’s
Amplifier Application Guide (available online at
www.crownaudio.com), Crown Tech Support,
your system installer or retailer.
We strongly recommend you read all
instruc tions, warnings and cautions contained
in this manual. Also, for your protection, please
send in your warranty registration card today.
And save your bill of sale—it’s your official
proof of purchase.
Features (continued from page 5)
• Switchable high-pass filter for each chan nel
provides low-frequency roll off to elim inate
step down transformer saturation when used
in distributed systems.
• Comprehensive array of indicators includ ing
Power, Data, and Bridge; along with Ready,
Signal, Clip, Thermal and Fault for each
channel, provide accurate diagnos tics.
• Blue Power Indicator flashes if the ampli fier
shuts off due to an under/over-voltage
condition on the AC mains.
• Advanced protection circuitry guards against:
shorted outputs, DC, mismatched loads,
general overheating, under-/over-voltage,
high-frequency overloads and internal faults.
1 Welcome
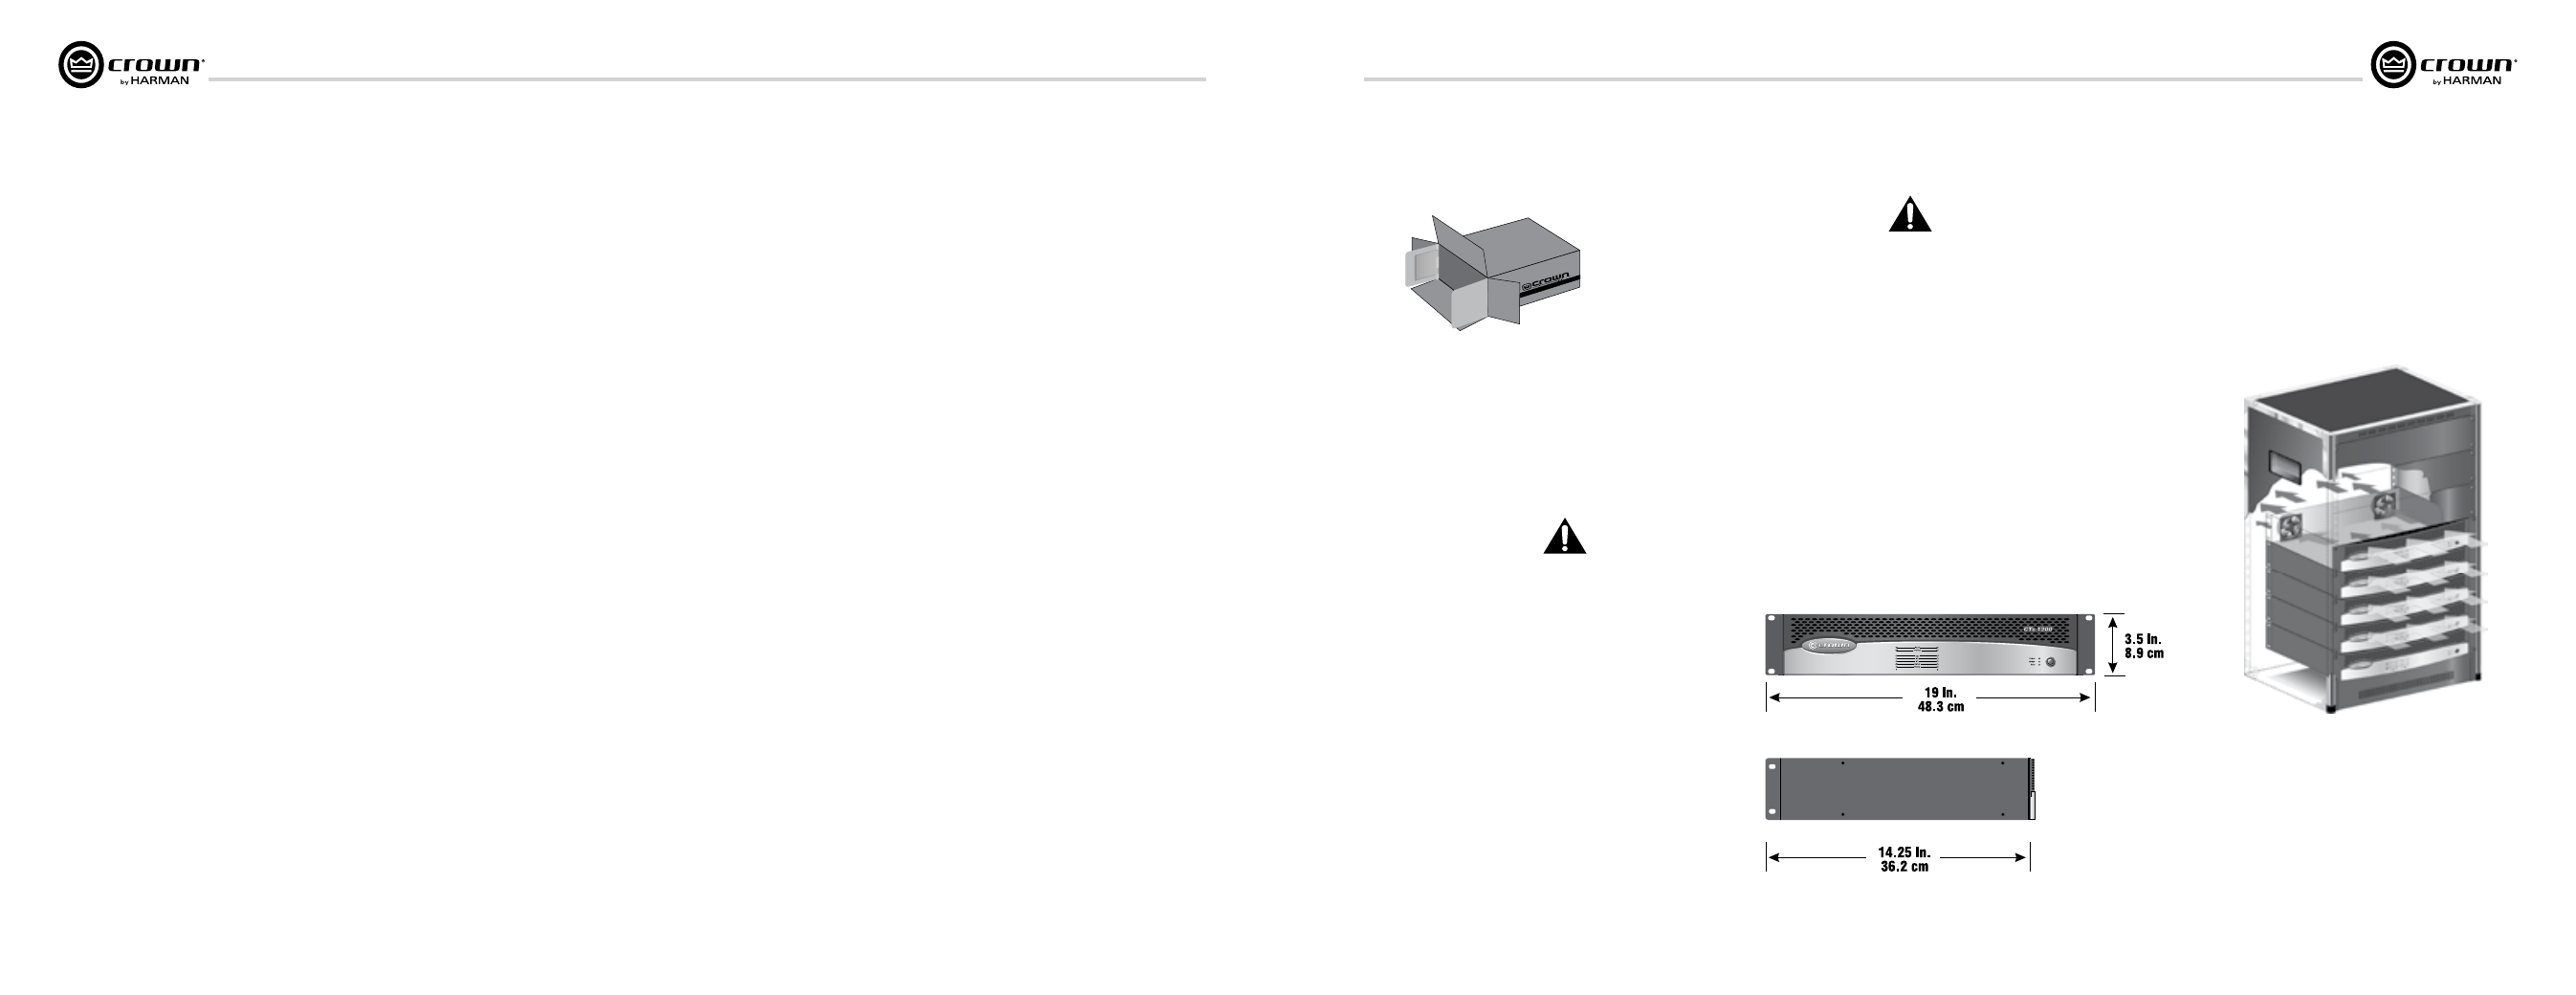
3.1 Unpack Your Amplifier
Please unpack and inspect your amplifier for
any damage that may have occurred during
transit. If damage is found, notify the
transpor tation company immediately. Only you
can ini tiate a claim for shipping damage. Crown
will be happy to help as needed. Save the
shipping carton as evidence of damage for the
shipper’s inspection.
We also recommend that you save all packing
materials so you will have them if you ever need
to transport the unit. Never ship the unit
without the factory pack.
YOU WILL NEED (not supplied):
• Input wiring cables
• Output wiring cables
• Phillips screwdriver
Rack for mounting amplifier (or a stable surface
for stacking)
WaRNiNg: Before you start to set up
your amplifier, make sure you read and
observe the important Safety instruc-
tions found at the beginning of this
manual.
3.2 Install Your Amplifier
caUTiON: Before you begin, make sure
your amplifier is disconnected from the
power source, with power switch in the
“off” position and all level controls
turned completely down (counterclock-
wise).
Use a standard 19-inch (48.3 cm) equipment
rack. See Figure 3.1 for amplifier dimensions.
You may also stack amps without using a
cabi net.
NOTE: When transporting, amplifiers should be
supported at both front and back.
3.3 Ensure Proper Cooling
When using an equipment rack, mount units
directly on top of each other. Close any open
spaces in rack with blank panels. DO NOT block
front or rear air vents. The side walls of the rack
should be a minimum of two inches (5.1 cm)
away from the amplifier sides, and the back of
the rack should be a minimum of four inches
(10.2 cm) from the amplifier back panel.
Figure 3.2 illustrates standard amplifier airflow.
Figure 3.1 CTs 2-Channel Series Dimensions
Figure 3.2 Airflow
3 Setup