Swanstone SD-A38NEO with alcove walls - Installation User Manual
Page 4
SwanStone_07/18/06
4
STEP 4
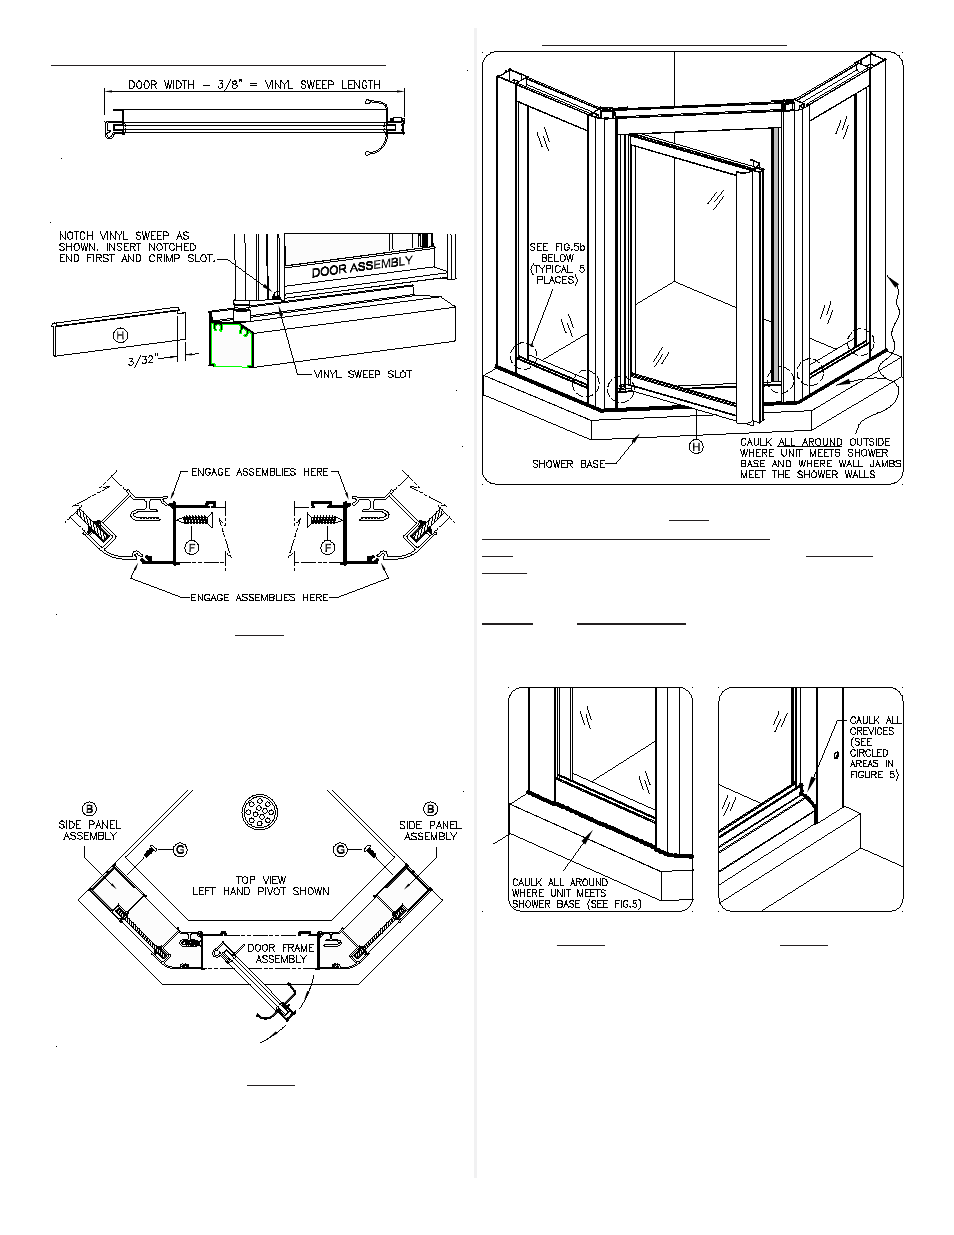
Vinyl Sweep Insert & Door Frame Installation
Center shower enclosure on base ledge. Using the Panel Ex-
pander Jamb adjustment holes as guides . . . fasten Side Panels
(B) to Wall Jambs (A) using three (3) #6 x 3/8" self drilling panel
adjustment screws (G) as shown in figure 4c.
Place Door Frame Assembly (C) between the Side Panels (B).
Starting with the pivot side first . . . engage the length of the Panel
Assembly with the Door Assembly as shown in figure 4b. Secure
Door Frame Pivot Post to the Side Panel with three (3) #8 x 3/4"
flat head screws (F). Repeat procedure for the Strike Post side.
Measure the Door Assembly width, then trim the Vinyl Sweep to
3/8” less than measurement obtained (see figure above).
Notch end of Vinyl Sweep as shown. Determine bottom of Door
Assembly and insert Vinyl Sweep into bottom rail. Insert 3/32”
notched end first.
STEP 6 Caulk for a leak proof installation
Fig. 4c
Fig. 4b
Fig. 5
TO INSURE A LEAK PROOF INSTALLATION:
First: Run a bead of clear mildew resistant caulking around the
outside of shower enclosure where shower unit meets the shower
base (see figures 5 and 5a).
Second: From inside the shower unit, caulk the six (6) circled
areas indicated in figure 5 above (caulk the crevice where the
horizontal member meets the vertical member as shown in fig 5b).
Fig. 5a
Fig. 5b
Carefully follow caulking manufacturer's instructions before using
shower.