Step 1, Step 3, Step 2 – Swanstone SD-DTF-C - Installation User Manual
Page 3
SWAN CMEP 07/18/06
3
STEP 1
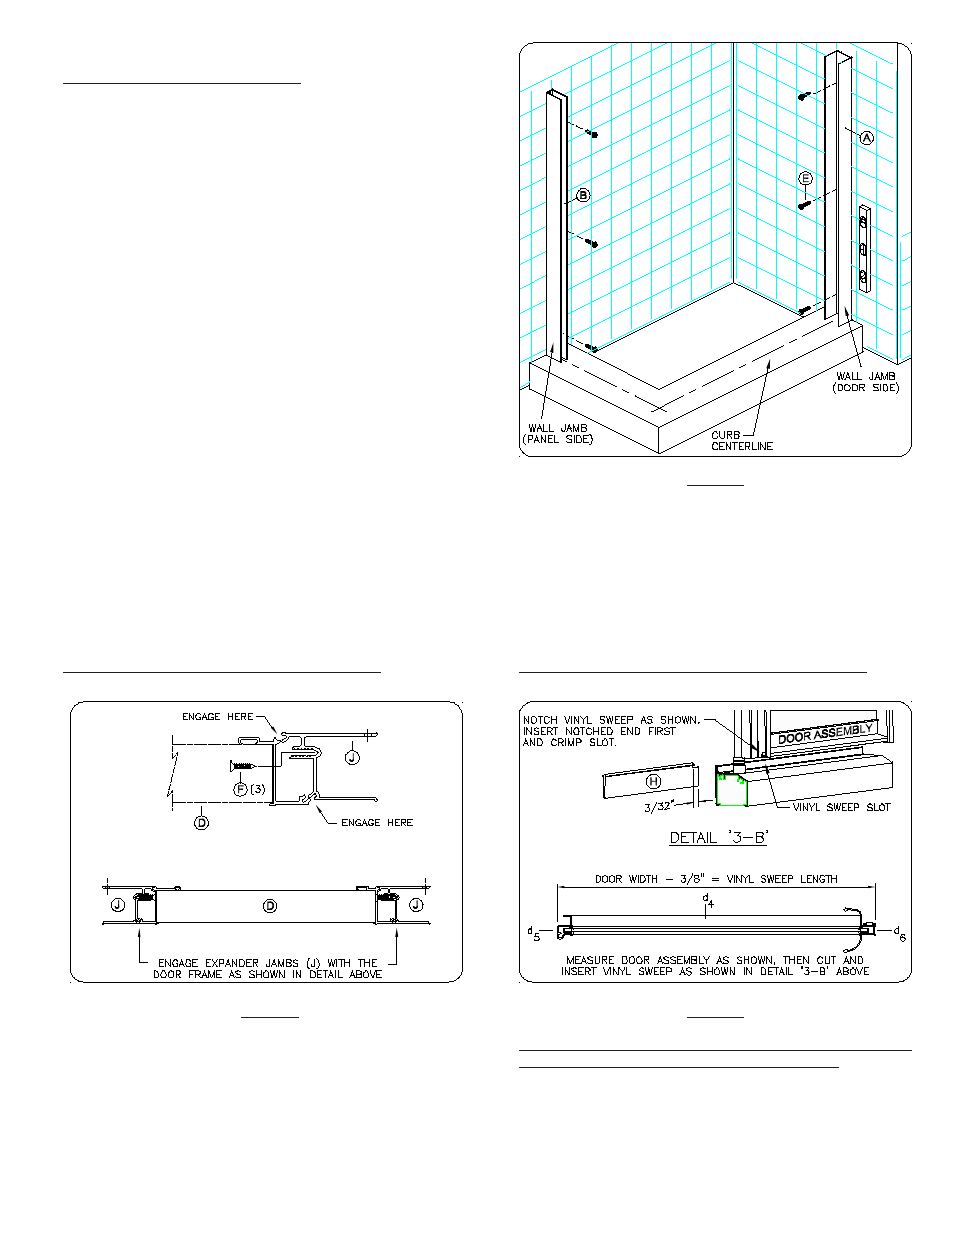
Position and Install Wall Jambs
Determine and mark the curb centerline, as shown in figure 1.
Before installing Wall Jambs . . . decide on the door location
(left or right side . . . your choice). Note that there are two(2)
Wall Jambs . . . one panel side (B) and one door side(A).
Position the Wall Jambs up against their respective wall and
center them on the curb centerline marks, as shown in figure 1.
Plumb the Wall Jambs and pencil mark their installation hole
locations on the shower walls.
Remove the Jambs and drill 1-1/2" deep installation holes in the
locations previously marked. Use a 3/16" masonry or ceramic
bit when drilling thru ceramic tile, marble or any masonry type
surface. Insert Plastic Screw Anchors (K).
Reposition Wall Jambs as before and secure to shower walls
using 8112P Installation Screws (E).
Right or left hand pivot doors, whichever desired, can be
achieved by cartwheeling door frame 180 degrees.
Determine direction of door swing at this time. Measure the
Door Assembly (see figure 3c), then trim the Vinyl Sweep (H) to
3/8" less than measurement obtained. Notch one end of Vinyl
Sweep and insert into bottom rail, notched end first (see figure
3d). Crimp slot when done.
STEP 3
Determine Door Swing and Insert Vinyl Sweep
figure 3
figure 1
figure 2
At strike side, engage the full length of Expander Jamb with the
Door Frame Assembly as shown in figure 2. Secure with three (3)
#8 x 3/4" flat head screws (F). Repeat step for the hinge side.
STEP 2
Engage Expander Jambs with Door Frame