Mount door hardware hang door finish jambs & trim, Sliding door hardware - pocket door, Assembly instructions – Knape&Vogt PKF-100 Series User Manual
Page 4
SLIDING DOOR HARDWARE - Pocket Door
5
6
7
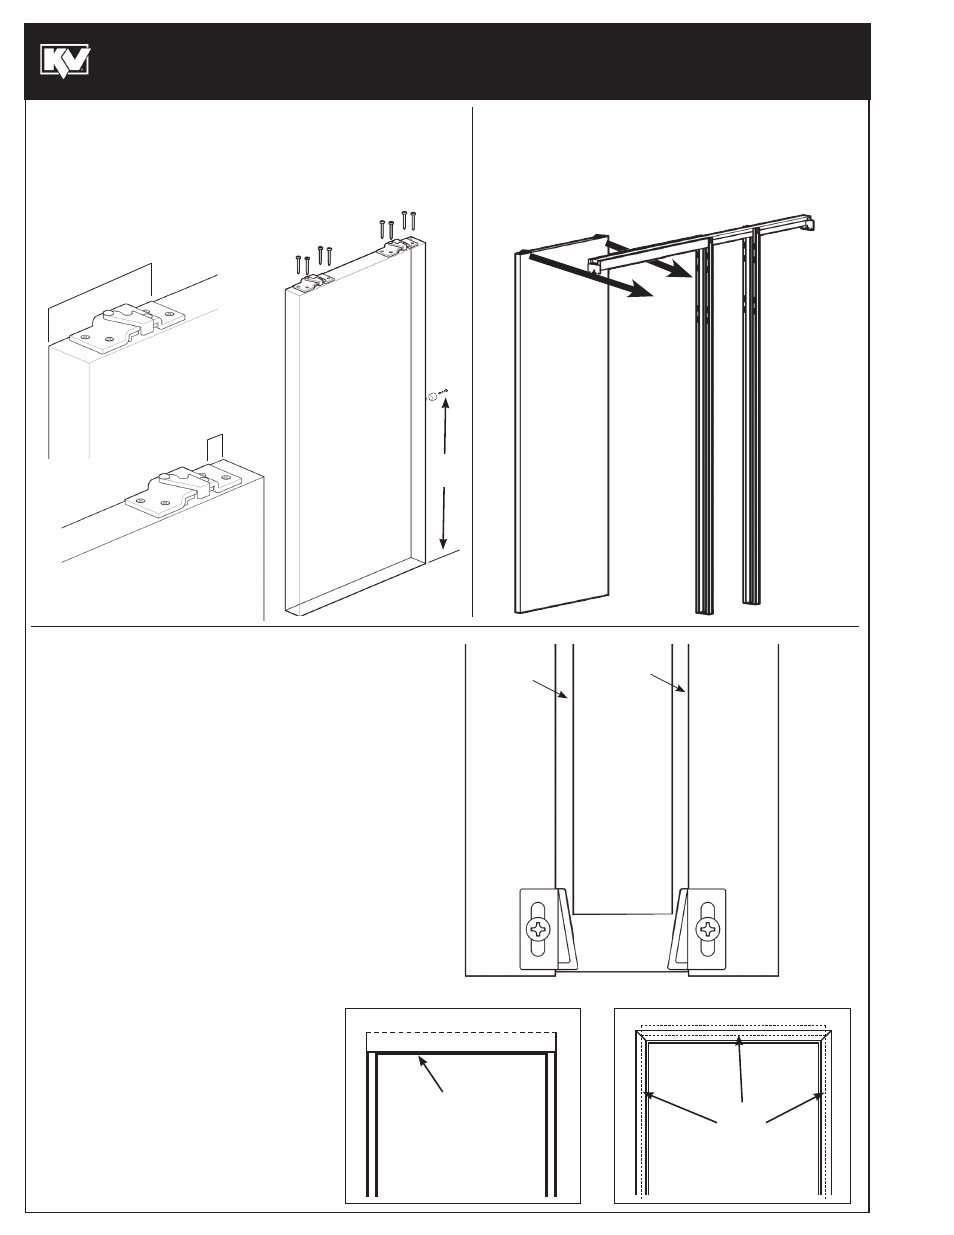
MOUNT DOOR HARDWARE
HANG DOOR
FINISH JAMBS & TRIM
• Install door, mounting rear edge first, then front edge.
• Open quick release latchs on brackets.
• Slide door onto carrier screws and close latch.
Assembly
Instructions
#310308_B (0113)
• (A) Install vertical finish split jambs, butting them all the way up
against exposed wood in nailing strips to header assembly.*
Leave 1/8" minimum distance on both sides of door. Check
clearance with door open and closed.
• (B) Install finish split header to the exposed nailer on
either side of the track, leaving 3/16" clearance on
both sides.
• To allow for future door adjustment or removal, at
least one finished split header should be attached
with screws only: The one on your right hand
overhead as you face the door in the pocket, is
recommended.
• Install finish trim casing. Fasten finish header trim
to
EITHER header OR wall, NOT BOTH, so header
can be removed later without damage.
• Attach door guide to finish split jamb and adjust to
within 1/16" of door on either side.
*Note: Standard doorway jamb can be ripped to suit.
A
B
• Place quick release top mount plates on top of each door at
the distance shown from the outside edge.
• Using brackets as a template, drill 3/32" diameter
holes and secure with (#8 x 1") screws.
• Secure door bumper as shown.
1/8" min
(0,3 cm min)
1/8" min
(0,3 cm min)
Center
Centre
Centro
5-1/2"
(14 cm)
1-1/2"
(3.8 cm)
Rear
Arriére
Parte trasera
Front
Avant
Delantera
Finish split header
(Fasten with screws)
Linteau Fendu de Finition
(Fixer avec vis)
Cabecera hendida de
acabado (fijar con tornillos)
Finish trim
Habillage
de finition
Embellecedor
de acabado