Mount frame hardware install split studs, Sliding door hardware - pocket door, Assembly instructions – Knape&Vogt PKF-100 Series User Manual
Page 3
SLIDING DOOR HARDWARE - Pocket Door
3
4
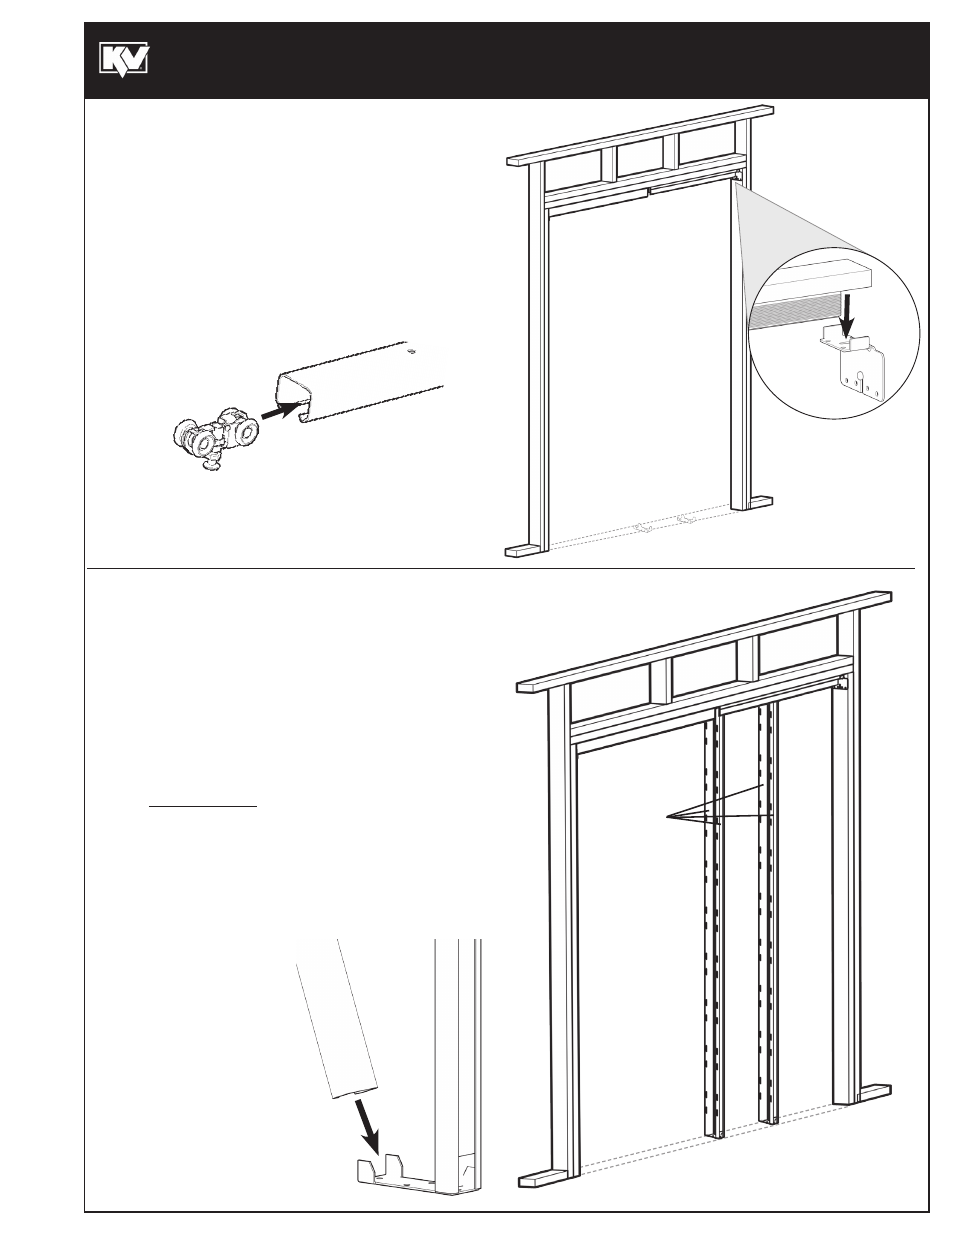
MOUNT FRAME HARDWARE
INSTALL SPLIT STUDS
Assembly
Instructions
#310308_B (0113)
• Engage split bottom end of studs, with exposed wood facing out,
at an angle with the floor plate.
• Locate stud sets.
Note: For best results, pre-drill holes before screwing.
• Butt one pair of split studs against the header nailing
boards and screw to header. Screw the other pair of
split studs to the header midway between the first pair
of split studs and the rough stud on the pocket side.
Reposition the floor plates between the chalk lines,
plumb the split studs, to make sure they are vertical
and square. Screw floor plates to floor.
• Engage ends of split studs onto floor plates so slots on backside
are against the header. If split studs must be shortened for
shorter doors, determine which end of stud has the slots close
to the end, then cut off the other end.
Note: When properly installed
in 3-3/4" stud wall without
modifications, this frame allows
2" free space between split
studs for door. A 1-3/8" door
would leave 1/8" clearance on
each side.
For doors greater than 1-3/8"
thick, replace the standard floor
plates with the plates provided
in the secondary included parts
bag PB-1634. Wood shims are
provided to be placed between
the split studs and header.
Fig. A
Note: For added security when using heavier doors, drill two 1/4" diameter holes, centered
in track, through header - one in the approx. middle of door opening and one in middle of
pocket. Insert 3-1/2" long #6 or #8 truss head screws through holes and screw to rough
header. Do not overtighten to avoid bending track or header. Clean inside of track of drill
shavings and saw dust.
• Insert both carriers (Fig. A) into track
BEFORE installing header
assembly with adjusting screws into lowest position.
• Snap two chalk lines on the floor, even with the sides
of the framing studs.
• Set header and track assembly on end brackets. Check to
make sure nailing boards are over doorway then screw end
bracket to header and track assembly with screws provided.
• Lay down floor plates between chalk lines, one approximately in the
center of the opening and the other approximately halfway between it
and the rough stud of the pocket side.
DO NOT NAIL IN PLACE.
Pocket
Partie coulissante escamotable
Cavidad
Doorway
Entrée de porte
Entrada
Split Studs
Poteaux de
cloison fendus
Montantes
hendidos
Doorway
Entrée de porte
Entrada
Pocket
Partie
coulissante
escamotable
Cavidad