Step 2: install wiring harness, Step 1: remove contents & plywood packaging – Pace-Edwards BL Ford Explorer Sport Trac User Manual
Page 3
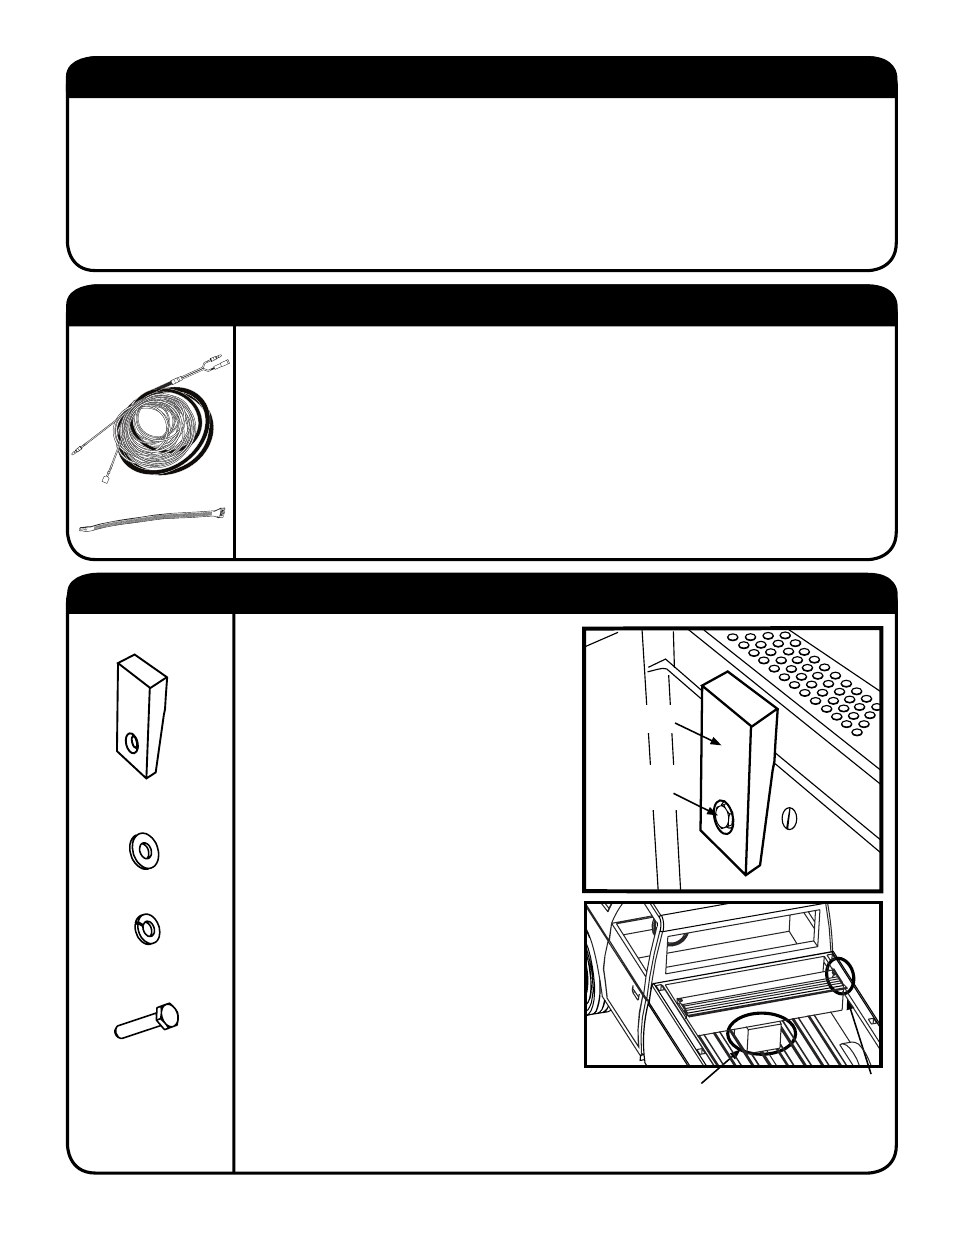
HARDWARE USED:
Use the washers, lock washers and bolts
provided and attach a front rail block to
each side of the truck bed in the existing OE
threaded holes approximately 4 inches from
front of truck bed. Place the Front Rail Block
angled side down against the truck bed. Place
the Front Rail Blocks so that the top is level
with the bed rail, then tighten securely (Figure
3A)
You will need one or two support pieces (We
suggest using the top of the box the Bedlocker
was shipped in) to set in the truck bed.
Set the support piece approximately one foot
from the cab.
Set the Canister on the support(s) in the
truck bed. The canister should be resting on
the support piece, centered in the truck bed,
raising the top of the canister above the bed
rails by 2-3 inches.
Firmly Hold the ribbed blanket and cut the zip
tie.
(Do not let the blanket roll back on itself
or the underside on the fi rst three ribs can
damage the visual surface of the other
rolled ribs)
.
Remove all of the vinyl sheeting protecting the blanket.
Pull the blanket out about 1 foot from the canister and let it hang.
FRONT RAIL
BLOCK x 2
1/4” FLAT WASHER x 2
1/4” LOCK WASHER x 2
FRONT RAIL
BLOCK BOLT x 2
Front Rail
Block
Washer,
Lock Washer
& Bolt
Top of Canister should clear
Truck Bed Rails by 2-3”
Support
Piece
3
INSTALLATION INSTRUCTIONS
STEP 3: INSTALL FOAM, FRONT RAIL BLOCKS & PLACE CANISTER
Fig. 3A
STEP 2: INSTALL WIRING HARNESS
(If the optional wire harness Part# BL1120 is used, you may want to tape it to the main harness
to ease having to pull them through the stake pocket separately).
From inside the truck bed push the long wire harness end without the plug through the stake
pocket on the drivers side of the truck and out the underside of the truck bed box.
Leave approximately one foot of slack inside the box for mounting the electronics.
Route the wire harness under the truck and to the battery in the engine compartment.
Attach the fuse holder to the end of the Red/positive wire.
(Do not attach to the battery yet.)
Secure the harness with wire ties provided after slack from the canister has been taken out.
HARDWARE USED:
WIRE HARNESS x 1
ZIP TIES x 5
STEP 1: REMOVE CONTENTS & PLYWOOD PACKAGING
Remove the canister and top cover from the box.
Remove components from inside the canister. Perform a quick inventory to insure all parts are there.
Using the 3/8” wrench or socket remove the 2 bolts holding the plywood packaging supports on the ends of the
canister. Discard plywood packaging supports and bolts.
DISCARD PLYWOOD PACKAGING AND BOLTS!