Step 4: installing clamps, Step 5: attach the pull strap, Do not tighten over 120-inch pounds – Pace-Edwards SWITCHBLADE Tundra User Manual
Page 4
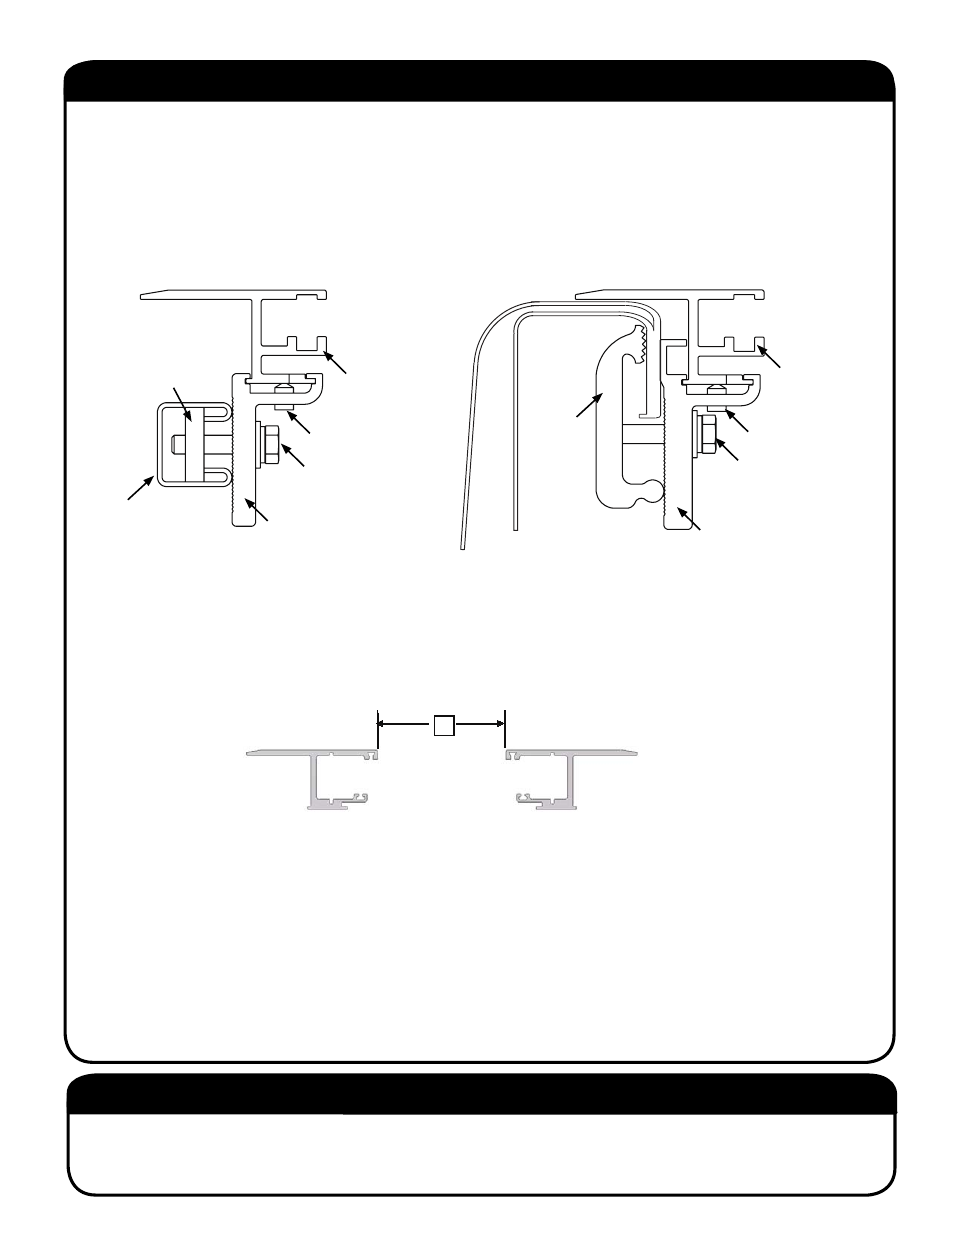
STEP 4: INSTALLING CLAMPS
SWITCHBLADE
®
SERIES
4
BR
Another way to assure proper fi tment is to check the side to side play of the handle assembly at the canister and at
the tailgate end of the rails. There should be, at the minimum enough play to allow the cover to move freely and at
maximum 1/8 inch per side. Too much may result in the cover coming open unintentionally and in severe cases it
may fall between the rail tracks and damage the cover. There are shims on the brackets that can be removed if
the unit is too tight and shims in the hardware pack that can be added if too loose.
Once everything is correct tighten the Rail clamps completely.
DO NOT TIGHTEN OVER 120-INCH POUNDS!
STEP 5: ATTACH THE PULL STRAP
Attach your pull strap to either of the clamps (right or lefthand side) at the tailgate end of the rails by looping it
through the assembly and pressing the two velcro strips together. This will ensure you it is always in easy reach
when trying to close the cover.
The Tundra bed is square and the clamps have been designed to fi t without shimming.
Close the tailgate and position the rails with a 1/16” gap from the tailgate.
If you have the Deck Rail Track System slide track nuts into the track system and use attachment hardware (Flat
washer, Lock washer & Bolt) to secure clamps in place per FIG 4B. Tighten and secure all the clamps at this time.
Install and tighten the cone point set screws using the 1/8” Allen Wrench.
If the bed does not have the deck rail track system you will use the pinch clamp in place of the track nut. (Fig 4C)
CLAMP RAIL GRIP
TRACK NUT
DECK RAIL
TRACK SYSTEM
HARDWARE
(Flat washer, Lock
washer, & Bolt)
RAIL
FIG. 4B
SET
SCREW
PINCH CLAMP
RAIL GRIP
HARDWARE
(Flat washer, Lock
washer, & Bolt)
RAIL
PINCH
CLAMP
(used if the
Deck Rail
System
Track is not
installed)
FIG. 4C
SET
SCREW
Measure the distance between the rails at the canister and tailgate ends. Compare this distance after clamping it
should be 58-13/16” to allow your cover to operate properly. A slightly tighter fi t (but NOT Dragging) is better than a
slightly loose fi t.
The Rail Brackets and Shims have been pre-installed to achieve the proper Between the Rail dimension (BR) when
placed on an average factory truck bed. However, not all truck beds are average dimensionally and some have
optional plastic caps or over the rail spray-in liners
FIG. 4A