Installation – Grain Systems PNEG-1499 User Manual
Page 9
9
PNEG-1499 High / Low Thermostat
INSTALLATION
1.
Mount the thermostat control on the right side of
the fan transition. Locate a suitable location on the
bin wall that will allow the power cord to reach the
heater and the control to be at eye level for easy ac-
cess.
2.
Use the S-280 self-drilling screws provided in the
packaging to mount the control.
3.
Run the power cord to the heater control box and
make the connections as shown in the electrical con-
nection section of this manual.
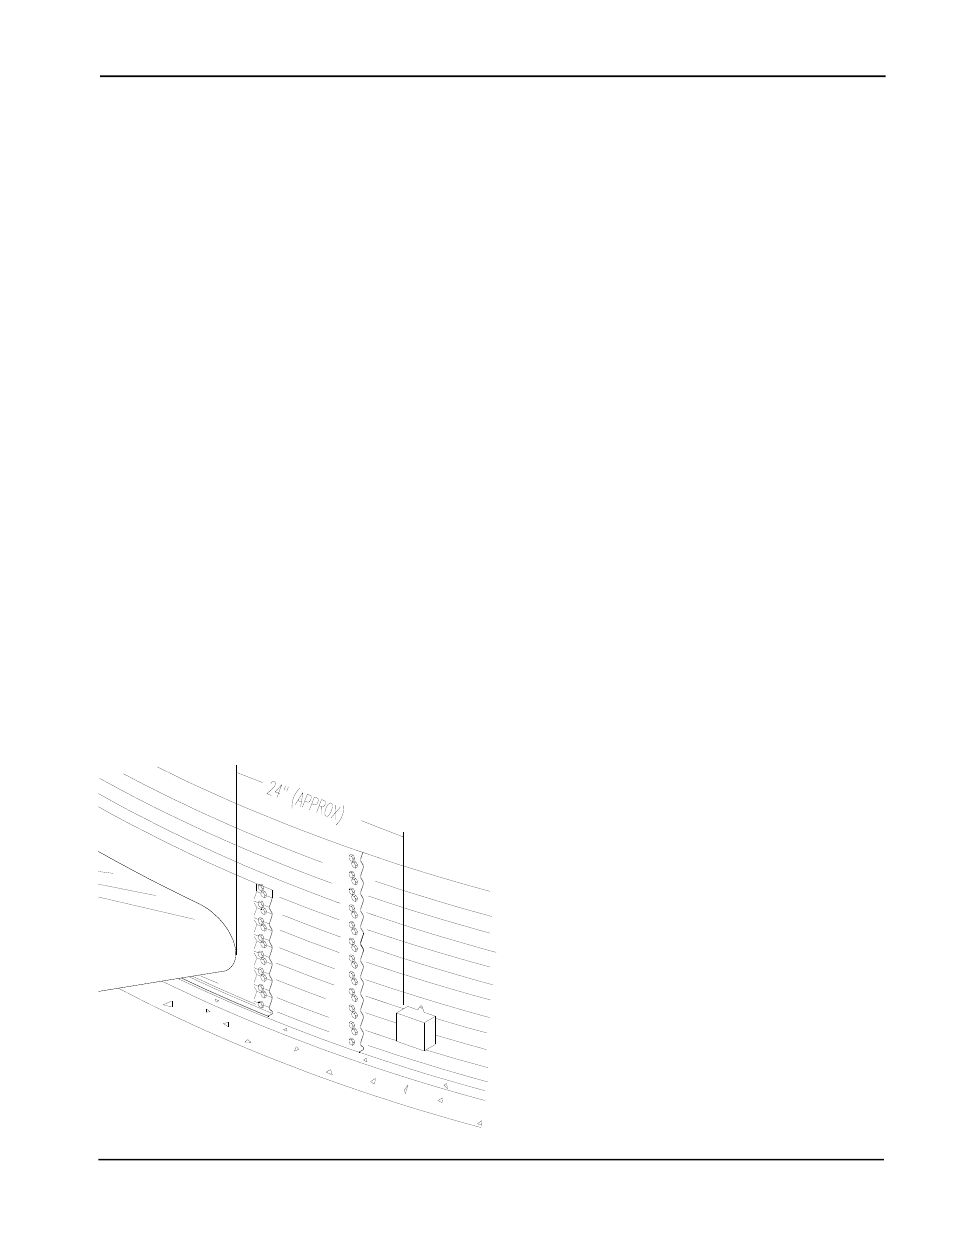
4.
Mount the thermostat sensor 24” to the RIGHT of
the transition. Use the C-8058 Sensor Mounting Plate
as a template. This part has holes to match the hills of
a 2.66” and 4.00” bin sidewall.
5.
Use the S-280 screws provided to mount the C-8058
plate on the sidewall. The large hole on the plate should
be centered on a valley of the bin corrugations. The
plate should be mounted approximately in the center of
the plenum at the closest valley.
6.
Use the hole in the mounting plate as a guide and
drill a pilot hole. Once the pilot hole is drilled in the
sidewall, remove the mounting plate.
7.
With the plate removed, enlarge the pilot hole to 1/
2” diameter.
8.
Attach the Sensor of the thermostat to the mounting
plate using the C-8057 Cord Connector. The Sensor
should extend approximately 3.00” beyond the plate. If
not, then adjust the sensor length by loosening the cord
connector and moving the Sensor.
9.
Insert the Sensor into the 1/2” hole and reattach the
mounting plate using the S-280 screws.
10. Caulk the area around the mounting plate to seal
any openings.
Mount the Sensor approximately 24” to the
RIGHT of the transition.
Installation Instructions