Scr drive setup – Grain Systems PNEG-1544 User Manual
Page 8
3. SCR Drive Setup
8
PNEG-1544 Vision SCR Board Calibration
The SCR Board should be checked before the start of each drying season and intermittently as a
preventive measure.
Ideally, calibration should be performed when the dryer is full of grain. However, if the auxiliary unloading
equipment cannot handle a dryer discharge of 100%, the calibration process should be completed with
the dryer empty. If this is the case, the calibration can be checked at minimum capacity (9 VDC at 5%) and
recalibrated if necessary once the dryer is full.
Before beginning the SCR Board Calibration procedure, it is necessary to check the settings on the
IR compensation potentiometer and the CL (Current Limiter) potentiometer.
IR - IR Compensation
The “I” represents the current (amps) and the “R” represents the amount of resistance (ohms). This setting
fine tunes the “curve” of voltage output across the 0-100% range of settings.
• The indentation of the adjustment knob should be set at the 10 o’clock position. If it is not set at the
10 o’clock position, adjust as necessary by using a small screwdriver.
CL - Current Limiter
This potentiometer sets the maximum current in amps allowed.
• The indentation on the adjustment knob should be set at the 4 o’clock position. If it is not set at the
4 o’clock position, adjust as necessary using a small screwdriver.
IMPORTANT: Before starting the calibration procedure, it is important to check the position of the
adjustment knobs on these two (2) potentiometers for the correct position. These settings
will always be the same.
NOTE: If these two (2) potentiometer settings are not correct, the SCR motor may stall before it should,
blow fuses, or make it impossible to correctly calibrate the SCR Board. For example, if the
5% setting is correct but the 100% setting is incorrect, adjusting the 100% setting will throw off the
5% setting and so on.
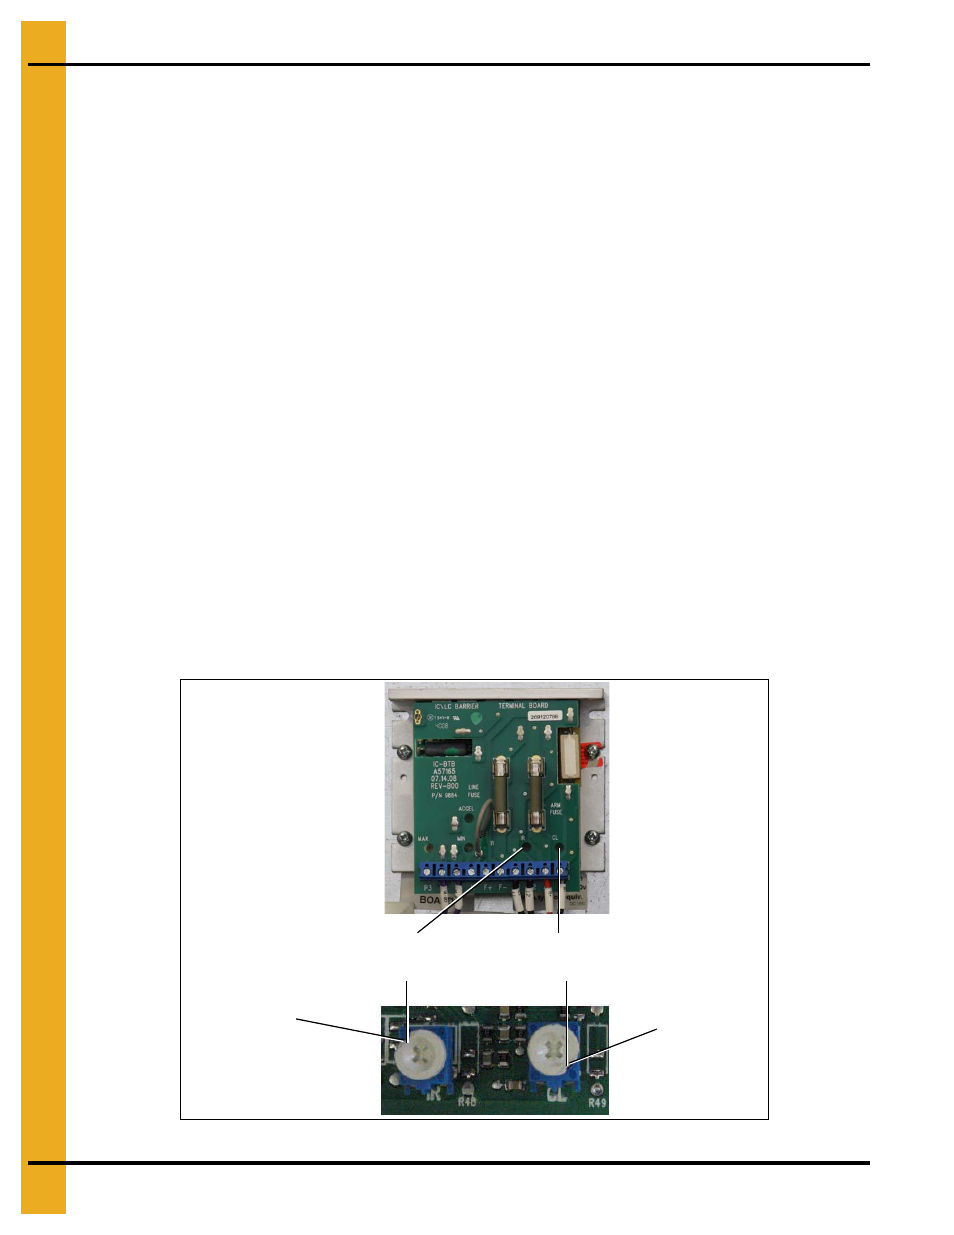
Figure 3B SCR Board IR and CL Adjustment Locations
IR - Set to
10 o’clock
position
CL - Set to
4 o’clock
position
NOTE: Notch at
the 10 o’clock
position.
NOTE: Notch at
the 4 o’clock
position.