Flashing, Chapter 20 flashing, Flashing installation – Grain Systems Tanks PNEG-805 User Manual
Page 70
70
PNEG-805 36' Diameter 40°/45° NCHT Commercial Hopper Tanks
20. Flashing
Flashing Installation
1. Attach flashing to the bin wall using the pre-punched holes at 9-1/3" above the horizontal seam.
2. Attach left side of the first piece of flashing to the sidewall using the connection as shown in
. Working clockwise, overlap the flashing at the right hand hole of each piece of flashing.
NOTE: If bolts are installed at flashing seam location they will need to be removed.
3. At vertical seams attach flashing that is to span the vertical seams using both left and right holes.
Drill flashing holes from the outside of the bin through the sidewall sheet holes. Remove drilled
flashing and assemble vertical seam bolts and nuts.
flashing and attach according to
. Continue around the bin clockwise.
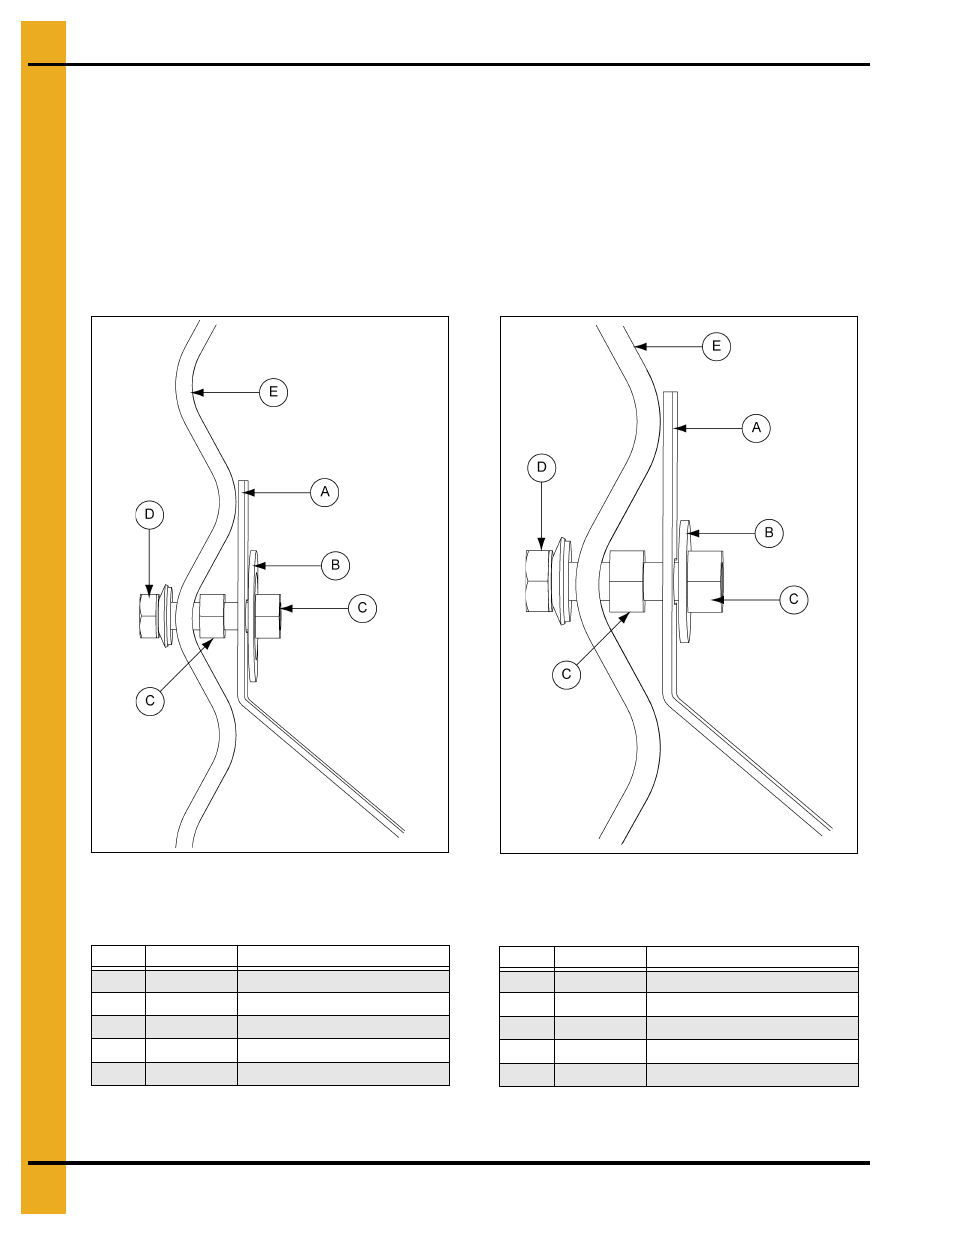
Figure 20A Flashing Hardware
Hardware Configuration for
Flashing Installation
Figure 20B Vertical Seam Flashing Hardware
Hardware Configuration for Flashing
Installation at Vertical Seams
NOTE: Only difference between normal hardware configuration and vertical seam hardware configuration
is washer.
Ref #
Part #
Description
A
CHT-2104
Flashing
B
S-7569
5/16" Fender Washer
C
S-396
5/16" Nut
D
S-277
5/16" x 1-1/4" Bin Bolt
E
Sidewall Sheet
Ref #
Part #
Description
A
CHT-2104
Flashing
B
S-248
3/8" Washer
C
S-396
5/16" Nut
D
S-277
5/16" x 1-1/4" Bin Bolt
E
Sidewall Sheet