Install hopper panels – Grain Systems Tanks PNEG-805 User Manual
Page 29
7. Hopper Section Assembly
PNEG-805 36' Diameter 40°/45° NCHT Commercial Hopper Tanks
29
Install Hopper Panels
The 36' hopper bottom has three (3) sections. Apply caulk to all hopper section seams as shown
in
.
Step 1: Attach all the top panels to the compression angles using bolts. See chart
for bolt
specifications. Install the compression splice plates on the back side of the compression angle.
All top panel overlap seams use 1/2" x 1" bolts. Lap all panels as shown in
.
Step 2: Assemble the left and right sides of the middle section to the top sections that were just installed.
Use 1/2" x 1" bolts for all middle section seams. Use 1/2" x 1-1/2" bolts at the corners of the panels where
three (3) or more panels overlap. Lap all panels as shown in
.
Step 3: Once the middle panels are installed the bottom hopper panels and discharge collar may be
attached with 1/2" x 1" bolts at four (4) opposing points as shown in
. Complete this
assembly by laying the remaining panels - moving around in one direction and lapping all sheets the same
way. Do not tighten bolts until all hopper panels are attached to each other, the compression ring,
splice plates and discharge collar.
NOTE: All bolts used in hopper assembly should be installed with the bolt heads to the inside of the hopper.
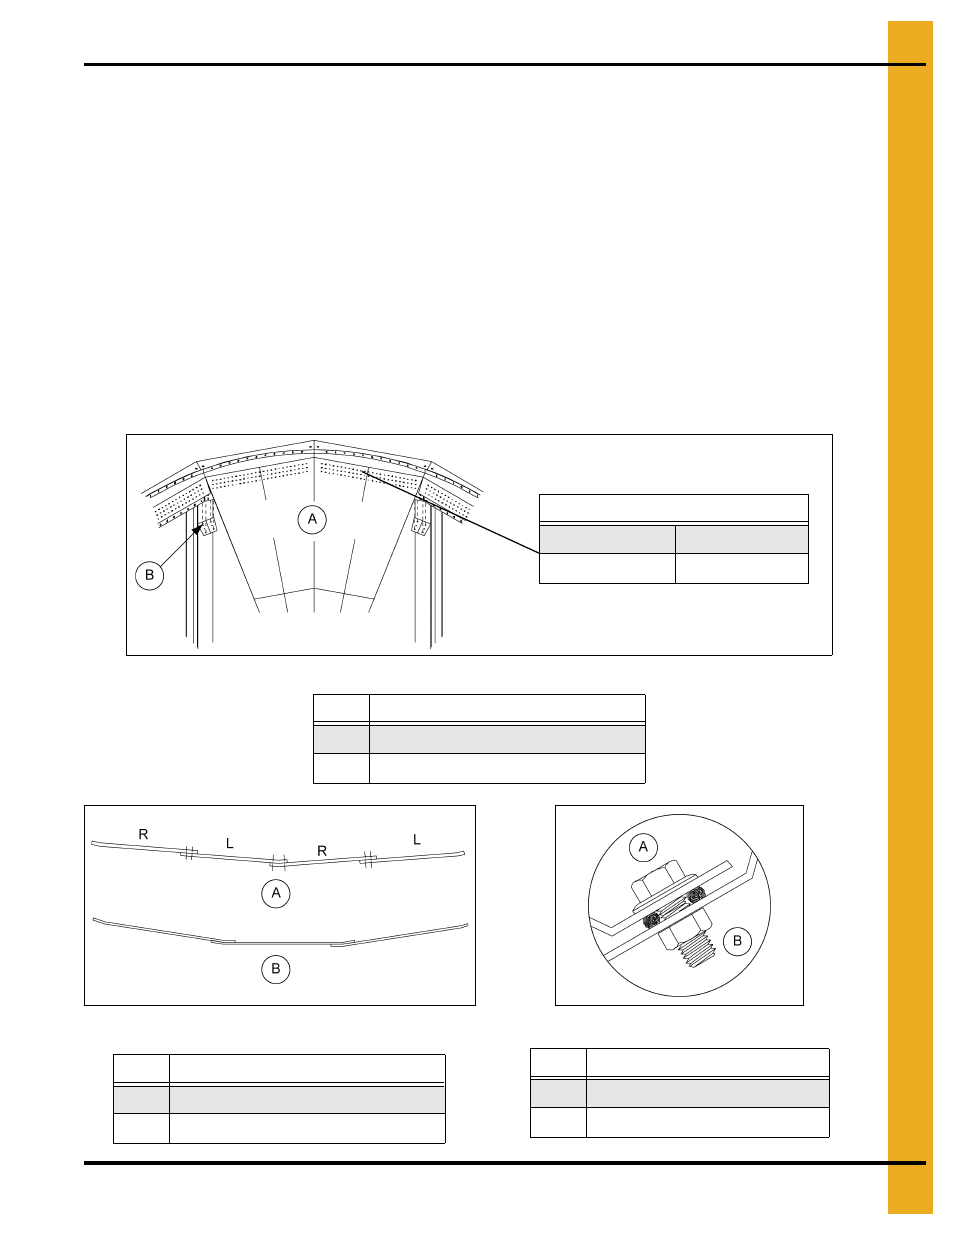
Figure 7E Top Section and Splice Assembly
Figure 7F Lap Details
Figure 7G
Ref #
Description
A
Top Panels
B
Splice Plate using 1/2" x 1-1/2" Bolts
Hopper Panel Attachment Bolts
20 Ring and below
1/2" x 1-1/2" Bolts
21 Ring-22 Ring
5/8" x 2" Bolts
Ref #
Description
A
Middle Hopper Section Lap Detail
B
Top/Bottom Hopper Section Lap Detail
Ref #
Description
A
Inside
B
Outside