Vutec ARTSCREEN R-SERIES - Installation Instructions User Manual
Page 5
ART-R SERIES INSTL_REVD
- 5 -
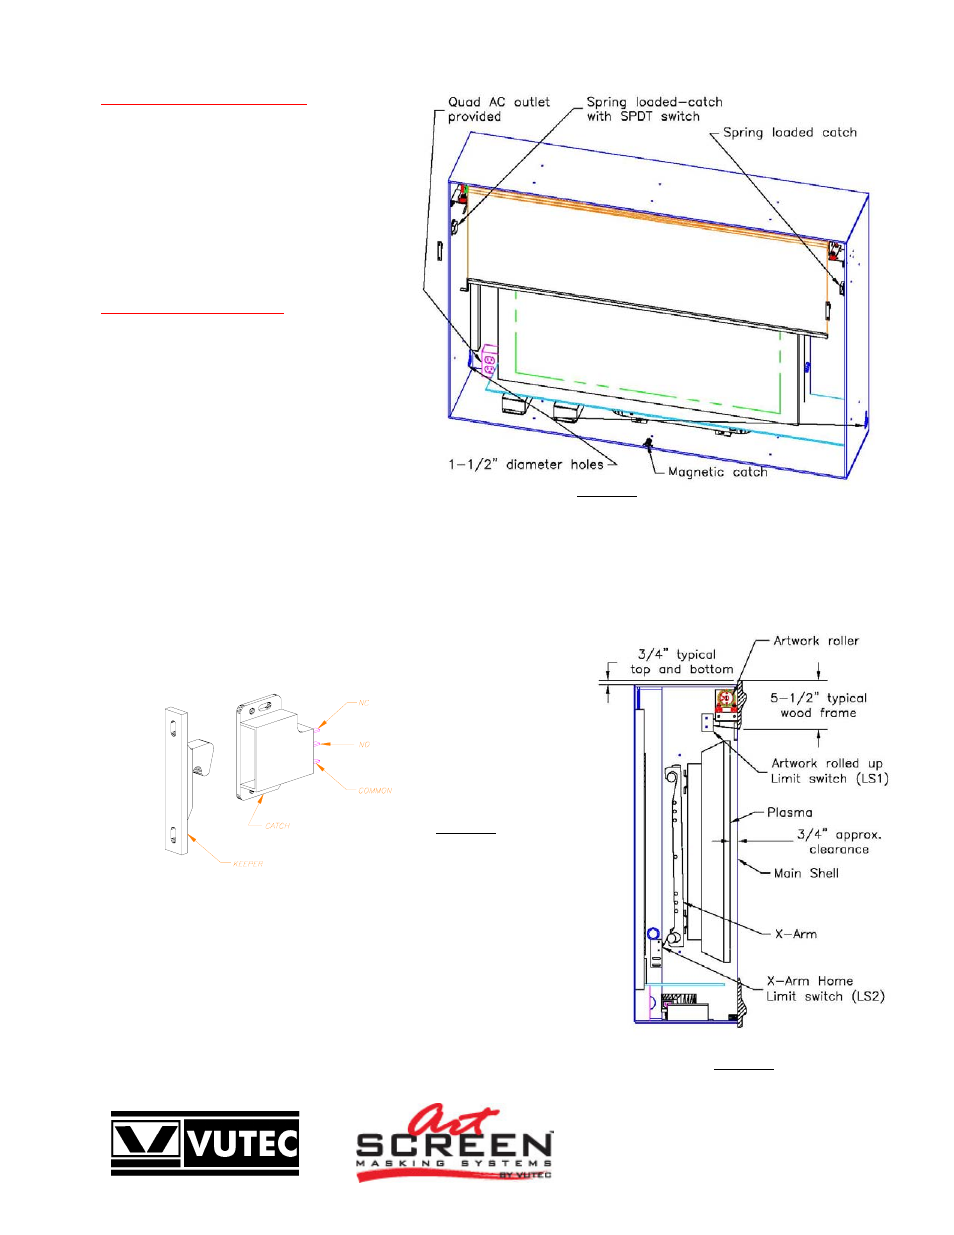
Wood Frame Installation
A typical wood frame including the liner is
approximately 5-1/2 inches wide to properly cover
the assembly. The wood overhangs the main shell
approximately 3/4 inch when attached.
Two corner woods are attached to the backside of
the wood frame to take-up the weight.
Two spring-loaded catches and a magnetic catch
will hold the wood frame to the main shell. Simply
snap the wood frame to the shell when ready.
Electrical Connections
A Quad outlet AC box is provided for 120VAC
connection. Connect 120VAC to this box to power
the TV, X-Arm and the IR remote control.
The Art Screen and the X-Arm come with
respective IR remote controls for operations.
Remotes are ready for use; no wiring connections
are required.
Place the IR sensors so that it can be seen by the
transmitters.
Plug the power cords to a 120VAC outlet.
The IR remote control and X-Arm have manual inputs for Home Automation systems, i.e. AMX, Crestron, etc. See IR remote control
manual and X-Arm manual (included) for detail information.
The spring-loaded catch (Figure 12) with SPDT switch may be used for security purpose; its contacts may be connected to an audible
alarm system or monitoring system. The breach of security will be activated when the wood frame is removed.
The states of the contacts are shown when the Keeper is not engaged with the
Catch.
Contact Rating: 6Amp, 250VAC or 3Amp, 30VDC.
The Art Screen R series has two normally open limit switches, as shown in Fig 13:
LS1 – Art rolled up limit switch needs to be engaged in order for X-Arm to
operate.
LS2 – X-Arm home limit switch needs to be engaged in order for Artwork to
operate. (See electrical schematic appendix)
Figure 12
Spring-loaded catch
with SPDT switch
Figure 13
Side View
Figure 11
Partial Assembly