KC HiLiTES KC #6314 QUAD BEAM Installation User Manual
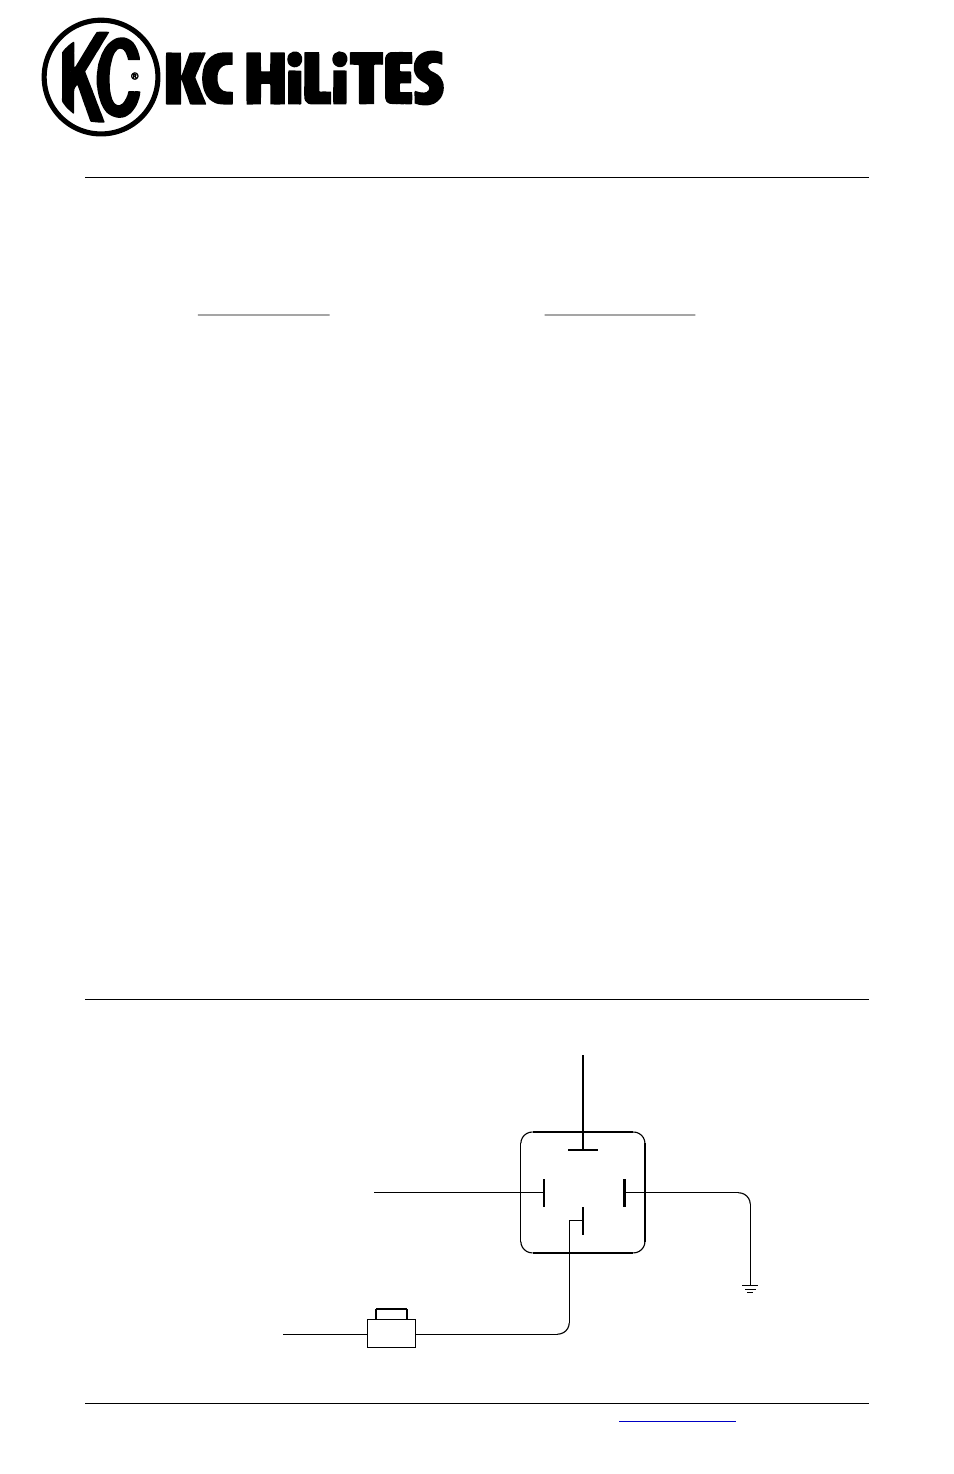
6314 quad beam installation instructions, Relay wiring diagram, Relay
6314 QUAD BEAM
Installation Instructions
Please Note
!
Not for use on cars equipped with high beam daytime running lights. Low
beam daytime running lights are okay.
!
This kit may not work on vehicles that utilize a negatively switched headlight
system.
Works on most GM vehicles up to 1999 & 2003-2006.
INGREDIENTS
TOOLS NEEDED
2 - Scotchloks
1 - 6” Black wire
Philips screwdriver
2 - Sheet metal screws
1 - 28” Yellow wire w/fuse
Pliers
1 - Relay
1 - 36” Green wire
1/4” Drill motor
1 - Relay plug
1 - 60” Convoluted tube
1/8” Drill bit
1 - 32” White wire
4 - Tyraps
1.
With one of the screws provided, mount the relay within 24 inches of both the battery and the rear of
your headlights.
2.
Using one of the screws supplied, attach the black wire to a grounded metal surface.
3.
Unplug the high beam wires from the rear of the headlight bulb.
A. Turn on your headlight high beam and with the use of a test light, determine
which wire is hot.
B. Turn off your headlights.
C. Using a Scotchlok, attach the white relay wire to the high beam wire.
4
Unplug the low beam wires from the rear of the headlight bulb.
A. Turn on your headlight low beam and with the use of a test light,
determine which wire is hot.
B. Turn off your headlights.
C. Using a Scotchlok, attach the green relay wire to the low beam hot wire.
5.
Remove the fuse from the fuse holder on the yellow wire and attach the wire to the battery or suitable
power source. Replace the fuse.
6.
Cut the enclosed protective tubing as required, slide the split side over the wire and secure with tyraps
as necessary.
KC HiLiTES, Inc. 2843 W. Avenida de Luces, Williams,
* 3266 - rev
30
86
85
87
(Green)
(White)
(Black)
Low Beam
RELAY WIRING
DIAGRAM
Relay
Ground
Fuse
Battery +
High Beam
(yellow)