Rear lift, Front installation diagram – High Lifter Lift Kit for Polaris Sportsman 400_500 (03-06) User Manual
Page 4
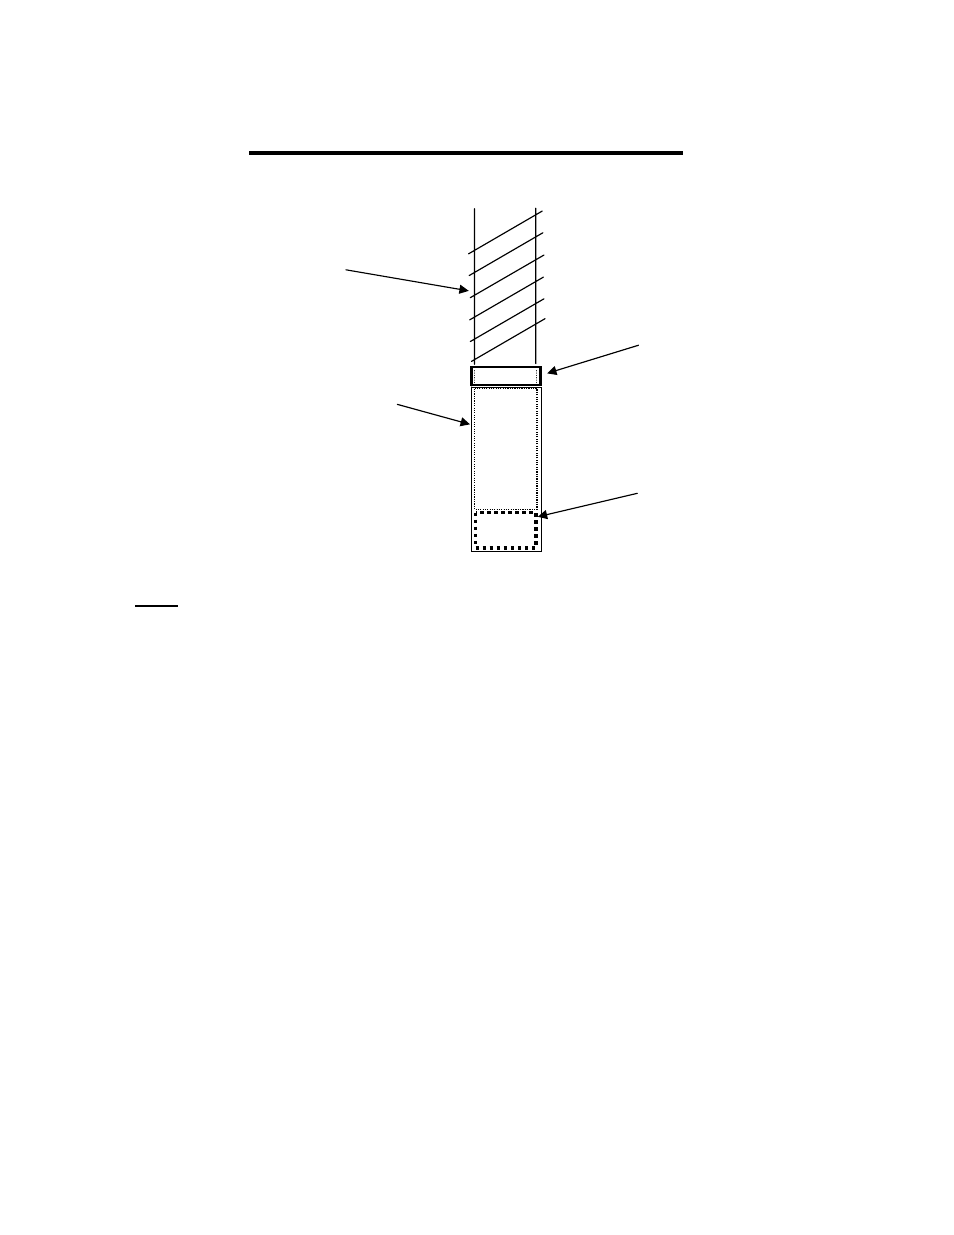
Front Installation Diagram
OEM
Shock
Bracket “B”
OEM
Shock
Mount
Bracket “A”
Note:
I have left out the Progressive Spring Kit; please follow those instructions for
installation. This is how the lift kit will fit without the Progressive Spring Kit installed.
The Progressive collar will go on top of Bracket “B”.
Rear Lift
1) Place jack under ATV at the rear of the bottom skid plate and lift until the weight is
off the suspension. Be careful to secure the ATV properly so as not to fall off the
jack.
2) Remove both rear shocks and wheels. (The lift can be installed with the bottom of
the left shock on, but this can make it more difficult to align the lift bracket.)
3) After removing the shocks, jack the ATV up an additional 1”-2”.
4) Remove the two spacers to the torsion bar.
5) Insert one of the new bolts through bracket “C”, the top shock mount and the
bracket “D” (spacer).
(See diagram). (Place 2 washers on one side of the shock and 1 on the other.)
Note: It is generally easier to install bracket “C” and the washers on the top of the
shock before attaching the bracket to the shock mount on the right side because of
the exhaust system.
6) Under the seat, behind the air box mount the support plate to the ATV using the
factory bolts.