Rear lift, Left side, Left rear installation diagram – High Lifter Lift Kit for Honda Rubicon 500 (01-14) User Manual
Page 4
Rear Lift
Left Side
1) Place jack under ATV at the rear of the bottom engine skid plate (not the differential), and lift until
the weight is off of the suspension. Be careful to secure the ATV properly so as not to fall off the
jack.
2) After removing the bottom of the shocks, jack the ATV up an additional 1”-2”.
3) Remove the top bolt on the left side of the differential housing, closest to the shock mount.
4) Place bracket “J” on the left outside of the shock mount (notch up).
5) Place spacer “E” on the inside of the shock mount.
6) Place bracket “I” between spacer “E” and the inside of the shock mount, (to the right of spacer “E”
and to the left of the inside wall of the shock mount).
7) Secure this with the stock OEM bolt.
8) Place the bottom of the shock (bottom shock eyelet) between brackets “J” and bracket “I”, securing
this with a 10x45mm Bolt. Install bolt from left to right.
9) Place end of bracket “G” to the right and outside of bracket “I” securing it with a 10mm Nut.
10) Last, secure the end of bracket “G” to the differential housing, use the OEM nut.
11) DO NOT TIGHTEN NUTS AND BOLTS AT THIS TIME. TIGHTEN AFTER
COMPLETION OF RIGHT SIDE.
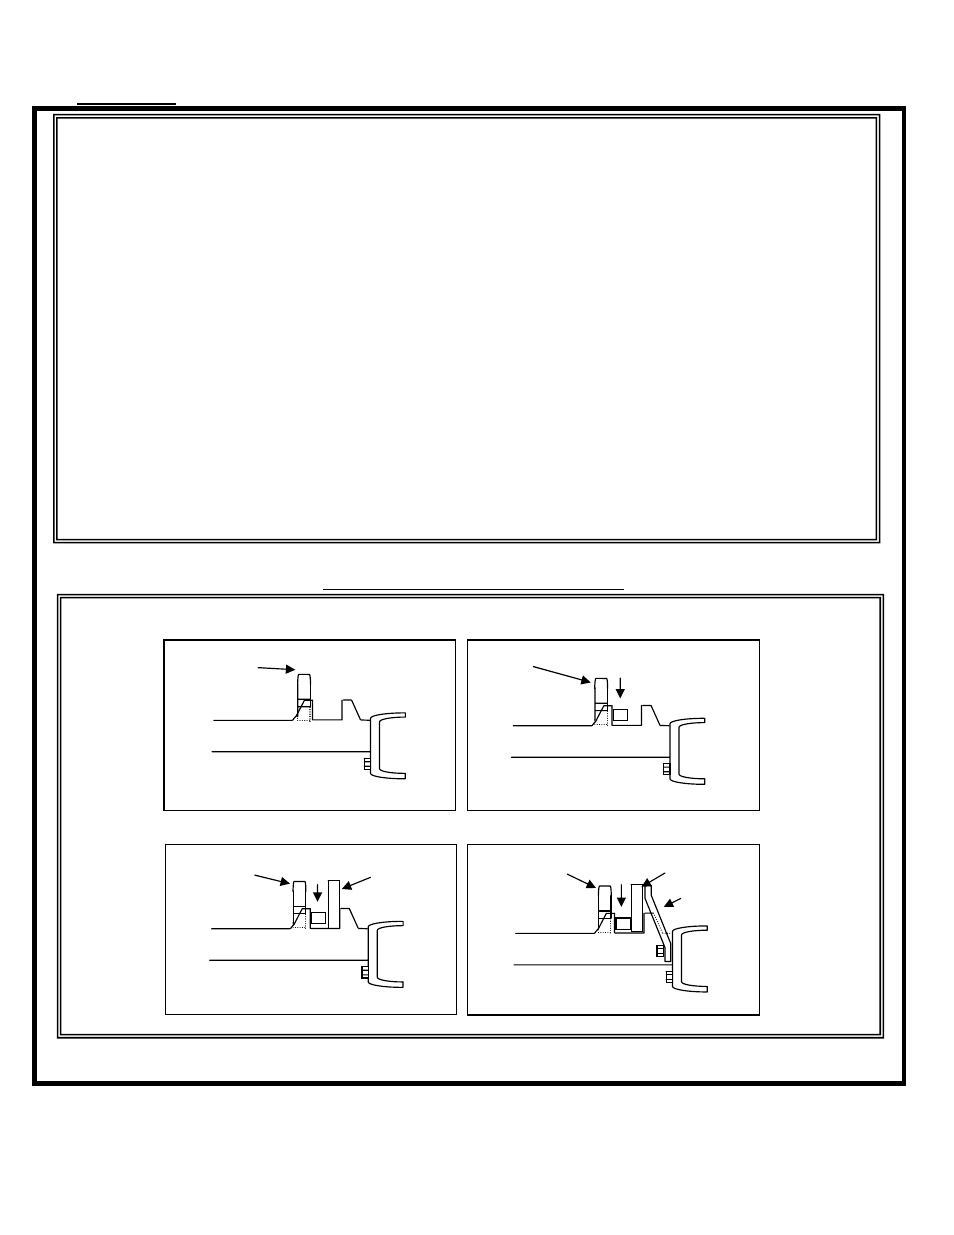
Left Rear Installation Diagram
1
2
J
J
E
Notch
Up
Notch
Up
3
4
4
J
E
I
J E I
Notch Up
Notch Up
G