Operating, E-11, Set up the screen and the projector – 3M PX5 User Manual
Page 11: ቢ turn the lens cover clockwise, Firmly plug in all the way. to wall outlet
E-11
Operating
Set up the screen and the projector
See the User’s Manual (CD-ROM Edition) “Projection Distance Table” for the distance between
the screen and the projector.
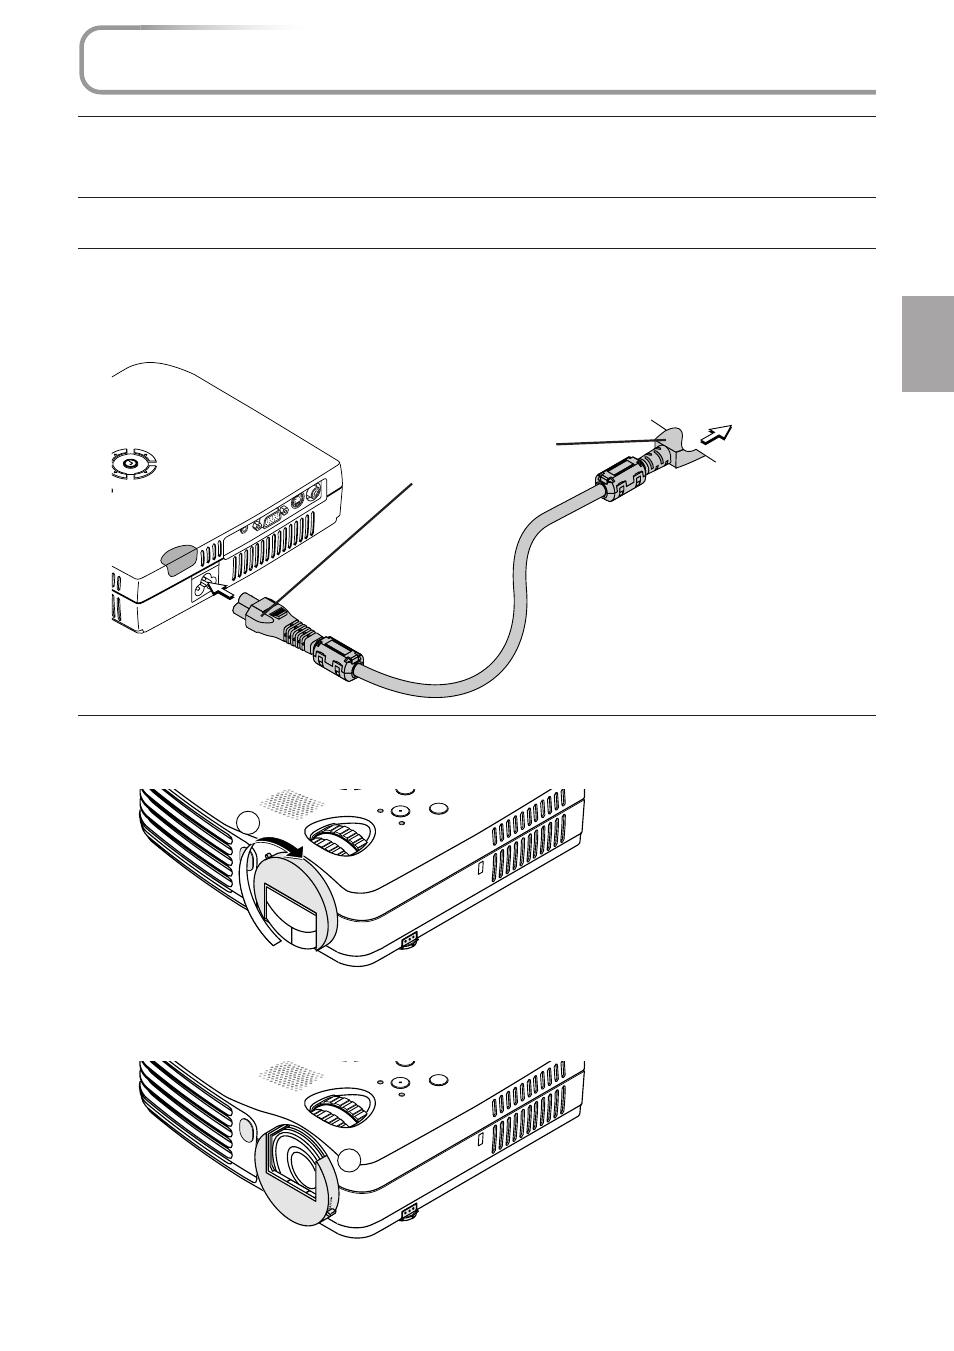
Connect the personal computer or video equipment to the projector
Connect the AC IN connector of the projector and the power outlet using the
supplied power cable.
The STANDBY indicator lights amber and the standby mode is set.
1
2
3
QU
ICK
ME
NU
AUDIO
MOUSE
RGB
S-VIDEO
VIDEO
SO
U
A
UTO
Firmly plug in all
the way.
To wall outlet
ቢ Turn the lens cover clockwise.
4
STAN
DB
Y
STATU
S
MEN
U
E
1
STANDBY
STATUS
MENU
CE
2
ባ When the lens cover stops with a click, the projector is ready for projection.
See also other documents in the category 3M Projectors:
- Super Close Projection System SCP716 (6 pages)
- S40 (40 pages)
- MP7720 (34 pages)
- MP8630 (28 pages)
- MP7630B (36 pages)
- S50C (41 pages)
- MP8725 (33 pages)
- MP8650 (32 pages)
- MP8640 (28 pages)
- 1700 (9 pages)
- MP8747 (44 pages)
- 9600 (28 pages)
- S15 (55 pages)
- MP8749 (41 pages)
- MP8670 (38 pages)
- Digital Projector X15 (55 pages)
- MP8750 (26 pages)
- 1800 Series (8 pages)
- X66 (2 pages)
- X80 (49 pages)
- MP8790CN (44 pages)
- S50 (2 pages)
- MP8760 (35 pages)
- 9800 (15 pages)
- MP8740 (34 pages)
- MP7730 (40 pages)
- MP8770 (39 pages)
- MPro110 (20 pages)
- DX60 (2 pages)
- X68 (51 pages)
- X75 (57 pages)
- MP8745 (39 pages)
- X40C (40 pages)
- S10 (45 pages)
- MP8620 (32 pages)
- SCP740 (58 pages)
- 9000PD (46 pages)
- MP8790 (44 pages)
- MP8660 (38 pages)
- MP8610 (37 pages)
- S10C (45 pages)
- MP7760 (36 pages)
- MP8770/MP8770L (28 pages)
- MP7640i/MP7740i (40 pages)