Operation 8. fonctionnement 34 – Zenoah BK4500FL User Manual
Page 34
English
Français
8. Operation
8. Fonctionnement
34
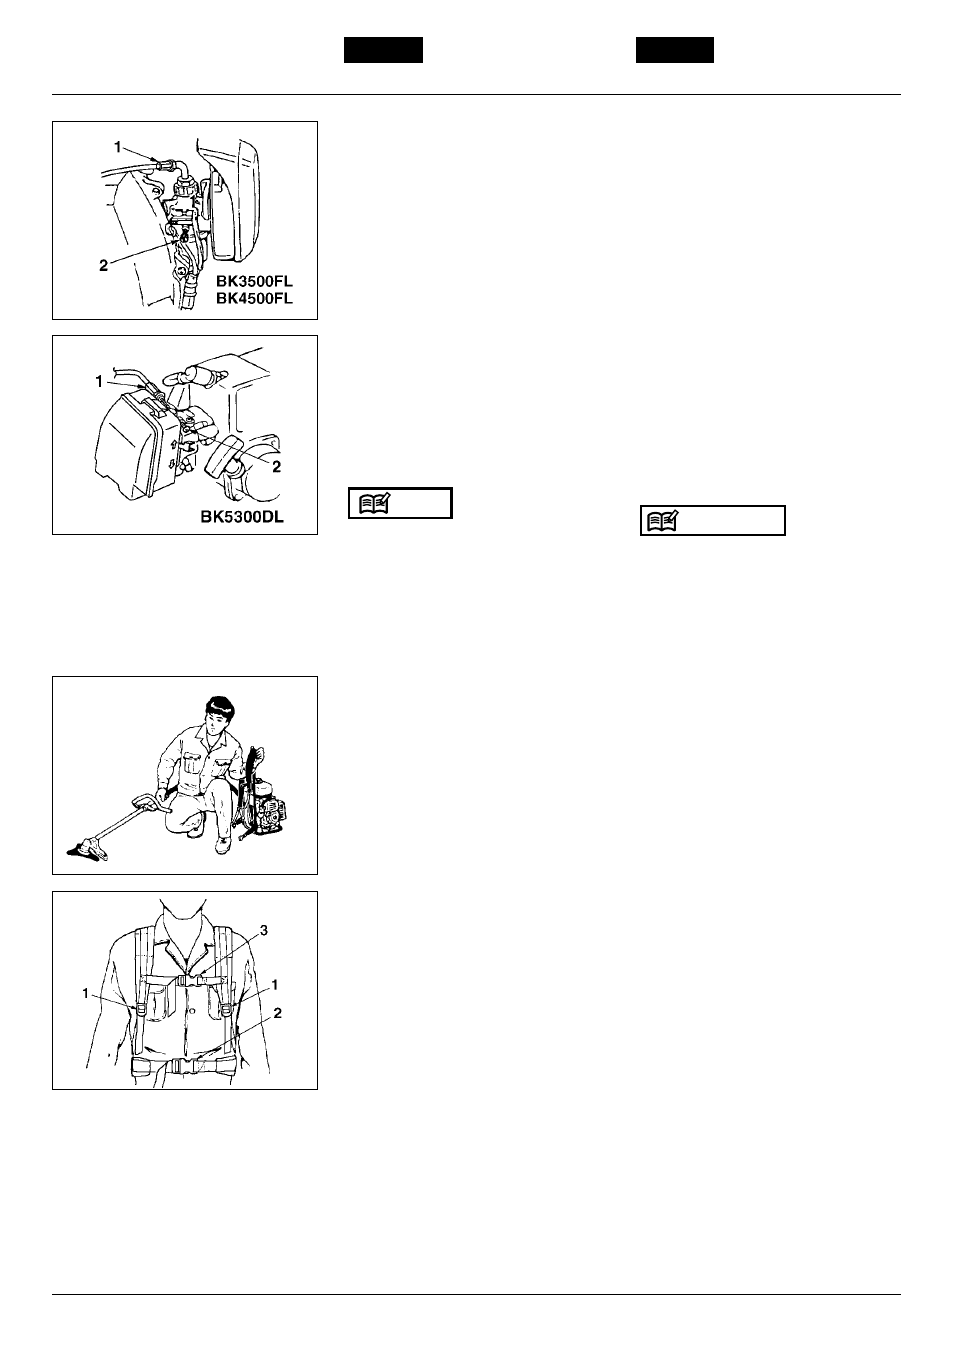
■ ADJUSTING THROTTLE CABLE
• The normal play is 1 or 2mm when
measured at the carburetor side end.
Readjust with the cable adjuster as
required. (OP1)(OP2)
■ ADJUSTING IDLING SPEED
(OP1)(OP2)
1. When the engine tends stop frequently
at idling mode, turn the adjusting screw
clockwise.
2. When the cutting head keeps rotating
after releasing the trigger, turn the
adjusting screw counter-clockwise.
(1) Cable adjuster
(2) Idle adjusting screw
• Warm up the engine before adjusting
the idling speed.
■ PUTTING ON THE UNIT
1. Start the engine and warm it up.
2. As holding the front handle with your
right hand, put on the unit on your left
shoulder. (OP3)
3. After passing the front handle to your
left hand, put the right strap on your
shoulder.
4. Adjust the shoulder strap length to your
comfortable position. (OP4-1)
5. Connect the waist strap and the front
middle strap. (OP4-2)(OP4-3)
6. Adjust the strap length to your
comfortable position.
NOTE
■ REGLAGE CÂBLE
D’ACCÉLÉRATEUR
• le jeu normal est de 1 à 2 mm mesuré
au niveau du carburateur. Si
nécessaire, effectuer ce réglage à l’aide
du régleur. (OP10)
■ REGLAGE DU RALENTI (OP1)(OP2)
1. Lorsque le moteur a tendance à
s’arrêter souvent au ralenti, tourner la
vis dans le sens horaire.
2. Si la tête de coupe continue de tourner
au ralenti après avoir relâché la
manette d’accélérateur, tourner la vis
dans le sens contraire des aiguilles
d’une montre.
(1) Ajusteur de câble
(2) Vis de réglage du ralenti
• Laisser chauffer le moteur avant
d’effectuer le réglage du ralenti.
■ UTILISATION DE L'APPREIL
1. Démarrer le moteur et le faire chauffer.
2. Tout en tenant la poignée avant avec la
main droite, placer l'appareil sur
l'épaule gauche. (OP3)
3. Passer la poignée avant à la main
gauche et mettre la courroie droite sur
l'épaule.
4. Ajuster la longueur de la courroie
d’épaule pour qu’elle soit confortable.
(OP4-1)
5. Connecter la courroie de taille et la
courroie avant centrale. (OP4-2)(OP4-
3)
6. Ajuster la longueur de la courroie pour
qu'elle soit confortable.
REMARQUE
OP1
OP2
OP3
OP4