Tool, Machine preparation, Operating the machine – Windsor COMPACT PTC17 User Manual
Page 4: Operating machine with accessory, Regular maintenance, Batteries and maintenance
MACHINE PREPARATION
BATTERIES
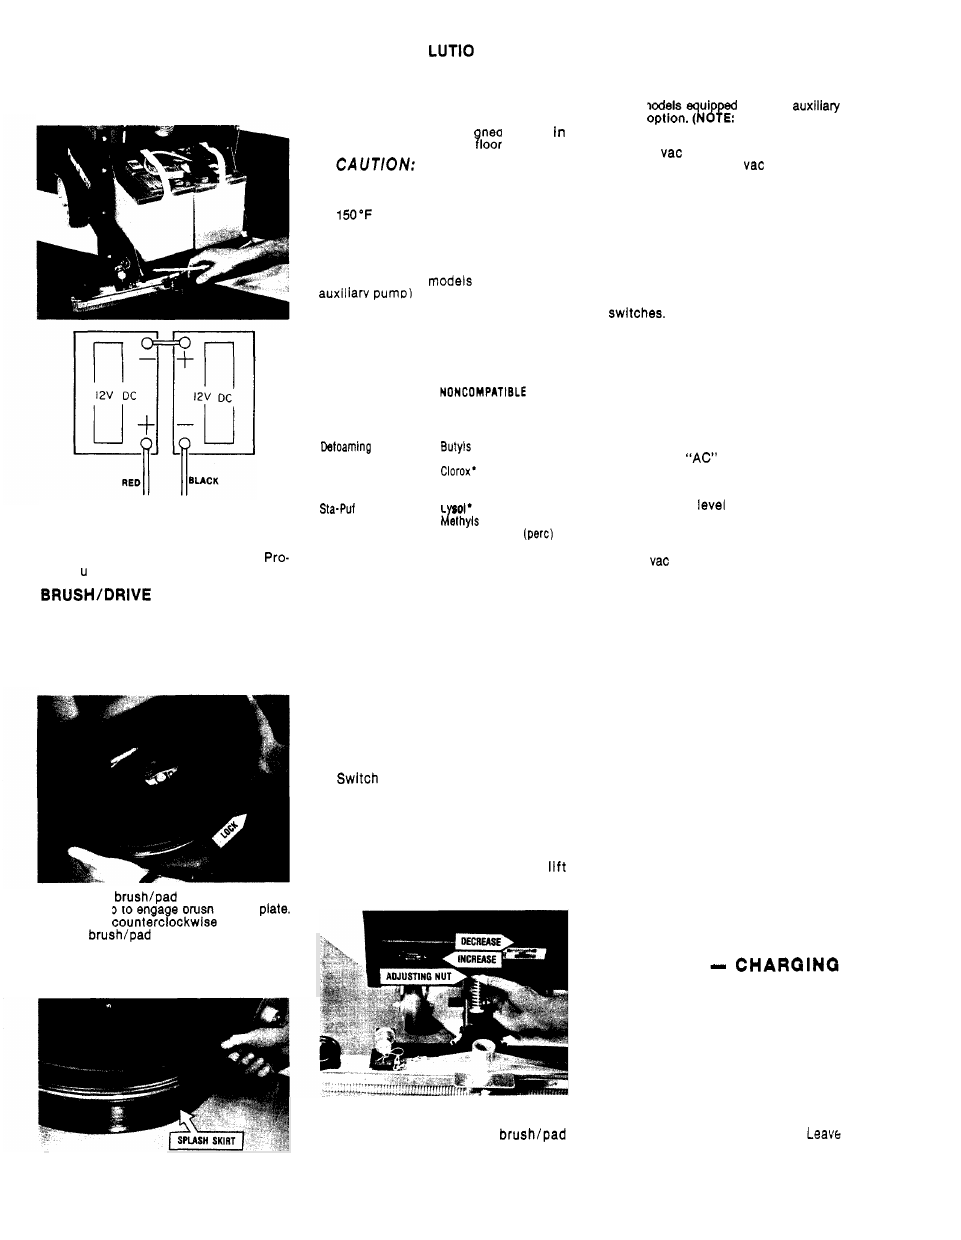
1. Install batteries and connect battery
cables as shown.
WARNING:
Provide proper ventilation,
leave door open when charging batteries.
2. Charge the batteries before using the
machine. (See Battery Charging
ced re)
PAD ASSEMBLY
1. Raise scrub deck assembly by raising
control lever to store position.
2. Reach under scrub deck and rotate drive
plate until a lug hole is visible through
scrub deck sight hole.
3.
Positlon
driver under plate
and lift up to enga e brush lugs in
A quick
motion will
lock
driver in position.
4. Lower scrub deck by pulling control
lever rearward. Adjust splash skirt to
floor.
4
CLEAN
I
N G
SO
N
1. Fill machine with hot water and add
cleaning chemical at the proportion
noted on the container.
CAUTION:
Always use a
low sudslng
cleaning chemical desi ned for use
automatic hard surface
scrubbers.
To avoid possible dis-
tortion of polyethylene solution/
recovery tanks. DO NOT USE WATER
TEMPERATURE THAT EXCEEDS
(65°C).
CHEMICALS
The internal parts of the pump used in
the scrubber (on
equipped with
are suitable for use with
most cleaning chemicals. But it is
sus-
ceptible to chemical attach from some
cleaning substances, such as hydro-
carbon solvents and chlorinated bleaches.
These noncompatible materials are not
of the type normally used for cleaning.
SUITABLE
CHEMICALS
CHEMICALS
Alkalis
Aldehydes
Clorox
ii
Bleach’
Aromatic Hydrocarbons
Agents
Detergents
Carbon Tetrachloride
Hydroxides
Oxygen Bleaches
Chlorinated Bleaches
Soaps
Chlorinated Hydrocarbons
Fabric Softener’
L
Vinegar
(MEK)
White Monday Bleach’
Perchlorethylene
*Registered Trademark
Trichlorethylene
Phenols
D-Limonene
OPERATING
THE MACHINE
1. Adjust the operator control handle to
a comfortable position.
2. Switch on main power switch.
3.
Release solution. Pull solution control
lever rearward.
NOTE The amount of
solution can be regulated during oper-
ation depending on the type of floor
and the traverse speed of the machine.
4. Switch on brush drive motor.
5.
on vacuum motor.
6. Lower scrub deck. Pull deck lift lever
rearward.
CAUTION:
DO
not leave brush running
on floor while machine is stationary.
7. Lower squeegee. Pull squeegee
lever rearward.
NOTE Use adjusting
knob to change pressure on squeegee.
8. Push machine forward to begin clean-
ing. Forward motion is assisted by the
scrubbing action of the
driver.
OPERATING MACHINE
WITH ACCESSORY
TOOL
The
HFT
floor tool for wet pick-up can be
used on models
with the
pump kit
E Factory installed
option only.)
1.
Remove
hose from squeegee and
connect to accessory
hose, using
metal hose coupler.
2. Connect solution hose from accessory
tool to solution outlet nipple located at
lower right hand corner of rear panel.
3.
Check solution tank for cleaning solu-
tion and make sure dome is in place.
4. Switch on main power switch.
5. Switch on auxiliary pump and vacuum
WARNING:
Do not switch on brush
motor when operating machine with
accessory tools.
REGULAR MAINTENANCE
BEFORE STARTING
WORK
PERIOD
1. Disconnect battery charger.
NOTE Dis-
connect the
power cord from the
wall receptacle before removing the
“DC” charger plug from machine.
2. Check water
in batteries. Add
distilled water as needed.
3.
Attach brush or drive pad to drive plate.
4.
Check
hose connection at squeegee
shoe.
5. Check squeegee blades for wear.
6.
Fill machine with hot water and add
cleaning chemical at the proportions
noted on the container.
NOTE Use a
low sudsing cleaner designed for use in
automatic hard surface floor scrubbers.
BEFORE STORING MACHINE AT
THE END
OF WORK PERIOD:
1. Drain both solution and recovery tanks
and rinse clean.
2. Remove dome, lift out float assembly
to allow recovery tank to air dry.
3.
Remove brush or drive pad from drive
plate and store upside down or hang
on wall.
4. Wipe down exterior of machine with
damp cloth.
5. Raise squeegee assembly to “store”
position.
6. Charge batteries. (See Battery Charging
Procedure)
BATTERIES
AND MAINTENANCE
BATTERY CHARGING PROCEDURE
WARNING:
Lead acid batteries generate
gases which can cause an explosion. Keep
sparks and flames away from batteries.
NO
SMOKING. Always wear eye protection
when working near batteries. Charge the
batteries only in a well ventilated area.
1. Set the charger on a flat level surface.
2.
Open bettery compartment door.
door open during charging cycle.