Wiring hood preparation (ducted configuration), Wiring, Hood preparation – Viking F20560 User Manual
Page 4: Ducted configuration)
Wiring
Grounding Instructions
Note: This range hood must be properly
grounded. The unit should be installed by a
qualified electrician in accordance with all
applicable national and local electrical
codes.
This appliance must be grounded. In the event of
an electrical short circuit, grounding reduces the
risk of electric shock by providing an escape wire
for the electric current. This appliance is
equipped with a cord having a grounding wire
with a grounding plug. The plug must be
plugged into an outlet that is properly installed
and grounded.
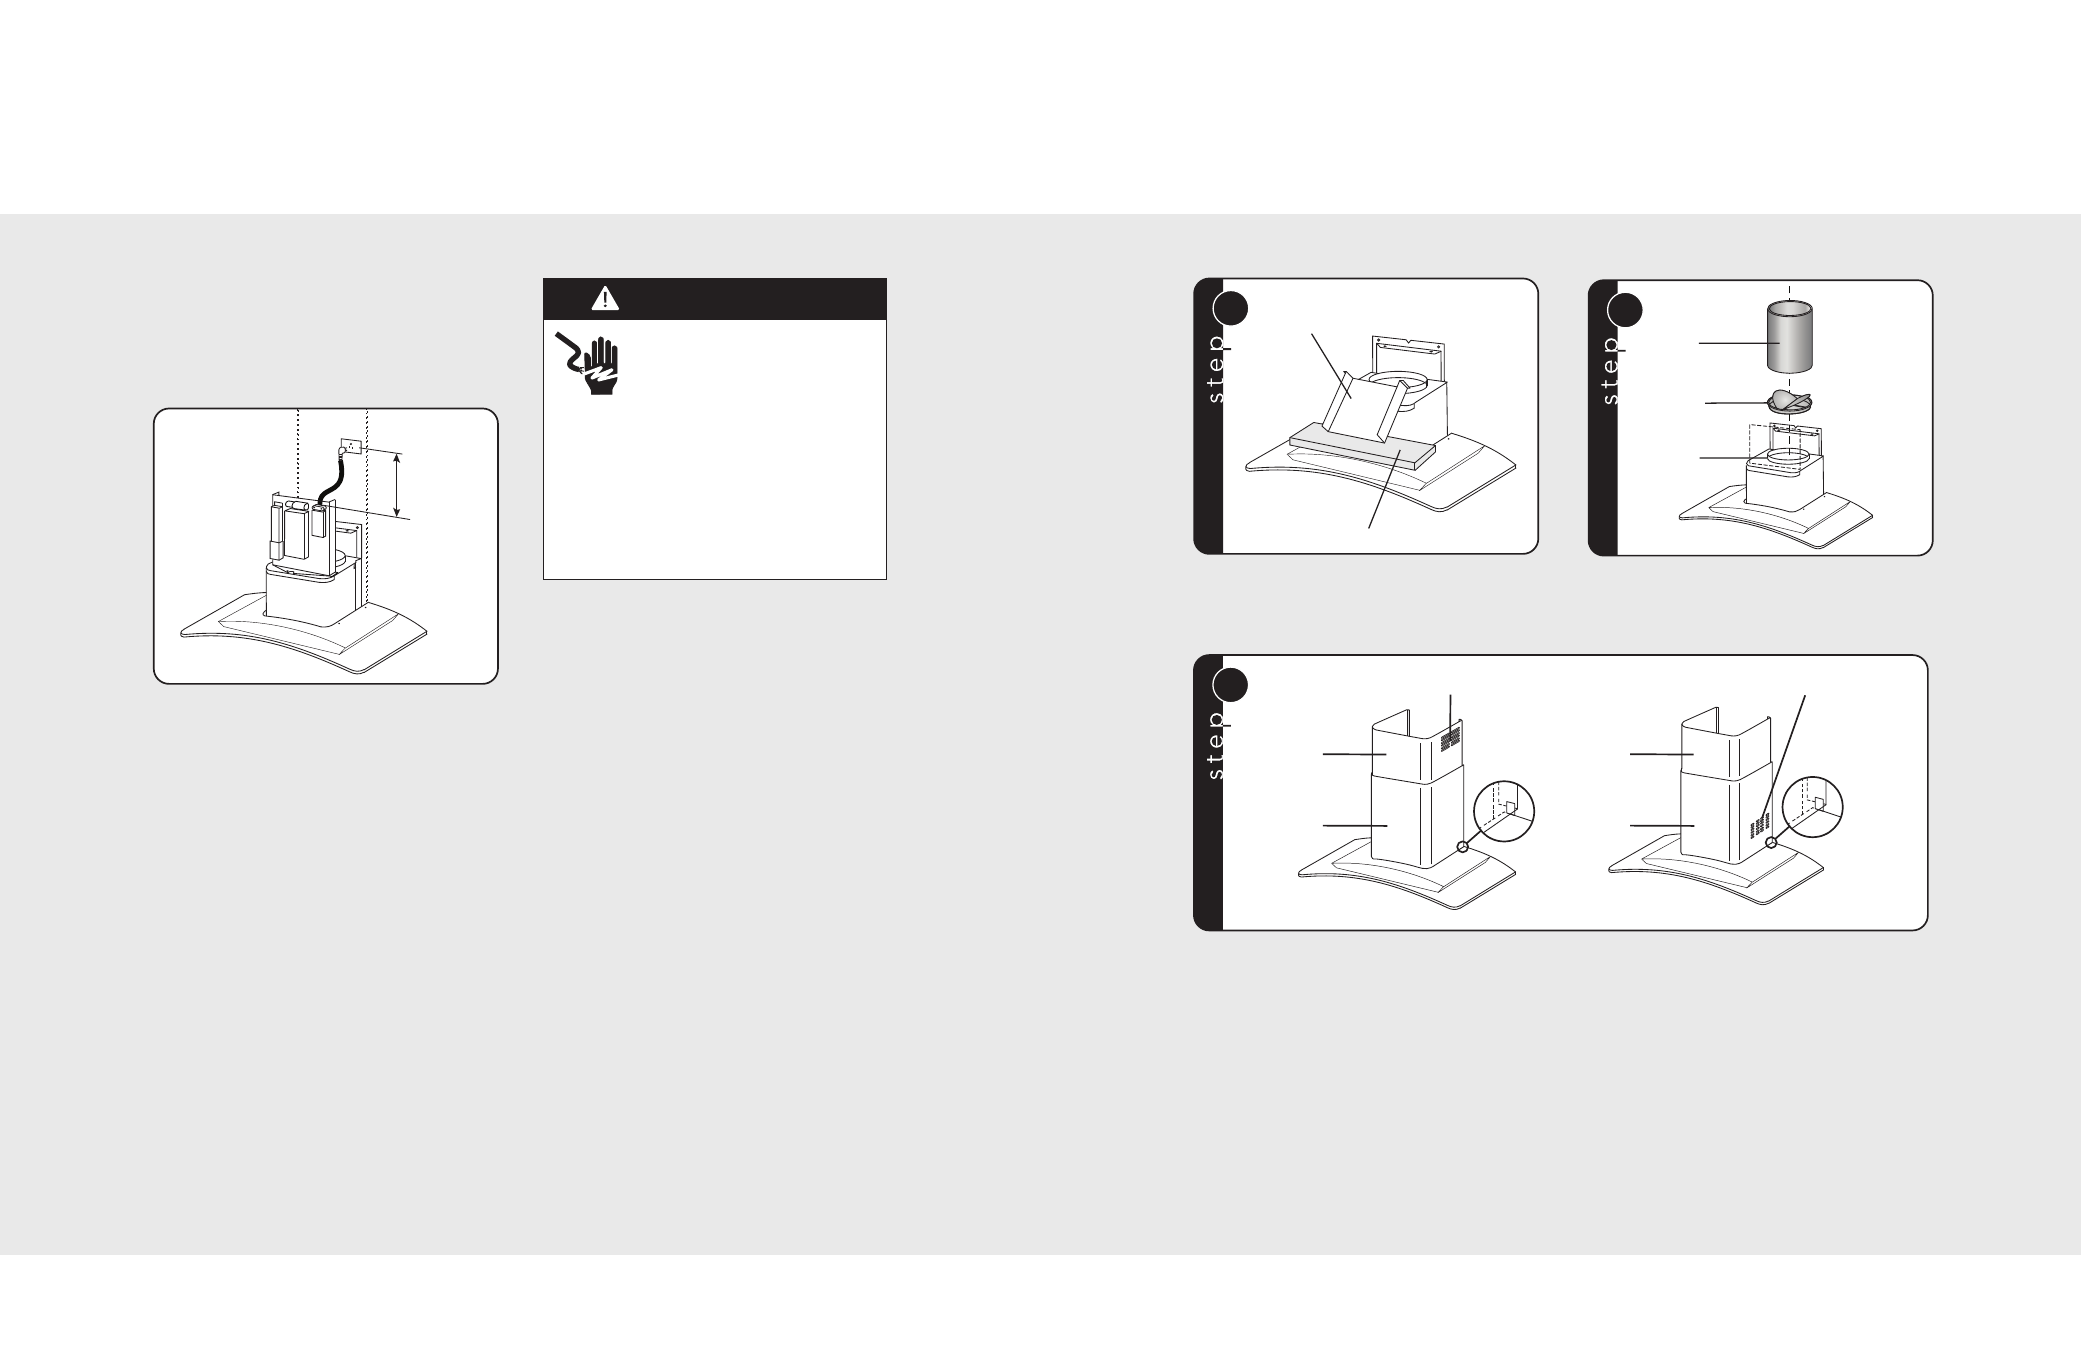
Set the electrical power supply within the
space covered by the decorative flues. Position
the power socket at a maximum distance of
33-7/16” (85 cm) from where the lead exits from
the hood (see illustration). Make sure this does
not interfere with the bracket fastening area or
with the decorative flue (where the flue touches
the wall). Fit plug into power socket.
6
33-7/16"
(85cm)
W A R N I N G
ELECTRICAL SHOCK
HAZARD
Improper grounding can result in
a risk of electric shock.
Consult a qualified electrician if the
grounding instructions are not completely
understood, or if doubt exists as to
whether the appliance is properly
grounded.
DO NOT use an extension
cord. If the power supply cord is too short,
have a qualified electrician install an outlet
near the appliance.
Hood Preparation
(Ducted Configuration)
Note: On stainless steel hoods, carefully remove the plastic protective film from all exterior surfaces of the
hood and decorative flues, prior to final installation.
7
1
Electrical
system plate
Protection
2
6” diameter
duct
Discharge
collar
Duct
connector
Remove the tape on the electrical system
plate; place the electrical system plate
on the hood (use a protection).
Install the discharge collar into the duct connector of
the range hood. Attach an adequate length of 6”
round steel ducting to the range hood duct connector.
3
Upper
flue
Lower
flue
Upper flue vents exposed
Upper flue vents concealed
Upper
flue
Lower
flue
Carefully place the lower decorative flue into the recessed area of the range hood top.
Carefully slide the upper decorative flue down inside the lower flue.
Note: On 8” ceilings the air vents on the upper flue are concealed by installing the flue with air vents down.
On 9” ceilings, air vents on the upper flue will be exposed after installation.