Toastmaster TP224 EN User Manual
Page 3
3
III. OPERATION
A. Location and Function of Controls
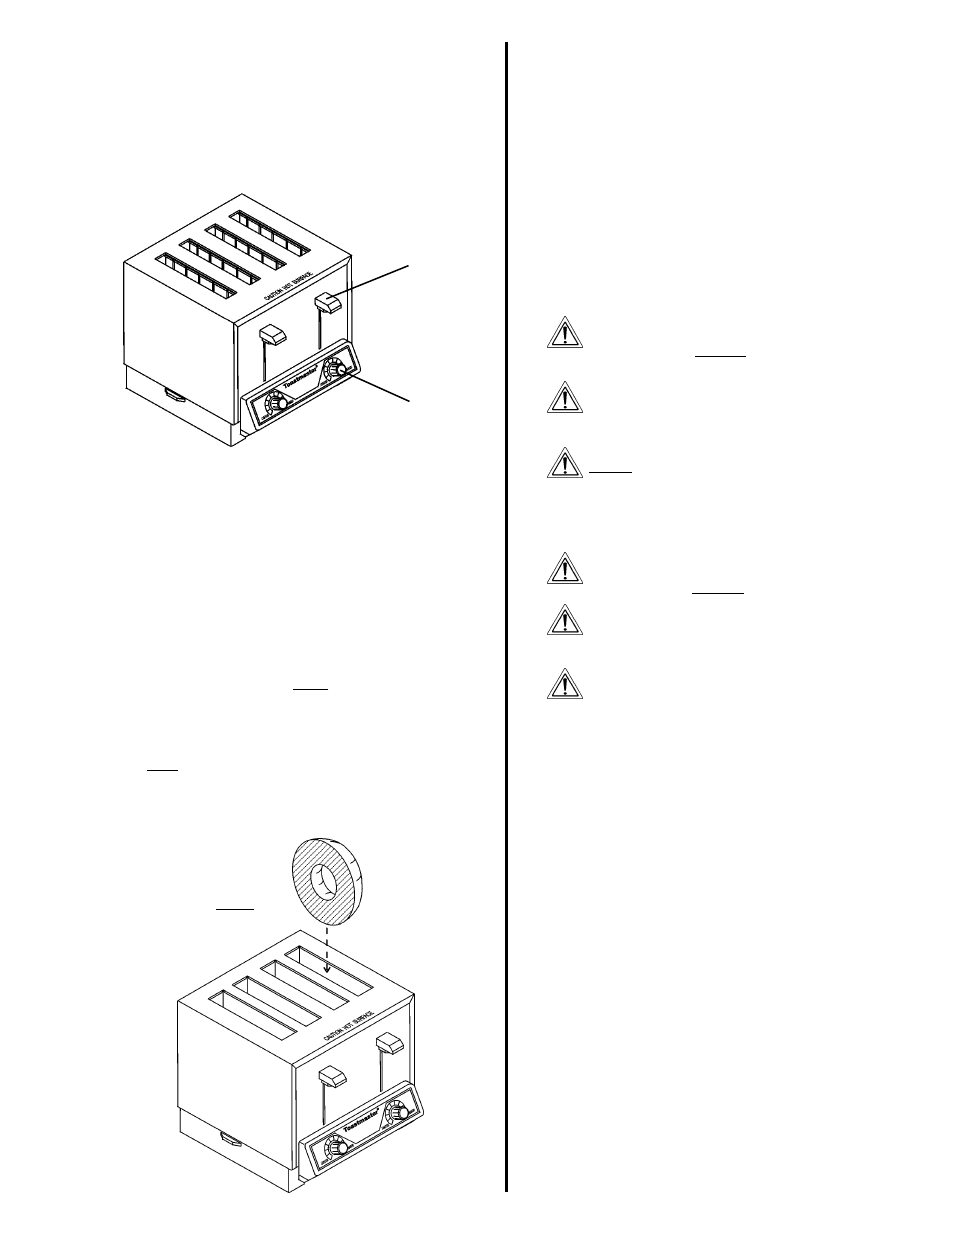
This section provides a basic description of the toaster controls, their
location, and the functions they perform. The operator MUST be
familiar with the controls. See Figure 3.
Figure 3 -Toaster Controls
Color
Selection
Knob
Operating
Lever
Figure 4 - Loading extra-wide, one-sided slots
Models HT409/424, BTW09/24 only
Side of bakery
product to be
toasted faces
LEFT
1.
Color Selection Knob
Adjusts the darkness of the toasted bakery product.
Turn the knob to the LEFT for lighter toasting.
Turn the knob to the RIGHT for darker toasting.
2.
Operating Lever
Press the lever DOWN to load the bakery product into the
toaster.
Push the lever UP to manually raise the product during the
toasting cycle. If the operating lever is not raised manually, it
will be automatically raised at the end of the toasting cycle.
B. Operation Procedure
CAUTION
THE REMOVABLE CRUMB TRAY MUST BE IN PLACE BEFORE THE
TOASTER MAY BE OPERATED. If the tray is removed for cleaning,
ensure that it is replaced before operation.
1.
Insert the bakery product into the slots. For extra-wide, one-sided
slots, check that the side of the product that is to be toasted faces
the LEFT side of the slot, as shown in Figure 4.
2.
Turn the color selection knob (if necessary) to set the desired
darkness. A medium color setting is achieved at the 9 oclock
position.
NOTE
It will be necessary to determine the color setting for each different
bakery product that is to be toasted. Test a single piece at the 9
oclock setting, and then adjust the Color Selection Knob as
necessary to find the proper setting.
3.
Press the Operating Lever DOWN to lower the product into the
toasting chambers.
4.
Wait for the toasting cycle to complete, and the toasted product will
automatically be raised.
OR
Push the Operating Lever UP to manually raise the product at any
time during the toasting cycle.
C. Clearing Jams
WARNING
DISCONNECT THE TOASTER FROM ITS ELECTRICAL
POWER SUPPLY BEFORE ATTEMPTING TO CLEAR A
JAM.
WARNING
DO NOT TOUCH HOT SURFACES ON THE TOASTER,
OR REACH INTO THE TOASTING CHAMBER, UNTIL THE
UNIT HAS COOLED THOROUGHLY.
WARNING
NEVER INSERT A KNIFE, FORK, OR SIMILAR OBJECT
INTO THE TOASTING CHAMBER. THIS CAN CAUSE AN
ELECTRICAL SHOCK OR DAMAGE THE HEATING
ELEMENTS.
D. Cleaning
WARNING
DISCONNECT THE TOASTER FROM ITS ELECTRICAL
POWER SUPPLY BEFORE CLEANING OR SERVICING.
WARNING
DO NOT TOUCH HOT SURFACES ON THE TOASTER,
OR REACH INTO THE TOASTING CHAMBER, UNTIL THE
UNIT HAS COOLED THOROUGHLY.
WARNING
WHEN CLEANING THE TOASTER, NEVER APPLY
ENOUGH LIQUID TO STAND IN PLACE ON THE UNIT.
DO NOT SPRAY, RINSE, OR SUBMERGE THE TOASTER.
EXCESSIVE MOISTURE IN THE UNIT WILL CAUSE A
SEVERE ELECTRICAL HAZARD AND MAY OTHERWISE
DAMAGE THE TOASTER.
CAUTION
DO NOT clean your toaster using abrasive cleaners or pads. Both will
scratch and dull the finish.
1.
Wipe the exterior of the toaster with a sponge or cloth soaked in hot
or warm detergent water. Wipe with a clean, damp cloth to remove
the excess detergent, and then wipe again to dry the toaster.
2.
Remove the crumb tray, and empty it. Wash the crumb tray in
warm detergent water, and rinse it.
3.
After the crumb tray is dry, replace it in the toaster.