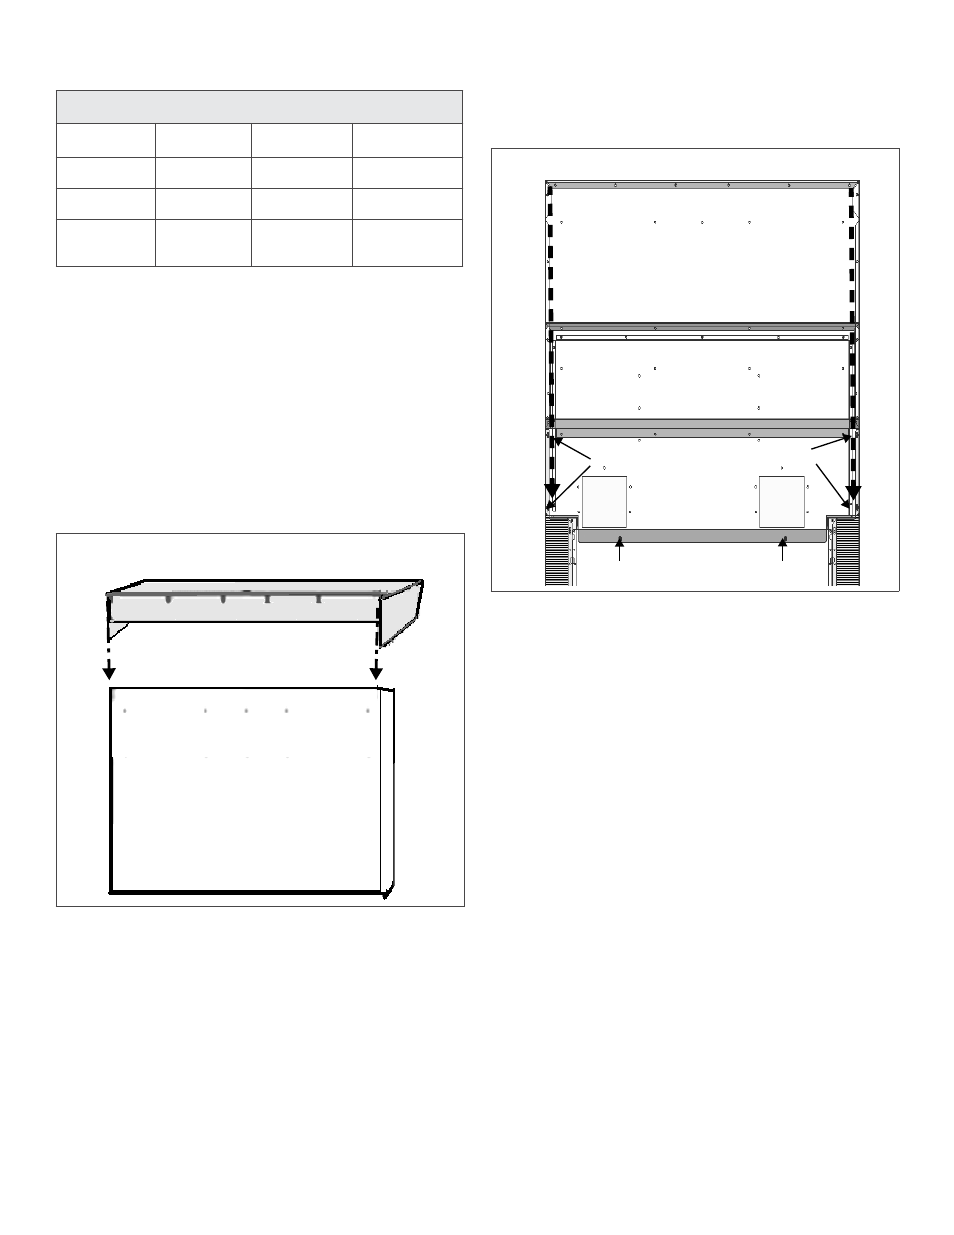
Backguard kit model numbers, Figure 22: backguard rear view, Remove protective plastic – Thermador PRO GRAND PRD48 User Manual
Page 26: Slide the shelf onto the backguard channel, Begin with backguard installation, Figure 23: backguard installation, High shelf low back flush island trim, High shelf assembly, Backguard installation
English 24
The backguard must be attached before sliding the range
into the final installed position. When there is less than a
12" (305mm) horizontal clearance between combustible
surfaces ∆
and the back edge of the range above the cook-
ing surface, a THERMADOR
®
Low Back or High Shelf
must be purchased separately and installed. When clear-
ance to combustible surfaces
∆
is over 12" (305mm) or for
island installations, the supplied THERMADOR
®
Flush
Island Trim may be used.
High Shelf Assembly
1. Remove protective plastic.
2. Slide the shelf onto the backguard channel.
3. Install the included (5) stainless screws along the
topside of shelf and (8) stainless screws into the back
of the shelf.
4. Begin with Backguard Installation.
Backguard Installation
1. Remove protective plastic.
2. Depending on model, remove the (3) or (4) T-20 Torx
stainless screws in the front face of the included Flush
Island Trim, the (4) drill point screws securing the trim
to the side panels, and the (2) or (4) drill point screws
securing the piece to the back panel. Lift up to fully
remove.
3. Align the back panel of the new accessory with the
flanges on the range side panels right and left rear
corners. The backguard is inserted inside the guide
channels on the back of the range.
4. Make sure the backguard’s front face is outside the
flange on the front side of the range.
5. Re-install screws in the new backguard’s front and
back panels.
6. Re-install (4) drill point screws to secure the
backguard’s back panel to the side panels on the back
of the range.
Backguard Kit Model Numbers
Model
36”
48”
48” Steam
Low Back
PA36JLBG
PA48JLBG
PA48JLBSG
High Shelf
PA36JHSG
PA48JHSG
PA48JHSSG
Flush Island
Trim
Included on
Range
Included on
Range
Included on
Range
Figure 22:
Backguard Rear View
(12x) screws along the back
(5x) screws along the top
Figure 23:
Backguard Installation
High Shelf
Low Back
Flush Island Trim
(Included with range)
Mounts inside back panel flange
Mounts inside side panel flange
Mounts inside side panel flange