10 managing security with the web monitor – Texas Memory Systems RamSan-500 User Manual
Page 26
RamSan-500 User’s Manual
26 of 48
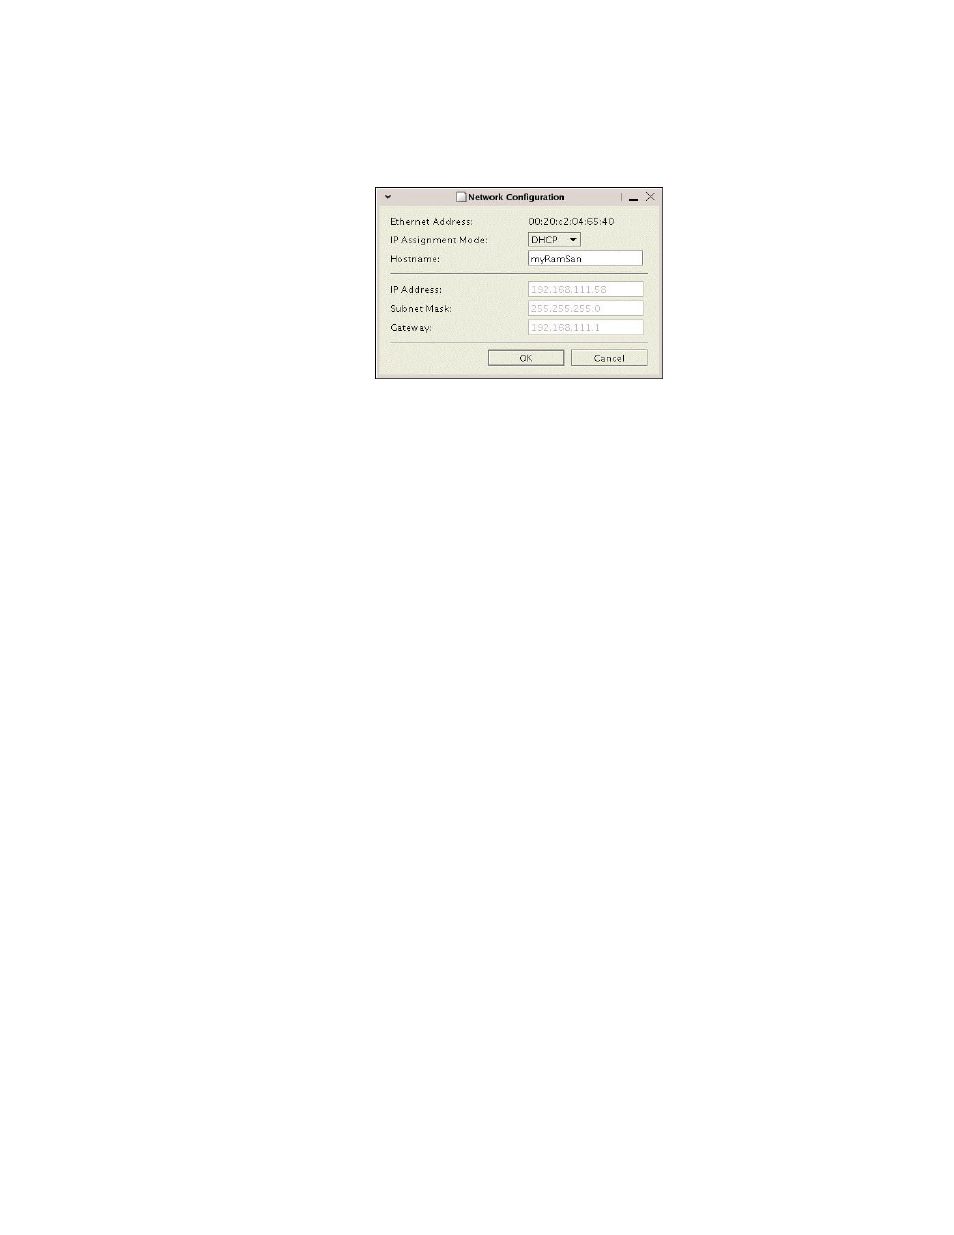
To modify the network configuration, right-mouse click and select
“Network config…” or left-mouse click the globe/wrench icon in the
button bar. Both methods bring up the network configuration window.
Figure 12 – Web Monitor Network Configuration
You can manipulate the network settings and then select “OK”. The
settings will be saved and the system’s network will be restarted. You
should see several system messages displayed in the “Recent Event
Log” panel of the Web monitor confirming your settings.
4.10 Managing security with the Web Monitor
4.10.1
4.10.1
4.10.1
4.10.1 Default
Default
Default
Default A
A
A
Accounts
ccounts
ccounts
ccounts
The RamSan-500 ships with a high-privileged user as well as a low-
privileged user. The high-privileged user is:
User:
admin
Password: password
The high-privileged user is allowed to change RamSan configurations.
The low-privileged user is:
User:
user
Password: password
The low-privileged user can view statistics, logs, and other information,
but cannot change any RamSan-500 settings.
4.10.2
4.10.2
4.10.2
4.10.2 Changing
Changing
Changing
Changing P
P
P
Passwords
asswords
asswords
asswords
You should configure the security on the RamSan to suite your needs.
At a minimum, you should change the high-privileged user password
to prevent accidental mishaps.
To configure users using the Web monitor, right-mouse click the
“Management” tab under the “Systems List”. This will expose four
menu options – left-mouse click “Add/Remove Users”. Alternatively,
you may just right click the head/wrench icon in the button bar while
the “Management” item is highlighted. Please see Figure 13 for a
screenshot.